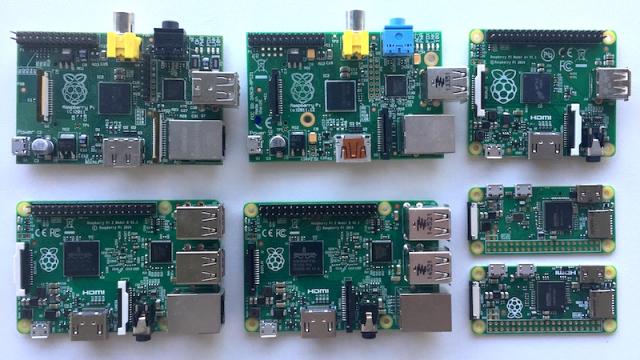
Yesterday was Pi Day, and what better way to celebrate everyone’s favourite mathematical constant than by taking a look back at everyone’s favourite cheap hobbyist computer, the Raspberry Pi. Since the launch of the Raspberry Pi, I’ve written an absurd number of guides, blogs and an already outdated book on the variety of projects you can do with it. I’ve learned a lot it that time.
Troubleshooting Is a Life Skill You Have to Practise
The joy I get from finding a solution to some dumb problem is one of the main things that drew me to the Raspberry Pi to begin with. Thankfully, Raspberry Pi projects have gotten easier over the years. Where it was once a complicated process to build an SD card, it’s now pretty much automatic. Still, the Raspberry Pi is far, far away from being as user friendly as a PC or Mac. That’s a feature, not a bug. The Raspberry Pi is built to force you to learn troubleshooting, and that’s still one of my favourite things about it.
Before hobbyists latched onto the Raspberry Pi, it was a computer for learning how to code targeted mainly at kids. Since then, the appeal has broadened, but it’s still impossible for a project to “just work” out of the box. You will have to tweak something, dig into the command line, or spend a few hours buried in an obscure internet forum to find solutions to problems that only you seem to be having. You will slam your head against the wall, yell a little, and throw your Raspberry Pi at least once for every project you attempt to make.
For every project you complete, for every bug you squash, and for every typo you correct, comes a small, glowing feeling inside your stomach that is well worth the trouble of it all. Troubleshooting is a way of processing the world at large, but if you’re not putting those if-then skills to the test repeatedly, you will lose them.
[referenced url=”https://www.lifehacker.com.au/2016/06/the-always-up-to-date-guide-to-setting-up-your-raspberry-pi/” thumb=”https://i.kinja-img.com/gawker-media/image/upload/t_ku-large/jzwyufcqkcmyhrejbgm2.gif” title=”The Complete Guide To Setting Up Your Raspberry Pi” excerpt=”So, you finally picked up a Raspberry Pi and it’s sitting on your desk, waiting for you to do something awesome with it. Good news, setting it up is stupid-easy these days, and in less than 30 minutes, you’ll be hacking away on your tiny little cheap-as-chips computer.”]
Linux is a Pain, but It’s Worth Learning How to Use It
Before the Raspberry Pi, my experience with Linux included one failed attempt to set up a music server. Now, while I still have no interest in using it on a daily basis, I’m comfortable with it as a whole. It’s still a pain to use though.
When I first started working on the Raspberry Pi, my biggest hurdle besides just using the command line at all was trying to learn when and when not to use the sudo command. If I learned anything in my formative years on Windows PCs and my later years on Mac, it’s that messing with system level files, folders and permission settings is a sure-fire way to destroy your computer. I had to break that thought process because a lot of Raspberry Pi projects require super user access. The good news is it’s near impossible to break the Raspberry Pi itself, though I’ve borked more than a handful of SD cards.
I am still astounded at how much you can do with Linux. You can bend it to your will and force it to do anything you want. That includes turning a Raspberry Pi into weird, tiny jukebox or a portable hacking device. It also means you can often reproduce a lot of commercial products. The Amazon Echo is the most notable example here, but security cameras, weather displays, and DIY security systems work too. Heck, we’ve even seen the creation of new products, like the sci-fi inspired smart mirror. You will need to know at least a little bit about Linux, Python, or both to complete most complicated Raspberry Pi projects. Learning the quirks of Linux might seem like a pointless pursuit in the age of modern computers, but I promise you that it’s worth it in the end.
For me, the extensibility of Linux has always been useless from a daily-driver perspective, but useful in the case of the Raspberry Pi. Linux makes it so I can take my stupidest ideas from an idiotic plan to a semi-working project, like an animated GIF photo frame. That dumb photo frame is still my favourite Pi project, for whatever that’s worth.
[referenced url=”https://www.lifehacker.com.au/2014/11/make-an-animated-gif-photo-frame-with-a-raspberry-pi/” thumb=”https://www.lifehacker.com.au/wp-content/uploads/sites/4/2014/11/Frame641-410×231.jpg” title=”Make An Animated GIF Photo Frame With A Raspberry Pi” excerpt=”w The Raspberry Pi is idea; for all kinds of interesting and complex projects. It’s also great for stupid projects, like this animated GIF photo frame I buot recently. Here’s how to make one for yourself.”]
The Raspberry Pi Makes a Great Game Console, but It’s When It Doesn’t Work That Feels Nostalgic
While we all love home automation systems, DIY voice-controlled computers, and clever portable computer design, the most popular reason to buy a Raspberry Pi is to turn it into retro video game console.
The first time I attempted to build a Pi-powered emulation machine was back in May of 2013. As most of my Pi projects went at the time, my first attempt failed after about 13 hours of waiting for a bunch of emulator tools that didn’t work to download and then break my SD card.
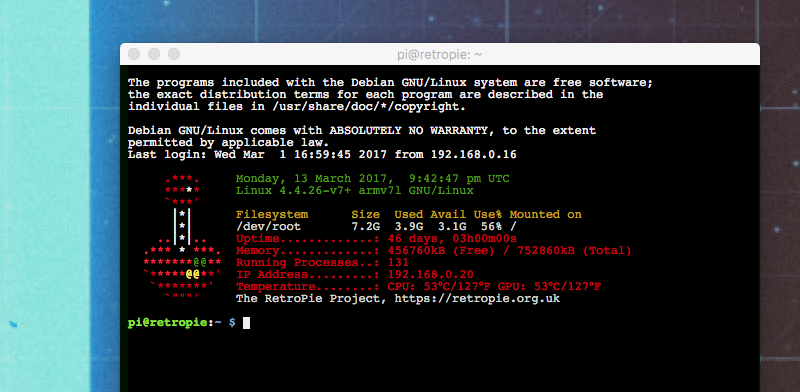
Once that failed, I dug deeper until I found Super Nintendo Pi, which linked to brand new project called RetroPie. It was still early in development at the time. I built on those two sets of instructions for Lifehacker’s first version of our Raspberry Pi video game console guide. RetroPie was the easiest tool I’d found for building an emulation machine with the Raspberry Pi, but even that required you to manually edit a text file if you wanted to use a controller. Now, the process is so easy that it takes less than five minutes to get the whole thing up and running.
[referenced url=”https://www.lifehacker.com.au/2013/05/how-to-build-a-cheap-all-in-one-retro-game-console-the-easy-way/” thumb=”https://img.youtube.com/vi/00QyL0AgPAE/0.jpg” title=”How To Build A Cheap, All-In-One Retro Game Console The Easy Way” excerpt=”Since it was released, the Raspberry Pi has been hailed as the perfect all-in-one retro game console. Now, it’s easier to do than ever, and it doesn’t take any advanced Linux knowledge to do. Here’s how to make your own retro game console in about 30 minutes.”]
The simplicity of RetroPie coupled with the open source, cheap nature of the Raspberry Pi means that people have done cool things with both, like build handheld devices, consoles crammed inside controllers, and of course, full-size arcade cabinets.
Game emulation has been around for a long time before the Raspberry Pi. If you’re a 30-something, it’s almost guaranteed you downloaded some SNES emulator for a nostalgia-filled game session at some point in your life. For geeks of all ages, trying out emulation at least once is akin to the rite of passage of building your own computer. Yet, while emulation has always been accessible on PC and Mac, the Pi made it all somehow seem better.
There are likely logistical, obvious reasons for this. The Raspberry Pi is inexpensive, and even with a good controller and everything else you need, you can build your game console for around $100. There’s even a kit for a small tabletop cabinet available for $US330 ($435).
[referenced url=”https://www.lifehacker.com.au/2016/12/the-advanced-guide-to-setting-up-a-diy-game-console-with-a-raspberry-pi/” thumb=”https://i.kinja-img.com/gawker-media/image/upload/t_ku-large/m4ojizltsbq3if8gclkl.png” title=”The Advanced Guide To Setting Up A DIY Game Console With A Raspberry Pi” excerpt=”It’s no secret that turning a Raspberry Pi into a retro game console is hands-down the most popular, easy, and fun project you can do with a Pi. That initial guide is just the beginning though, and if you really want to get more out your little DIY console, you’ll want to dig in with some advanced tips.”]
I don’t think low cost is the only appeal though. It’s one thing to be nostalgic for old games, it’s another to be nostalgic for the experience of playing those games. The Raspberry Pi not only emulates the games themselves, but the clunky set up process is more in line with my memory of what it was like to set up a game console in the ’80s and ’90s. To child-Thorin, a console takes what seems likes thousands of cables to hook up to the TV. Even after consoles were set up they didn’t always work. Blowing on cartridges might not have done anything, but it was the first troubleshooting tip most of us learned. Even after leaving the cartridge era, I remember having to turn my PlayStation upside down in order for it to read discs. It seemed like with every console iteration, there was a ridiculous fix for some common problem. This persists through this day, but it’s not the same as it used to be.
Everything about old consoles seems unwieldy and weird to a child brain, and while the Raspberry Pi doesn’t recreate any of those troubleshooting moments, it does a good job of creating its own. It still feels like a small triumph every time RetroPie works. That triumph when you load up a game is as powerful a feeling as flipping over a PlayStation to get Final Fantasy VII to load.
Comments