Todoist is like one of those old shops in the neighbourhood that has stood the test of time as other stores keep coming and going. For a productivity app to cross the decade mark, not only remaining relevant but improving along the way, is no small feat.
Todoist has done it, and, over the past couple of years, has gone through a big redesign that is frankly gorgeous on any platform you use. It also picked up plenty of neat features from its competitors over the years. No matter if you’re an old Todoist user, or a returning customer, these are some features you might not even know existed.
Find your way around the Intelligent Input bar
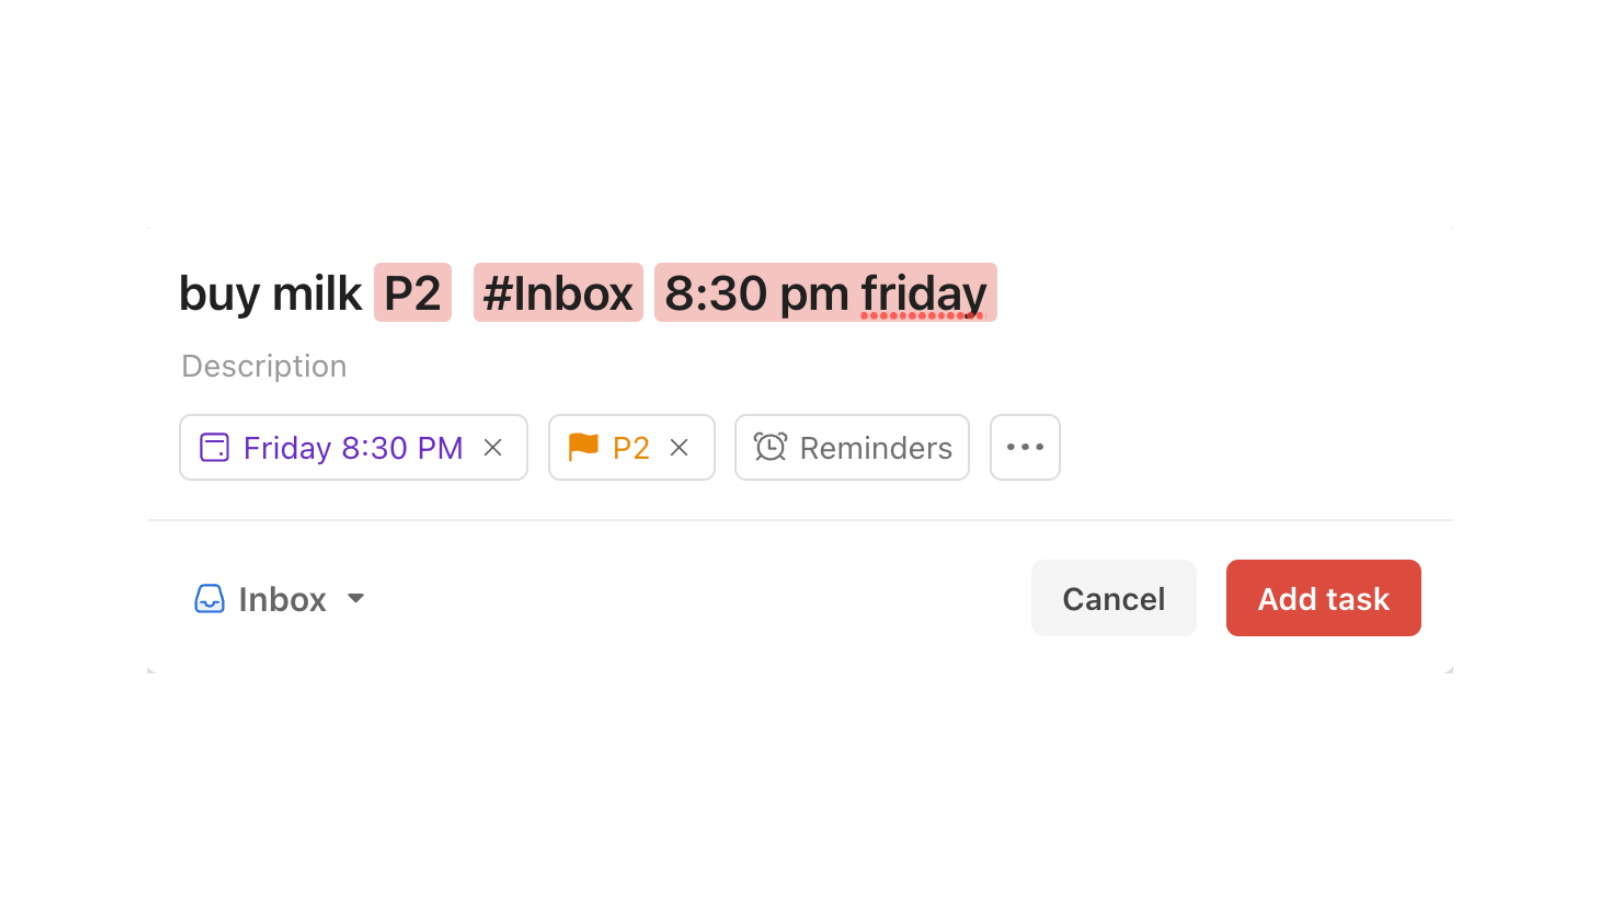
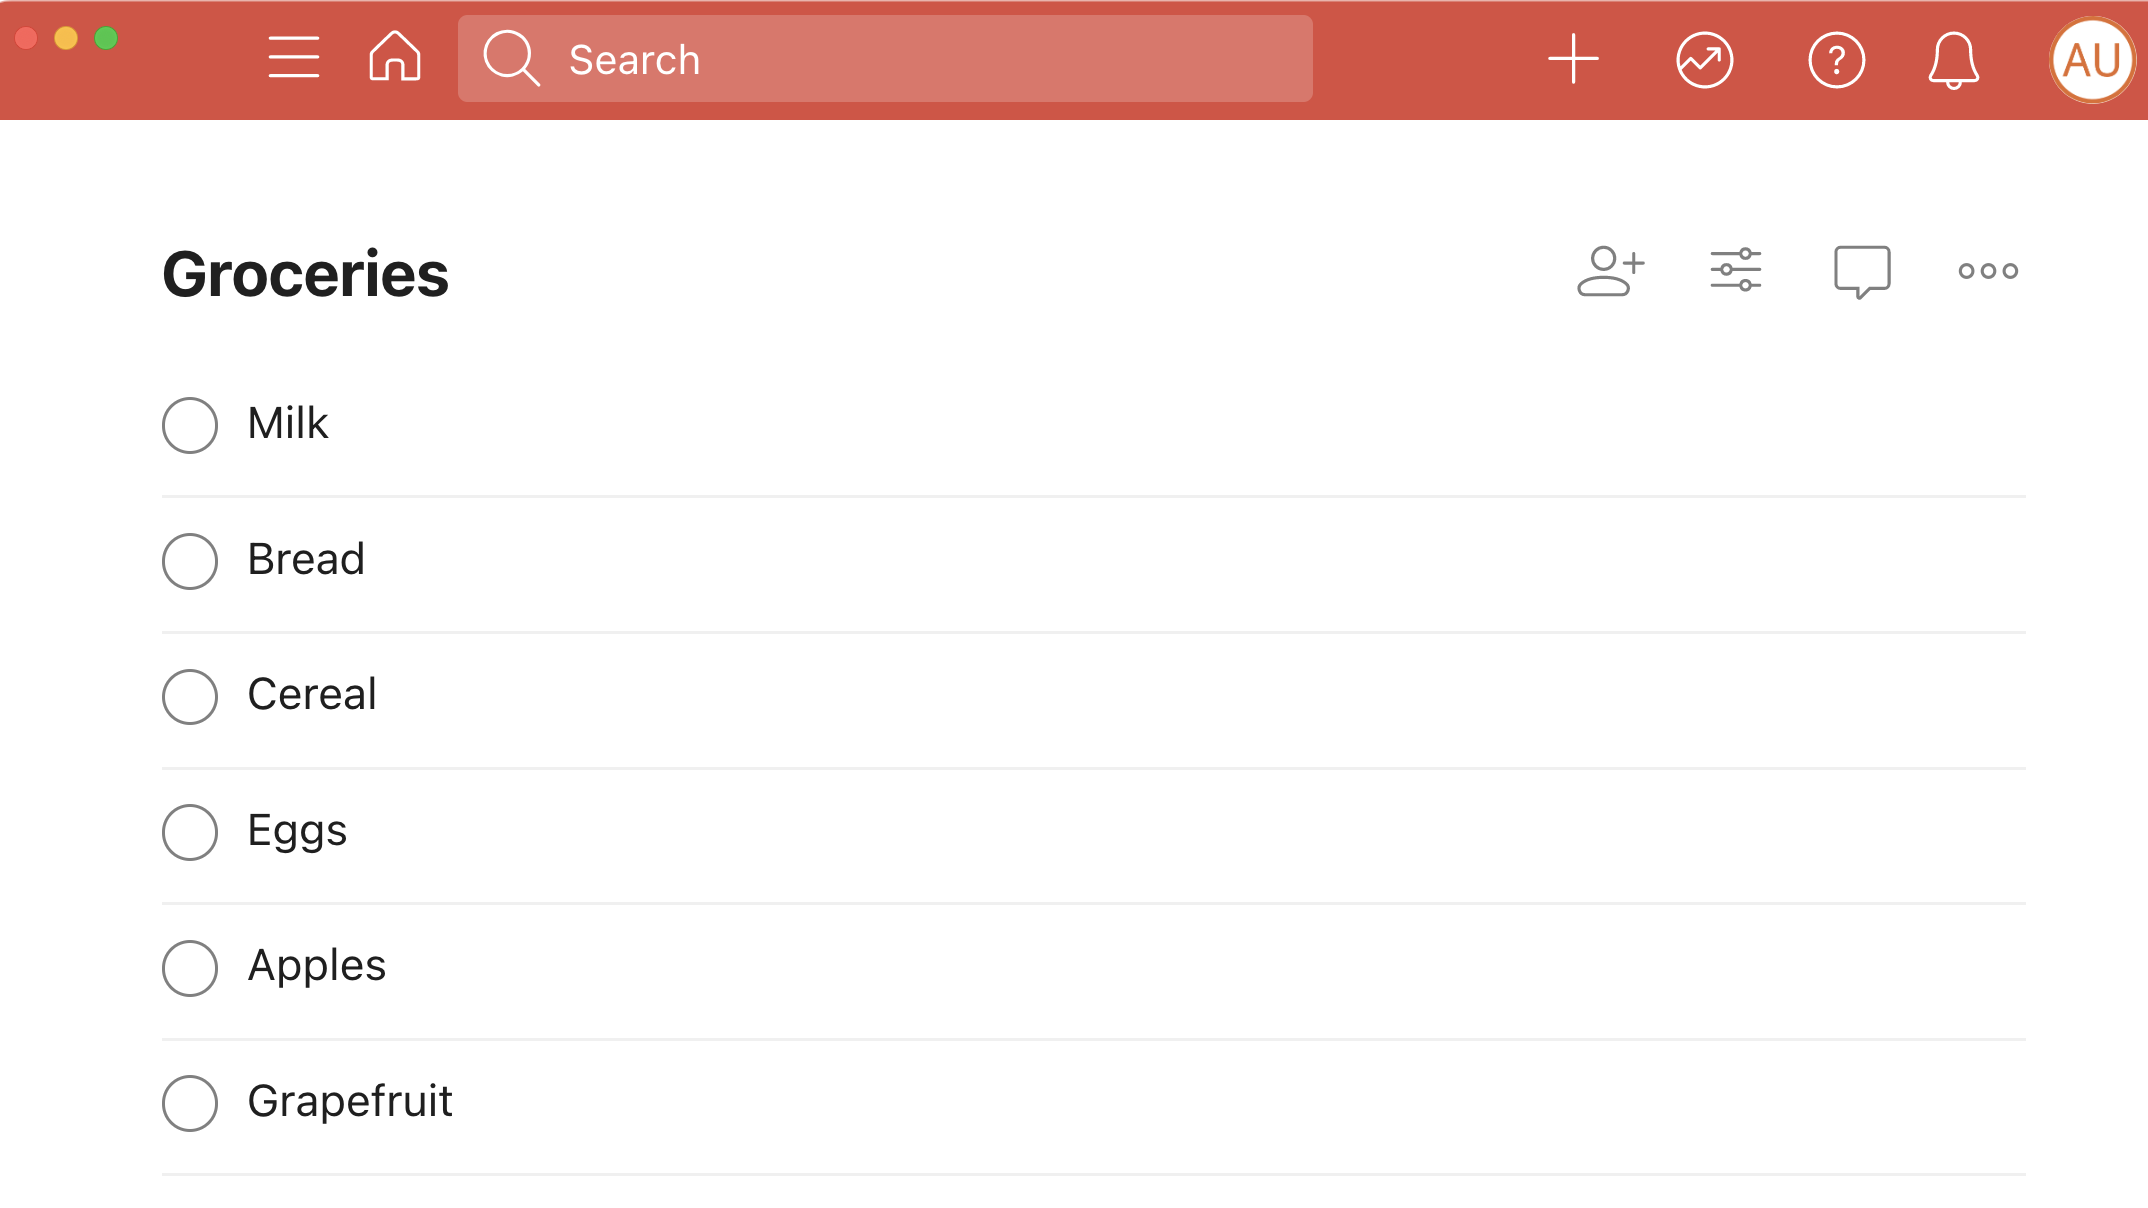
Todoist’s Intelligent Input is one of its best-kept secrets. It scans what you type and automatically picks up anything actionable. For example, if you type in “Pick up milk at 8 a.m. tomorrow,” it will highlight the time and the date, and add it to the task.
This intelligent feature will also work for tagging teammates, labels, projects, filters, and even for setting a priority level (use P1, P2, and so on). Use # to tag a project, @ to add a label, and + to assign the task to a contact.
Master the command bar and become a keyboard ninja
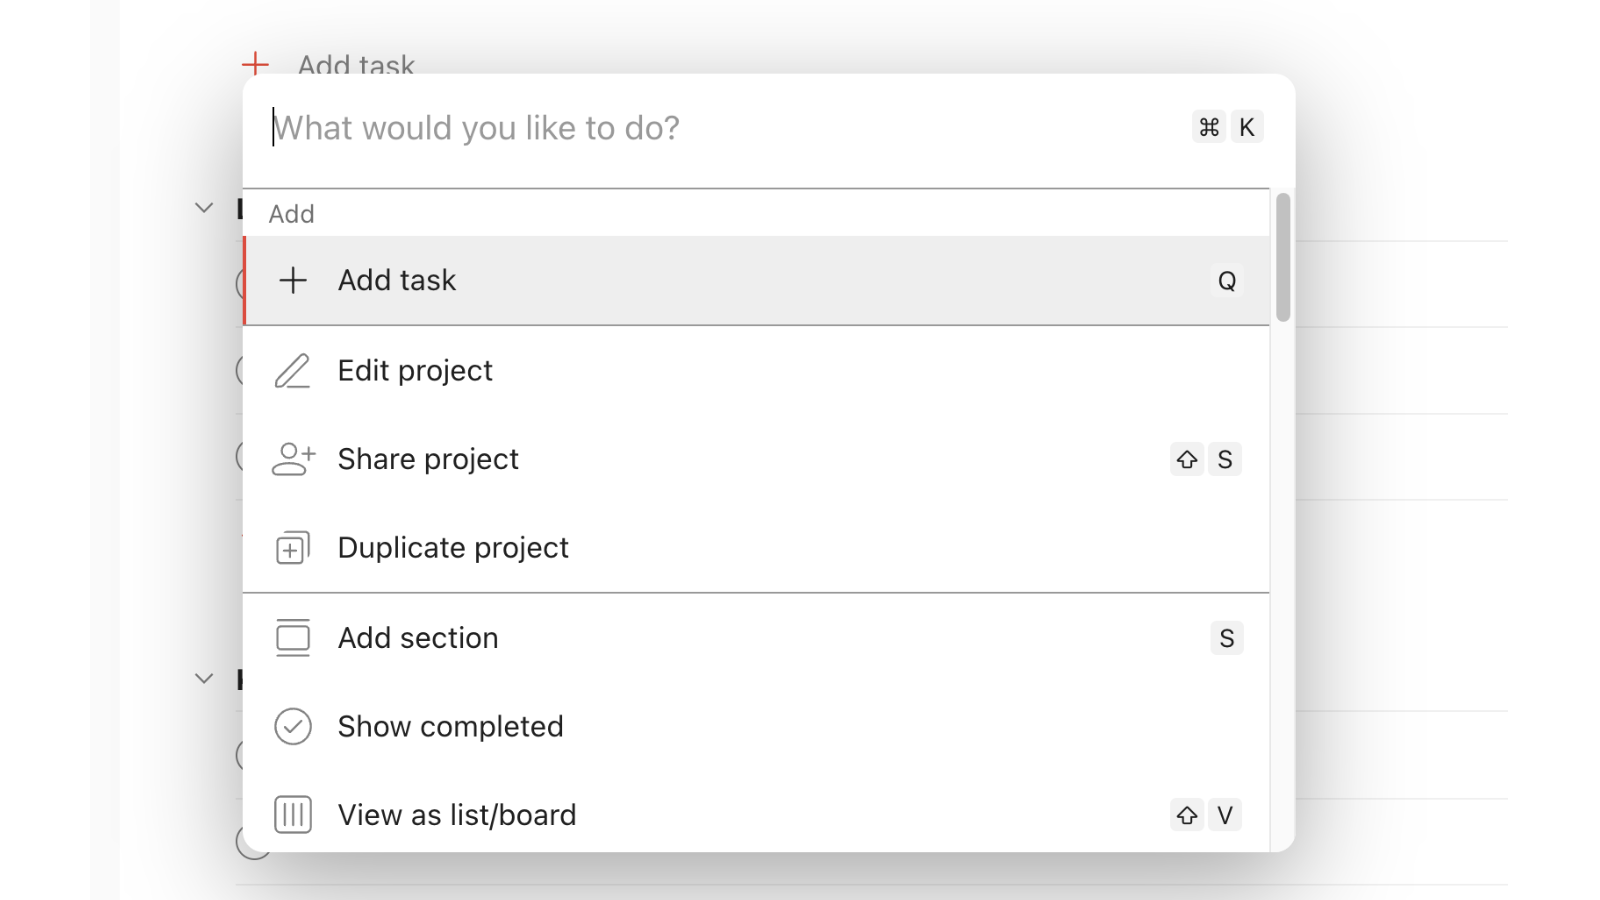
Productivity apps are running with the concept of a command bar, and we are here for it. Press Command/Control + K and up pops a Spotlight Search-like bar. But instead of searching, you can give it commands like creating a new note, going to Inbox, or switching to a different sorting menu.
Scroll through the list, and you’ll see all the actions, and their corresponding keyboard shortcuts. Take a look at Todoist’s blog post to see all the important keyboard shortcuts, but here are our favourites: You can use the Q button to enter the Quick Entry view, and a / will start you off with a search. Press the ? button to see a list of all keyboard shortcuts.
Use the description area to take full-fledged notes
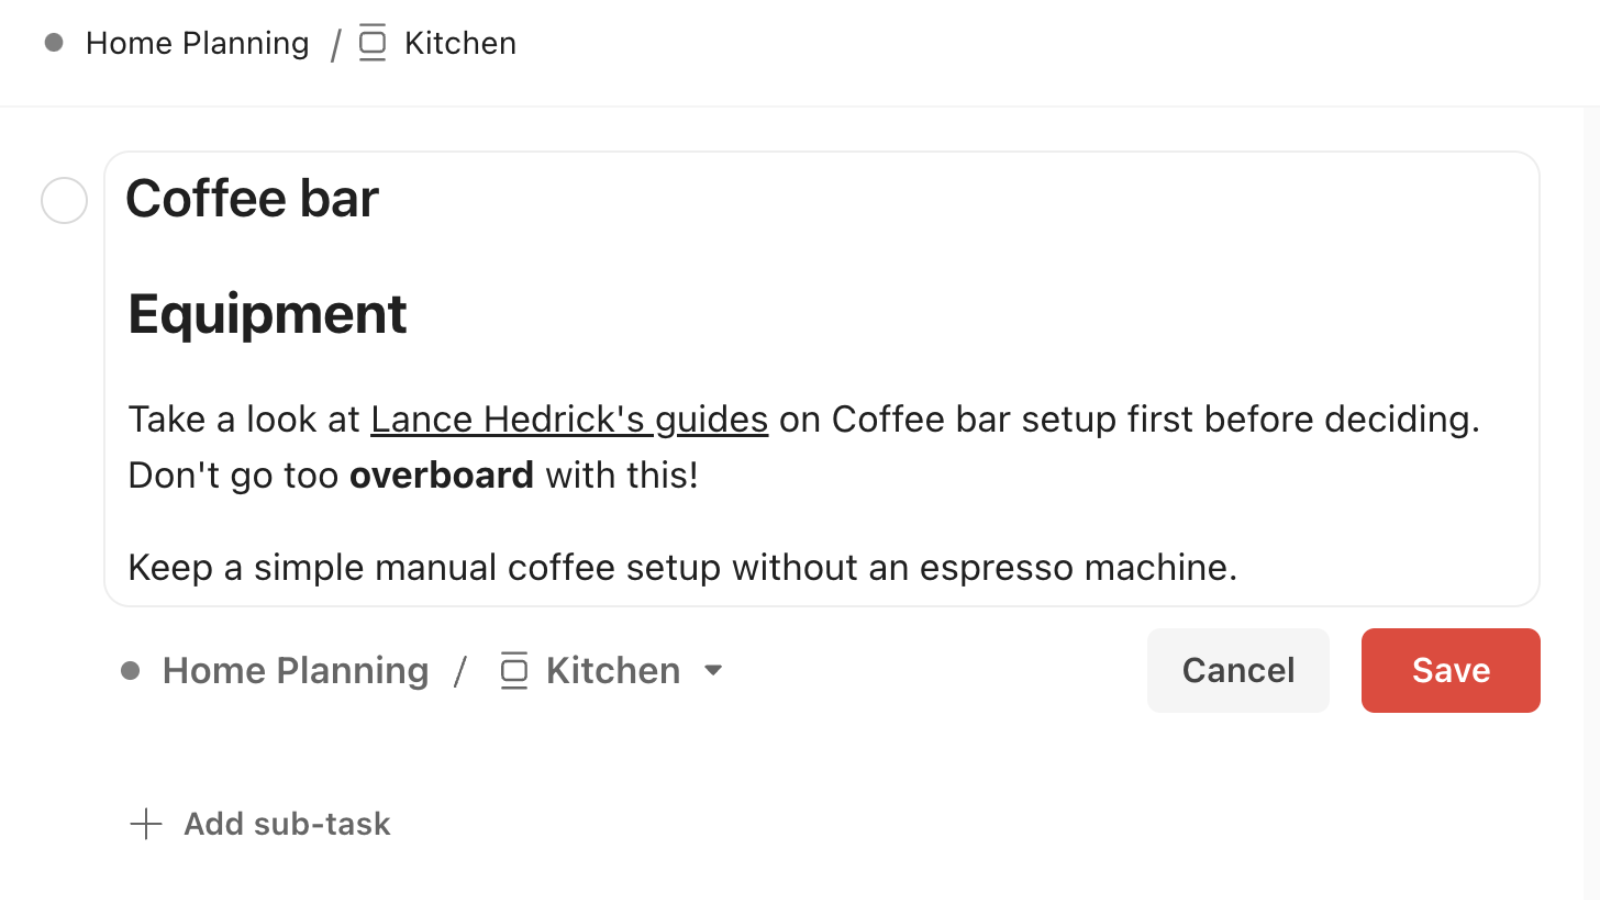
If you’re the kind of person who likes to attach a lot of details to a task, you’ll be happy to know that Todoist is taking a page out of Notion’s playback, allowing you to attach a description to any task while you’re adding it. But it’s better to click the task to expand to the full view.
When you go to the Description section, you’ll see a full notes canvas to go crazy with. You can highlight any text to format it, and add links to text as well (a rarity on to-do apps). If you just paste a link, Todoist will automatically turn it into a clickable link with the page title.
The cherry on top is Markdown support. You can use hashtags to create headings in notes, underscores for italics, and so on. If you know Markdown, you know the drill.
Don’t be afraid to zoom in
This might be a niche complaint, but most to-do apps are designed to fit the most amount of information on the screen at a time, and they just don’t scale. If you like more breathing room, or you want a view that only shows today’s tasks in detail (and removes the rest of the clutter), you’ll like Todoist’s Zoom feature.
Pick your view, then use the Command/Control + Plus keyboard shortcut, and you’ll start zooming into the view. Text will get bigger, as will the interface elements. Keep doing this five or six times, and you’ll hit a point where the sidebar will disappear, and you’ll only see the task list. Bliss.
It goes the other way, too: You can use the Minus button to zoom out and out and out, making the text smaller and smaller.
Block your calendar according to tasks
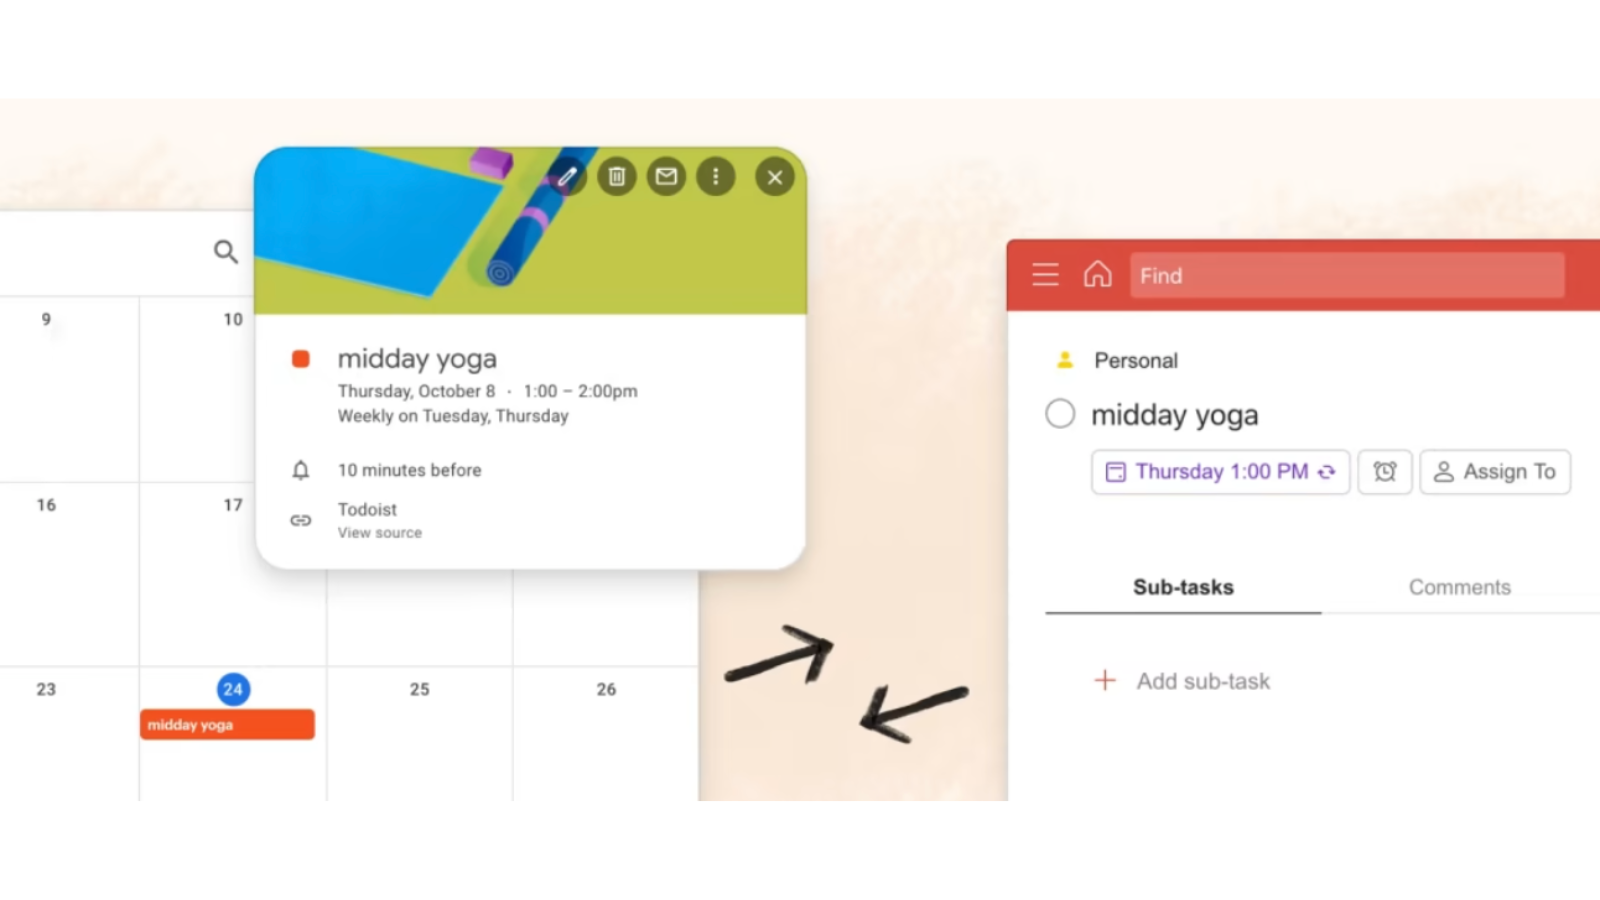
Todoist offers genius-level Google Calendar integration that works both ways. If you add a time-bound task to Todoist, it will automatically reflect in your Google Calendar, and when you create a new meeting in Google Calendar it will show up in Todoist automatically. This two-way sync is live, and will be updated automatically when you modify a task or the meeting.
You need to manually enable this integration. You can do this by going to Settings > Integrations > Browse > Google Calendar > Add.
Turn your task list into a Trello board
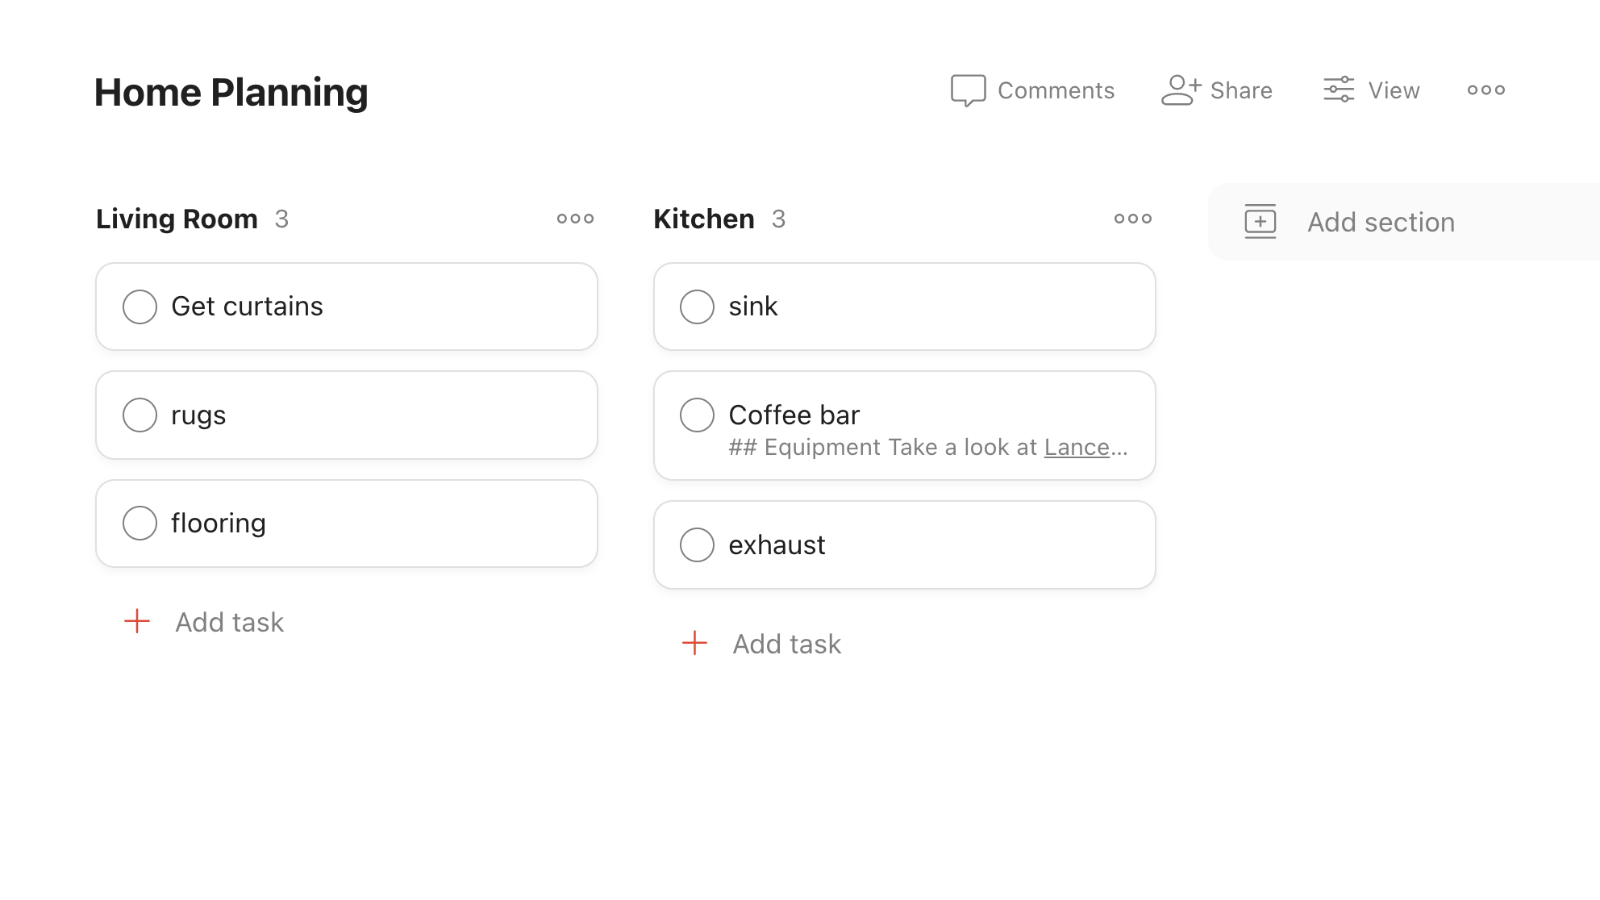
If you’re into Kanban, Todoist has something for you as well. You don’t need to use Trello or Asana to get a process-based workflow going. You can turn any Project into a Board, at any time. Go to View > Board to configure your list into the Kanban system. Todoist automatically sorts these using sections. You can click on a section to rename it, and, just like with Trello, you are free to add new sections.
You can revert to the List view at any time.
Use Sections anywhere and everywhere
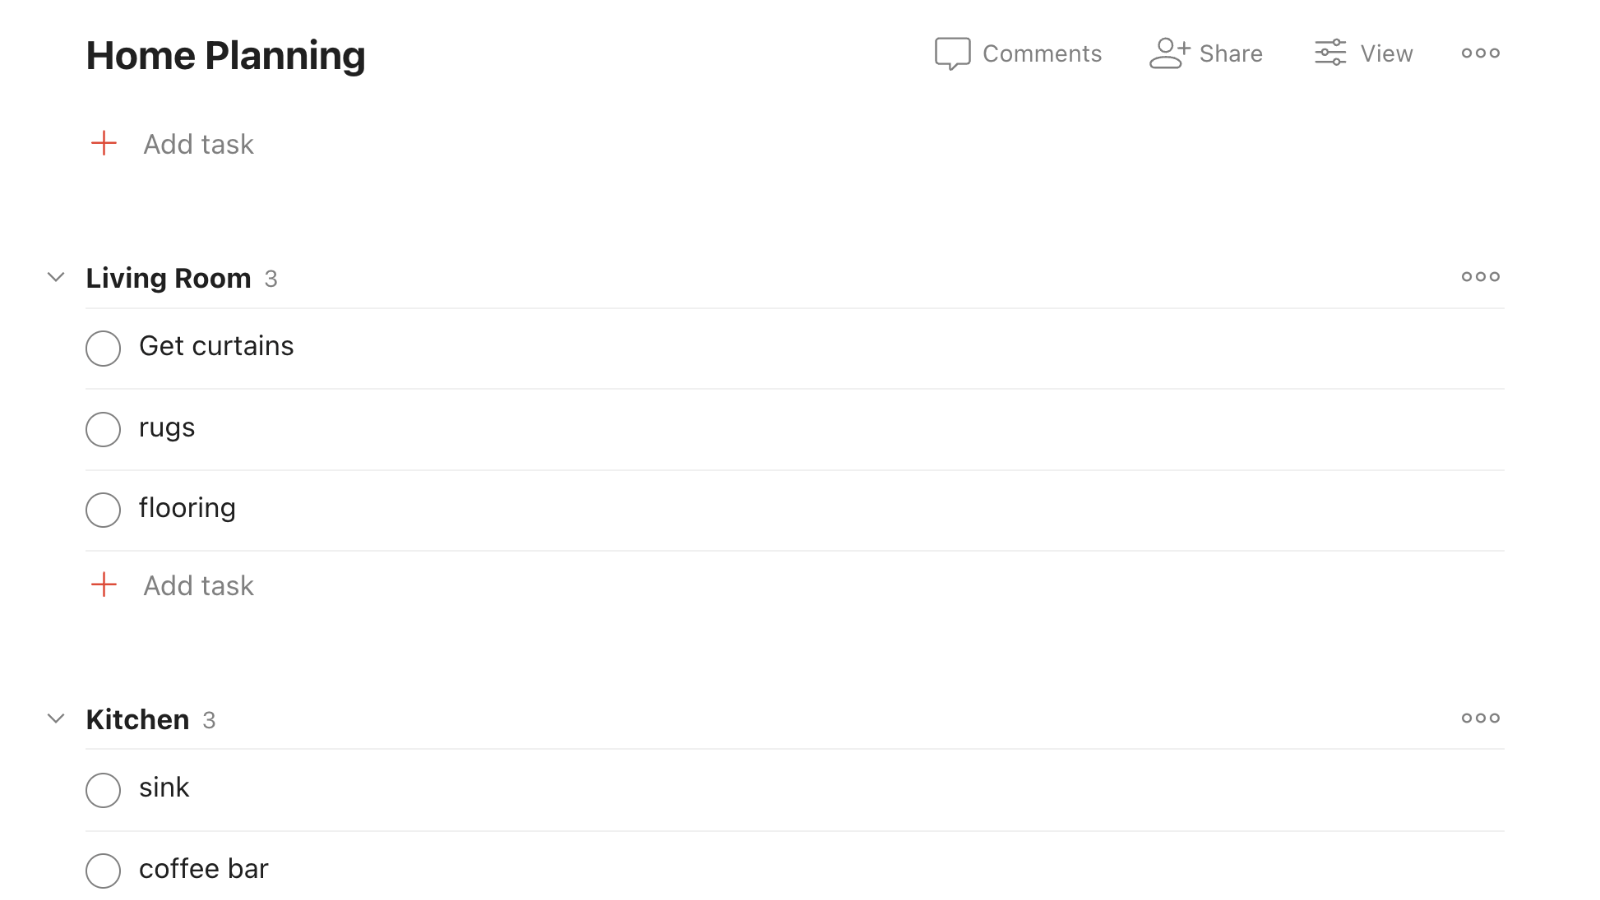
Just as it helps to break down tasks into subtasks, it’s useful to break down any project into sections. In fact, it’s most helpful to do in the Inbox, so you can sort out your tasks in different sections before you add them to a project (if at all).
Organising your tasks into different sections can help separate different pools of tasks and can lead to a lot of clarity. It’s much better than just looking at a sea of tasks in a project list.
Use the Add Section button in the three-dotted Menu button or the “S” keyboard shortcut to add a new section. Give it a name, and start moving tasks to it using drag and drop.
Leave a Reply
You must be logged in to post a comment.