Where wings are concerned, I’m very easy to please. For me, the Buffalo wing (chicken wing) experience is 90% sauce, with the remaining 10% split between juicy meat (that’s properly cooked) and some degree of skin crispiness; basically, as long as butter is involved, I’m thrilled.
But even if I had exacting Buffalo wing standards, I’d be impressed by pressure-cooked Buffalo wings, which are easy, infinitely adaptable, satisfying, and best of all, fast. What’s not to love about that?
How to make Buffalo wings in your pressure cooker
If you love a crispy skin, then you should rest the wings overnight in the fridge to dry out the skin. But if you’re willing to sacrifice some crunch in favour of time, you can have a batch ready in less than an hour, no deep-frying required. Here’s how to do it.
First, separate the wings into drums and flats if needed — the nice man at my local store hacked mine up for me so I didn’t have to — and season with salt. (Your batch size will depend on your pressure cooker’s capacity — you don’t want to overfill it.)
Place a steamer basket in your pressure cooker and carefully arrange a layer of flats on the rack, making sure that none of them touch the bottom of the cooker. Once you have a nice solid layer, arrange the remaining wings on top and pour in a cup and a half of water.
Lock the lid in place and press the “Steam” button, then use the “Adjust” button to select “Less” (or equivalent settings on your pressure cooker). This will steam the wings for 5 minutes at high pressure, which is what you want — and while they cook you can make some sauce.
Let the pressure release naturally for about 5 minutes, and release the rest manually. If you’re making wings for a crowd, repeat this process as many times as you need to get all the wings cooked. (Save the leftover steaming water — it makes for great chicken stock.)
From here, you have two options: grill the steamed wings straight away, or let them dry out in the fridge overnight. Because I am a serious journalist, I made several versions to help you decide. It is my duty. You’re welcome.
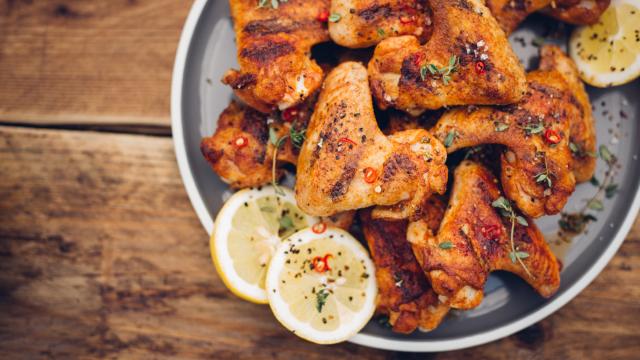
The wings, pre-fridge drying.
First, I made a batch the same way I always do: lightly sauced right out of the pressure cooker, grilled on both sides until crisp, and then heavily sauced.
If you’re hungry now and indifferent to crispy skin, these are for you. They took 30 minutes start-to-finish and are downright succulent: juicy and flavourful all the way through, and incredibly tender — but not so tender they fall apart in your hands. Look, you could do a lot worse.
But if you’re after that crispy, crispy skin, I suspect you feel you could also do a lot better. If that’s your deal, place the steamed wings skin side up on a cooling rack and let them rest, uncovered, in the fridge overnight. Make some ranch sauce if, like me, you prefer it to blue cheese dressing for wings, then go to sleep and dream of Buffalo wings.
I APOLOGISE FOR NOTHING
Once the wings are nice and dry, you have to decide how you want to crisp them up. Grilling is my preferred crisping method because I hate smelling like a vat of oil, but I fried some wings anyway just for you. Following Claire’s method from her sous-vide wing adventure, I heated about 1.5cm of vegetable oil to about 200 degrees Celsius and shallow-fried three wings.
Were they good? Obviously, yes, they were amazing. But now there’s a ring of gummed-on vegetable oil inside my stainless pan, all my windows are open even though it’s snowing outside, and I need to shower.
Grilling your wings, on the other hand, is low-risk and high-reward. You can grill them straight out of the fridge to approximate a fried texture or do the sauce-broil-sauce method I mentioned earlier. Whichever you choose, keep your pan about 15cm away from the hot griller and put the flats in the centre, surrounded by the drums.
They will brown more evenly this way. Broil ’em skin side-up until golden and crisp, then flip and repeat twice more — you want to finish them skin side-up to maximise that crispiness.
Here’s what dried, broiled, then sauced wings will look like:
These were legitimately crunchy, but they dried out a bit in the griller. You can try moving the pan closer to the grill, but you’ll need to watch them closely so they don’t burn. Overall, these are just OK; I scarfed down the testers happily, but technically they were the “worst” of the bunch.
And here are some dried-sauced-broiled-sauced wings:
Drying them in the fridge helped the skin crisp up, but the cushion of sauce kept the meat from drying out. These are amazing. I’m keeping this technique in my back pocket for the next time I have a wing craving that I can wait 12 hours to satisfy.
No matter what your usual technique for at-home Buffalo wings entails, I think it would be improved by high-pressured steam and a stint under the griller, especially if you’re making wings for a big crowd. Steam the wings the night before, whip up whatever sauces you like, and grill them off in batches the next day. Then you’re set to party.
RIP.
This article has been updated since its original publication.
Comments