Baking is less about feeding oneself and more about having a hobby, and I tend to gravitate toward dead-simple recipes I can throw together on a whim. Though I have absolutely nothing against perfectly executed pastry, it takes a certain amount of patience to make such, which is why I bake my bounty of summer fruits into cobblers rather than pies.
Cobblers are not only much more forgiving than their pastry-enrobed cousins, they come together so much faster. (Case in point: microwave mug cobbler.) Soupy, juicy fillings are the bane of the pie maker, but they’re practically encouraged in the world of cobblers; their biscuity dough soaks up fruity sauce without mushing out.
Then there is the matter of time commitment. Pie dough takes rolling, folding, and resting, and unless you have a bunch of pre-made crusts ready to go, there’s simply no way you’ll get a pie on the table as fast as a cobbler. Cobbler also cools much faster than pie, which means you get to eat it much faster than pie.
Now, depending on where you’re from, your vision of what, exactly, a cobbler “is” may be a little different than mine. I have always enjoyed a simple drop biscuit or baking mix-based crust, because cakey and biscuity are my two favourite textures to pair with syrupy fruits. I also don’t sweeten the fruit too much, as I like a cobbler that can be eaten for breakfast with cold slices of cream cheese, but you can always add more sugar if you like; such is the joy of cobbler.
I have been making some variation of the Bisquick recipe since I was a child, as I’ve found it takes very well to whatever nonsense I throw at it. For a very basic cobbler, you will need:
-
6 tablespoons of butter
-
3 cups of fruit
-
3/4 cup to 1 cup of sugar, divided
-
1 1/4 cups baking mix
-
2/3 cup whole milk
-
Other things you may need: lemon juice, vanilla, cinnamon, nutmeg, booze, perhaps even more sugar
This is just the bare-berry recipe. You can of course tweak both the filling and the topping as you see fit. Let’s address each component on its own:
The Butter
This part is very easy; just melt the butter in the microwave (or on the stove) and pour it in an eight-or-nine-inch square pan. I have also used pans that were not that size, as well as cast iron skillets, and everything turned out fine; it affects the timing, so you have to keep an eye on it while it cooks — once the top gets golden brown, take it out.
You can use salted or unsalted butter, but I prefer salted, because I love a salty-sweet contrast and I think it makes it more breakfast friendly.
The Fruit
Both water and sugar content vary from fruit to fruit, and your approach should vary accordingly. First, taste your berry or drupe, and see what sweetness it’s bringing on it’s own. I usually toss whatever I’m working with with at least 1/4 cup of sugar, but you can increase it to a 1/2 cup, or omit it entirely if you have a very ripe batch. If you’re using frozen fruit, rinse it to thaw and let if dry on some paper towels.
I like to leave my berries whole, but peaches and other such fruits should be peeled and chopped (no doy). Once the fruit is prepped, toss it with your desired amount of sugar. If you want to get a little fancier you can add a couple of tablespoons of lemon juice, a tablespoon or lemon or orange zest, a teaspoon of vanilla (or bourbon), or swap out the plain white sugar for brown sugar.
If you’re using a chopped fruit, let everything hang out in the bowl for half an hour and let the sugar and extracted juices from a nice sauce.
The Topping
Sift half a cup of sugar with the baking mix, adding 1/2 teaspoon of cinnamon or freshly grated nutmeg (or both!) if it is what your heart wants. Stir in the milk to make a dough. It’s very easy.
Putting It All Together
Pour the melted butter into your pan, pour the batter on top of that, and distribute the fruit in an even manner over the batter. Sprinkle some course sugar on top if you like. Pop that mess in a 175-degree Celsius oven, and bake until the top is golden brown, and the fruit is bubbling.
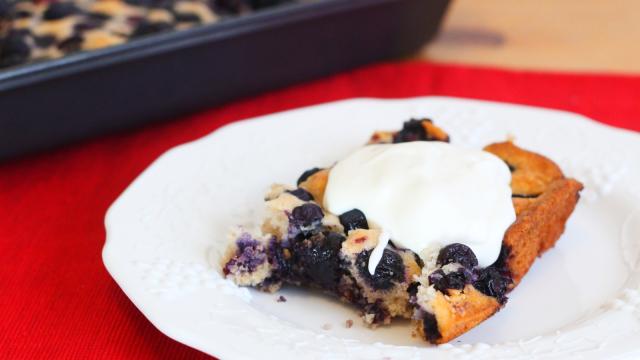
If you are using a dish that is larger than the suggested eight-or-nine-inch square, this could be as little as half an hour, but it usually takes about 40 minutes. Let your cobbler cool for about 10 minutes, then serve with ice cream, very softly whipped cream, or — if you’re eating it for breakfast—cold slices of cream cheese.
Comments