
There are loads of simple white bread recipes out there, many of which yield multiple loaves worth of dough. Whether you’re a seasoned bread baker, or trying your hand at yeast breads for the first time, sometimes you just want one small loaf of bread. Here’s a recipe for a single, mini loaf of bread with a short ingredient list, no pre-ferment, and a quick bake time.
How you can make homemade bread faster
More traditional bread recipes build flavor with a pre-fermented yeast mixture. That might come in the form of a sourdough mother, a poolish, or a biga. These large-batch, lean breads require long periods of kneading high-gluten bread flour to achieve a chewy texture, and extensive proof times.
But if all you want is a casual, small loaf of bread, less is more. Breads created to be made the same day can skip the pre-ferment the night before, and use a higher dose of instant, or active dry yeast, to make more gas in less time. (More bubbles make for a faster proof time.) Would some bread-heads say this is “bad bread”? Maybe. But they’re wrong. I have had bad bread, and this is not it.
If you don’t have bread flour, you can use all-purpose flour. The bread won’t be as chewy, but the slightly lower protein content will render the dough less elastic, and that will allow the gas bubbles to move and expand more freely. Now you’ve got a comparatively fast yeast-raised loaf, which will have more of a malty flavor than fermented flavor and a bit less chew. These aren’t bad things. In fact, this is the perfect white sandwich bread.
How to make a mini loaf of bread with a single cup of flour
One of my favorite things about a mini loaf is the very reasonable ingredient list. Five ounces of flour (about one cup)—instead of 35 ounces—sounds much more approachable.
1. Make the dough
Start by pouring the water into a medium bowl and sprinkling the yeast on top. Allow the yeast to bloom; it only takes about 30 seconds. Use your fingers to mix the flour and salt together in a smaller bowl, then pour the flour over the top of the yeasty water. Use a rubber spatula or a bowl scraper to mix the dough. The dough should come together into a slightly tacky mass.
Continue to stir and work the dough for a couple minutes to build up some gluten strength. Lightly flour a work surface and dump the dough on top. Knead the dough for a minute or so by folding it in half, rotating it 90° and folding it in half again. Repeat this five or six times then round off the mass of dough to make a ball.
2. Proof the dough
Place the dough ball seam-side-down in a lightly oiled bowl, making sure to get oil on all sides of the dough. Cover this bowl with plastic wrap or a damp tea towel to proof. This takes an hour or two, depending on the environment your dough is resting in. Check on it after an hour, to see if bubbles have developed and if it’s doubled in size.
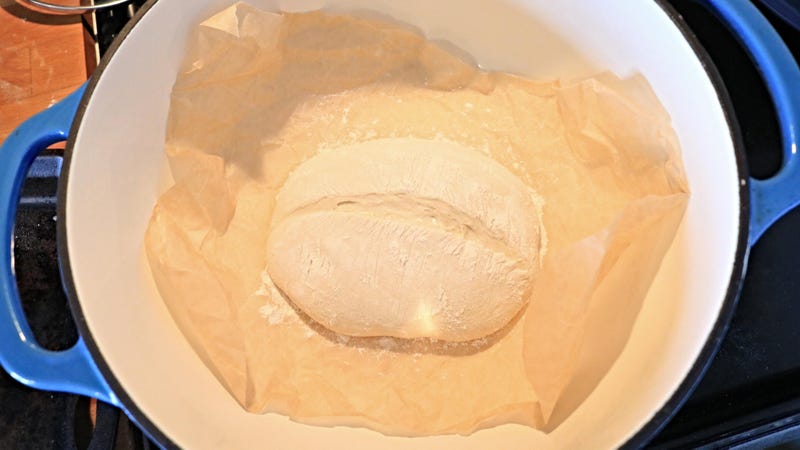
Now you have a choice. You can butter a loaf pan and use that to shape and support your loaf, or you can do a freeform loaf on a sheet tray or in a Dutch oven. I used a Dutch oven.
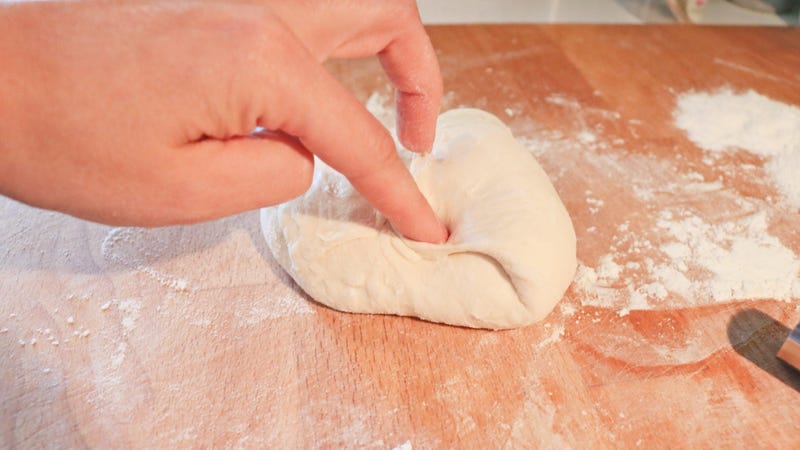
3. Shape the dough
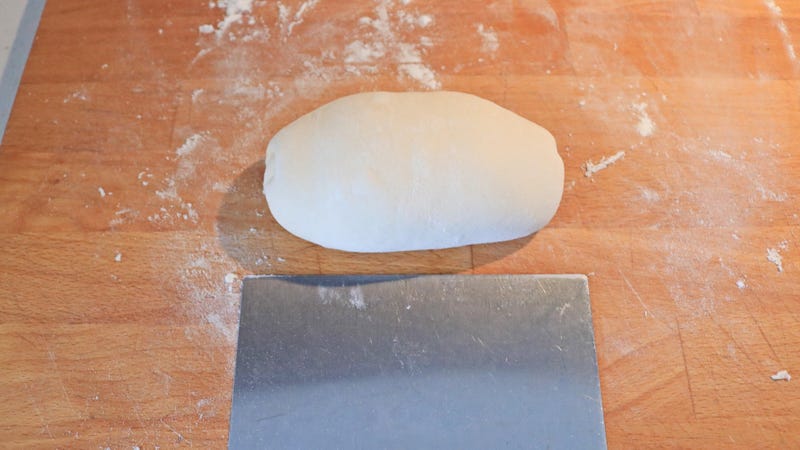
Flour your work surface once again, and place the dough ball onto the flour. This time do letter folds to tighten up the dough. To do that, fold the dough in half to make an oblong shape. Then, like a letter you get in the mail, fold one of the short ends over a little more than halfway. Press to seal it. Take the opposite end and fold it over that. Squeezing the seam to seal it, making it oblong once again. If your dough is shapeless, repeat the letter folds until the dough feels more perky.
4. Proof the dough again
Drop the dough, seam-side down into a buttered eight-inch loaf pan or onto a parchment paper-lined sheet pan. Cover the dough loosely in plastic wrap or in a plastic bag. Let it proof for another 40 minutes in a warm place. If you’re using a Dutch oven, preheat it inside the oven at 425°F during the last 15 minutes of the bread’s proof time.
5. Score the loaf
Just before baking the bread, dust the loaf with flour and score the top with a sharp knife in a straight or curved line, a quarter-inch to half-inch deep. This allows you to control where the bread breaks open as it rises in the oven. Put the loaf pan in the oven. If using a Dutch oven, lift the entire parchment into the pot, and place the lid on before putting it in the oven.
6. Bake the mini bread
Bake your bread until it is well risen and browned on top, about 20 minutes for a loaf pan, or up to 35 minutes in the Dutch oven. For the Dutch oven, uncover the pot for the last 10 minutes so the bread browns well. Cool the loaf on a wire rack completely before slicing.
This loaf will be about six inches long, fluffy, and slightly chewy, with a thin crust. It makes a great mini hoagie, or you can cut it in half to build two modest breakfast sandwiches.
Mini Bread Loaf Recipe
What you’ll need:
- ½ cup lukewarm water
- ¾ teaspoon instant yeast
- 5 ounces (about 1 cup or 142 grams) AP flour
- ½ teaspoon table salt
Directions:
- Add the yeast to the water in a medium bowl. Give the water a swirl. Add the flour and salt to a separate small bowl and mix in the salt. Pour the flour mixture over the water mixture. Stir the dough thoroughly for about two minutes.
- Flour the countertop and scoop the dough out onto the flour. Knead the dough for another minute or so. Shape it into a ball. Lightly oil a bowl and add the dough to it, turning the mass to get oil on all sides. Cover it and let it proof for about an hour or up to two hours, until doubled in size.
- Flour the countertop again and scrape the dough onto it. Letter fold the dough a few times to tighten the skin. Shape the dough into a ball. Place the dough on a parchment-lined baking sheet and cover loosely. Allow the dough to proof for about 40 minutes. Meanwhile, preheat the oven to 425°F (approx 220C). Preheat the Dutch oven inside of the oven for the last 15 minutes.
- When the dough is ready, carefully take the Dutch oven out of the oven and place the dough, including the parchment paper, into the pot. Cover it with the lid and bake for 25 minutes. Uncover the bread and bake for another 10 minutes until well-browned on top. Cool completely on a wire rack before slicing.
Leave a Reply
You must be logged in to post a comment.