Knowing how to make horrific desserts is an essential skill during the month of October, especially if you live in a home with young humans. There is no shortage of silly, creepy Halloween characters, but not everyone has the artistic skill set to sculpt a Count Chocula head out of fondant. However, one of the most basic scene-setting, eerie designs is the spiderweb, and you don’t need talent or even much of a steady hand to make one.
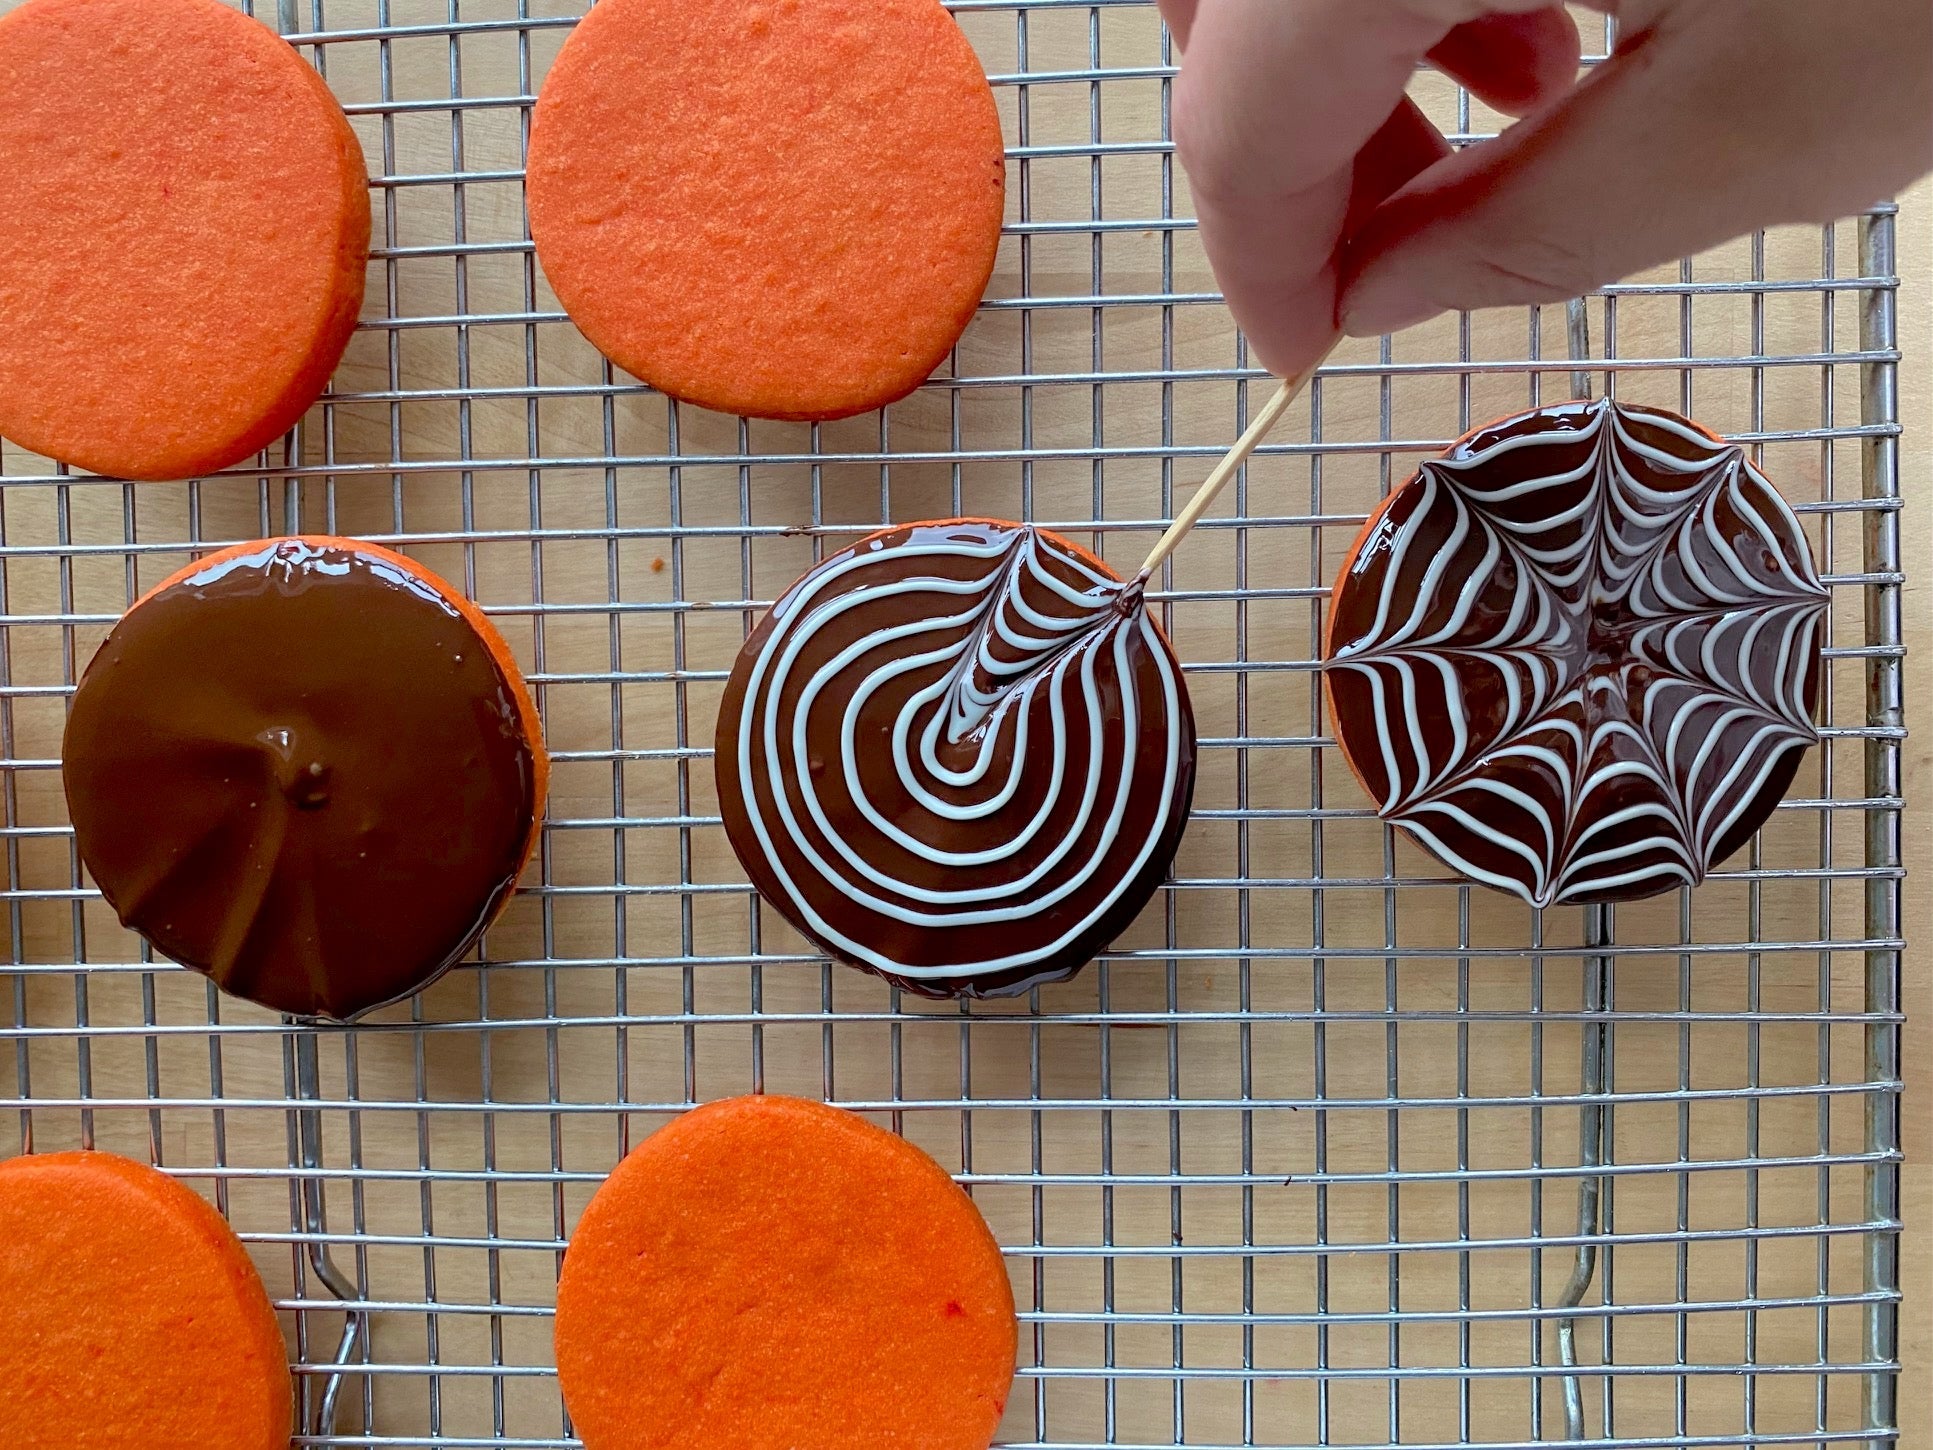
Unlike piping out frosting designs, or icing an entire cake (which requires patience and a certain level of dexterity), making a spiderweb pattern is less about precision and more about the consistency of the medium you’re working with. The simplest way to make a web pattern is to draw a spiral in a contrasting colour to the background colour, and drag the spiral out in lines, from the centre to the edge. In pastry terms, this would be a version of marbling or feathering lines. And no, you don’t need a steady hand — although you do need to draw the spiral, once you drag the lines, the pattern will shift, and no one will ever know if your initial spiral was terrible.
That doesn’t mean you can’t mess it up — you need to keep an eye on the consistency of your components. This mostly applies to chocolate because it will set when it cools. If the “web” is too stiff, or the background colour sets, the pattern won’t drag; it will just break, and that will look terrifying for other reasons.
If you’re dipping cookies in chocolate to make spiderwebs, keep the dark chocolate as hot as possible without burning it, and use a microwavable bowl. If it starts to cool and thicken, microwave it for a few seconds to bring it back to a runny state. For the white chocolate, you can also keep it in a microwave safe bowl, or use a small disposable piping bag. You can microwave these for a few seconds at a time and massage the white chocolate around until it’s runny again. If you’re marbling an icing or glaze, temperature isn’t an issue, but make sure you drag the pattern immediately after making the spiral. If you make a spiral and walk away for 10 minutes, the icing will likely have set and won’t marble as well.
An easy place to start practicing this technique is with contrasting cake, brownie, or cheesecake batters, where temperature control isn’t as much of an issue. But if you’d like to challenge yourself with Halloween spiderweb cookies, start with any sugar cookie recipe you like, and use a cookie cutter to cut out circles. I started with this simple recipe from the Food Network and substituted two teaspoons of orange food colouring for the milk measurement to get an uncomfortable shade of orange (you can also mix red and yellow with a 1:2 ratio respectively).
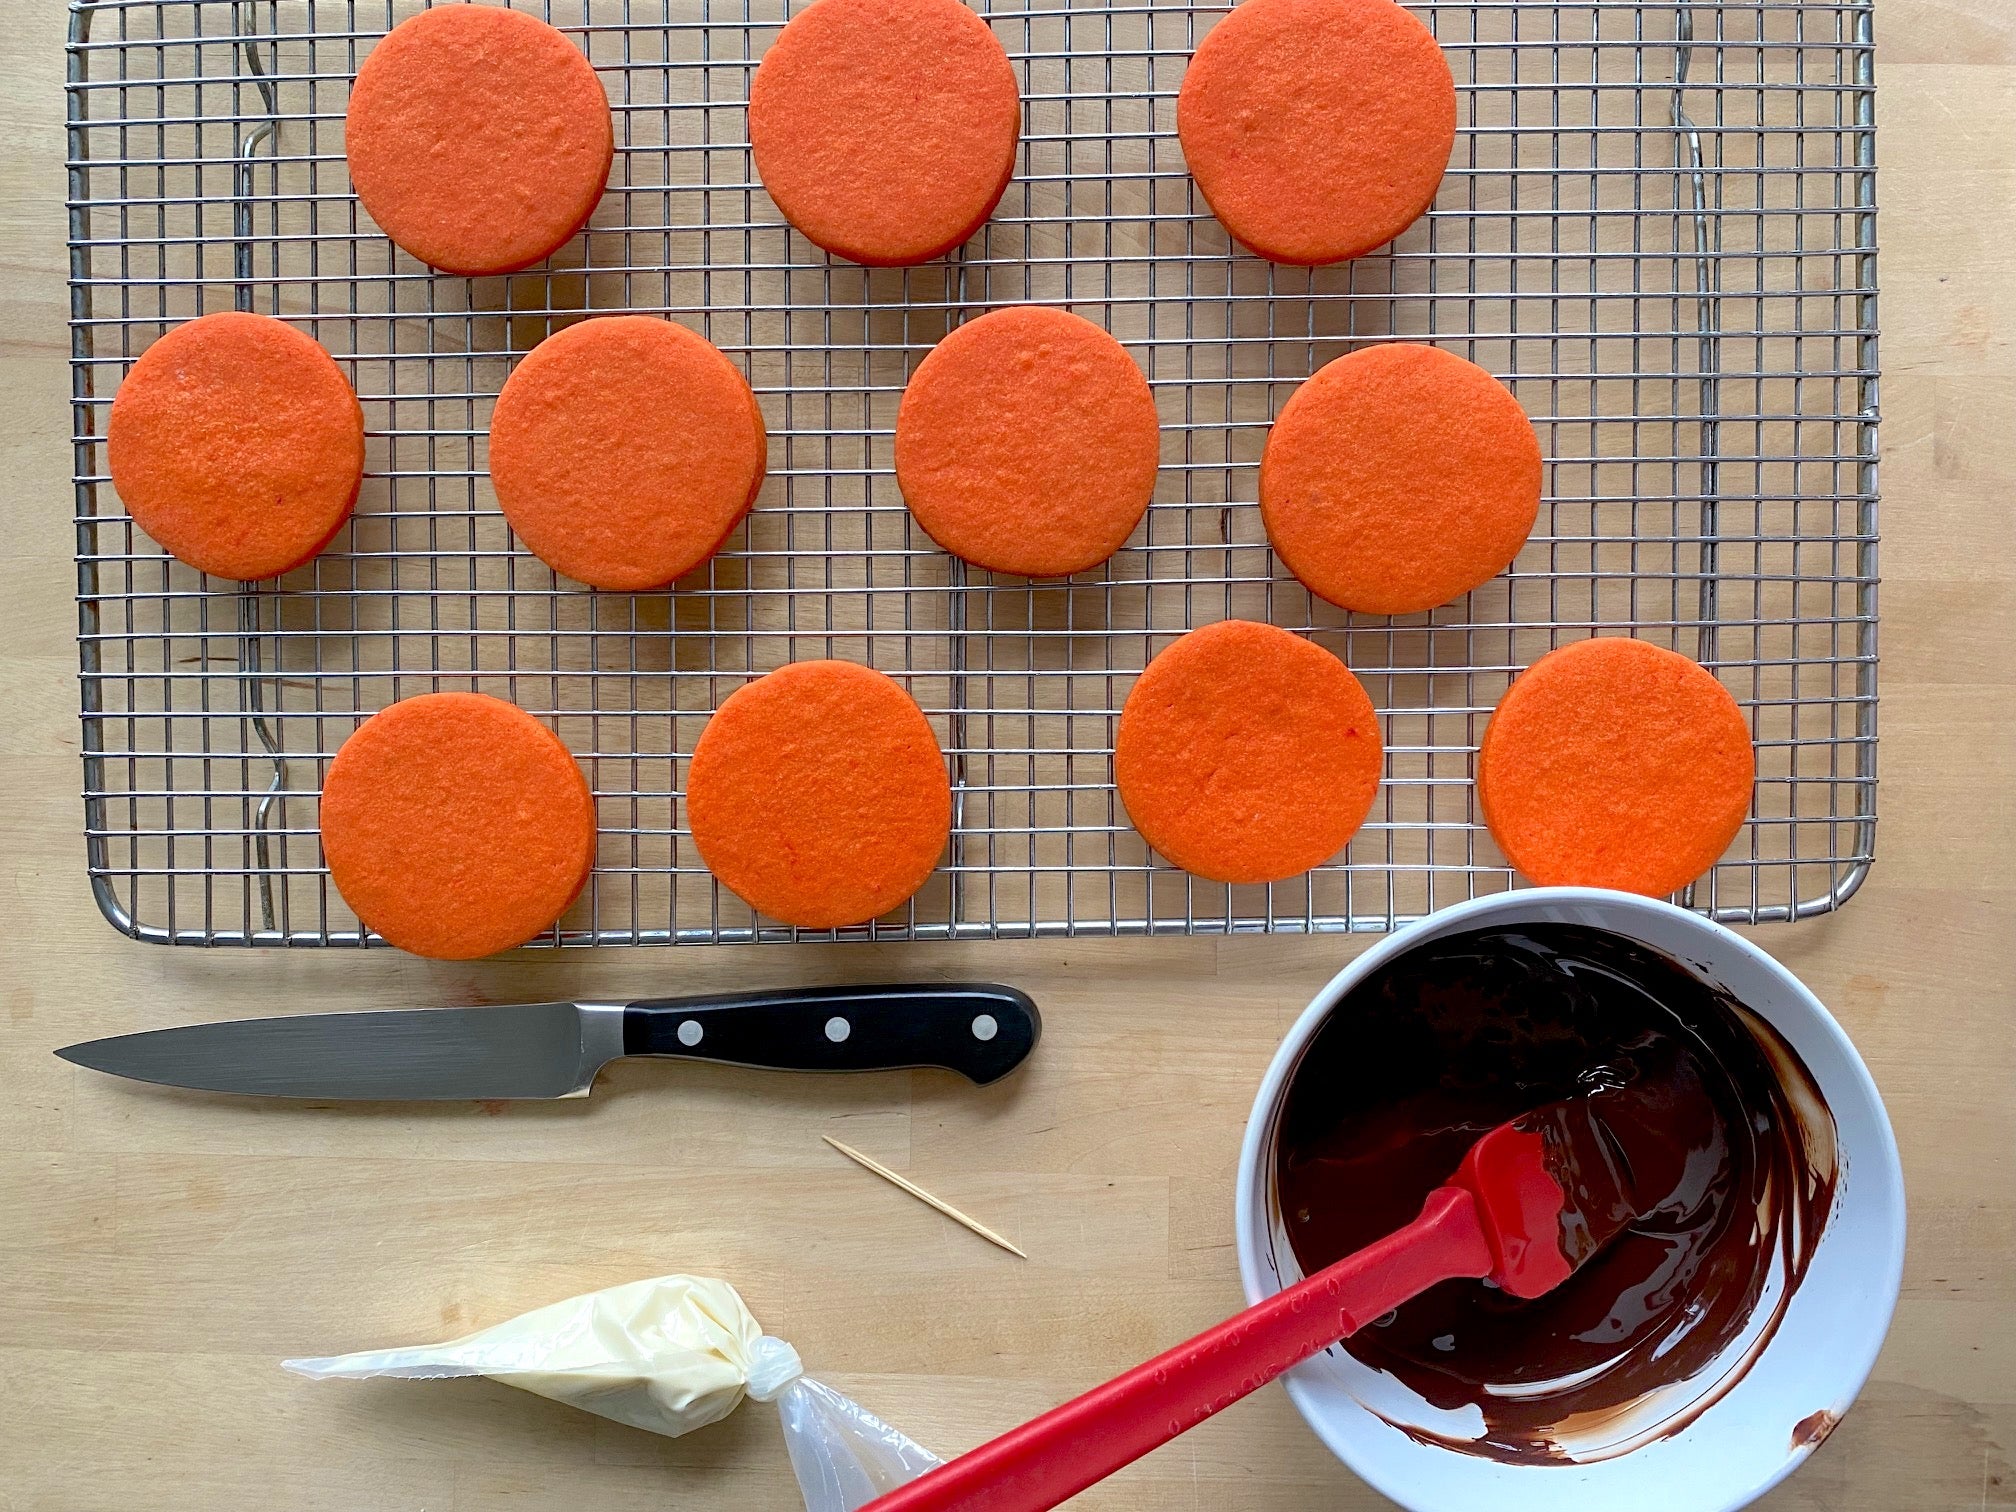
As the cookies cool, melt about four ounces of dark chocolate in a bowl in the microwave. Stir every 30 seconds, then as it gets more melted, stir every seven seconds until smooth. Melt a couple ounces of white chocolate the same way. Put the melted white chocolate in a small piping bag, make a cornet out of parchment, or snip the corner of a zip-top bag if you lack piping bags. If you’re more of a visual learner, check out this video on the feathering technique.
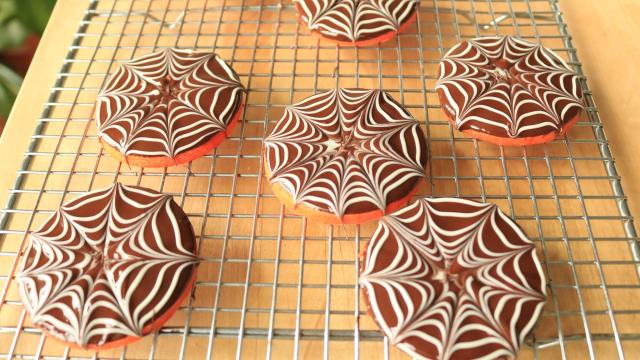
Dip one cookie in the dark chocolate. Put it on a cooling rack or on parchment paper. Immediately use the piping bag to make a spiral with the white chocolate (you could also make a three-concentric-circle bullseye pattern if that’s easier for you). Immediately use a toothpick or the very tip of a small paring knife to drag a line from the centre to the outer edge of the cookie. Turn the cookie, or your body, and do another line next to it. Continue this motion around the entire circle, always dragging from the centre to the outer edge. The hot chocolate will close up any dips and you’ll have a beautifully haunted cookie. Normally, for efficiency, you would want to dip all the cookies, pipe all the lines, then drag the patterns; but for marbling, it’s crucial to do each cookie one at a time to prevent the dark chocolate from setting before the white chocolate pattern is drawn. Microwave the chocolate periodically to keep the pattern smooth. You’ll know when the chocolate is starting to set, as it won’t drag as smoothly.
You can do this technique with contrasting colours of any batter, icing, or glaze of a loose consistency. Simply take a small portion of the base colour and mix in a little food colouring. Pipe a spiral, and use a small knife to pull out the pattern. If you still feel shaky on the method, ask your kid to do it. Odds are, their circle drawing skills are more practiced than yours.
Leave a Reply
You must be logged in to post a comment.