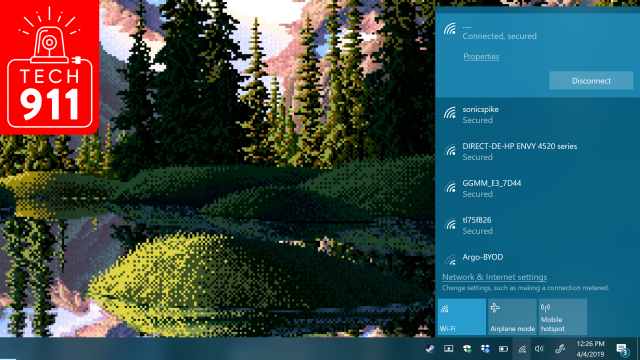
Hiding your neighbours’ wifi networks, not to be confused with blocking, is entirely possible. After all, your device automatically connects to your wireless network if you’ve saved the credentials. And in Windows’ “wifi connection box”, for lack of a better name, your OS automatically sorts all the wifi networks it sees from the strongest signal strength to the weakest (minus any hidden networks).
Unless your neighbour has an access point inside your house, you should be seeing your wifi networks at the top — or close to it.
Admittedly, you could be trying to connect at the edges of your wifi network, which means its signal strength will be low and your device will display up all the stronger neighbouring networks before yours. I can see how that would be annoying.
Then again, if you save your wifi networks’ passwords in Windows, like most do, these networks will appear at the top of the connection list regardless of signal strength.
To your specific question, there is a way to hide various wireless networks from the list of potential connections in Windows. (I haven’t found a great way to do this on the Mac, but I’ll keep exploring.)
Fair warning, though. Hiding wifi networks is a bit of a process, since you’ll have to hide each wireless network individually. Once you’ve done it, you’ll be set (until your neighbours change their wifi to another clever name, like “Wu Tang LAN.”)
Start by opening up a command prompt with administrator rights. Click the Star button, type “Command prompt”. right-click on the app, and select “Run as administrator.” Then, type the following into the command prompt:
netsh wlan show networks
This will give you a list of all the wifi networks your system detects wherever it happens to be, which you should then copy and paste into a temporary text file. (You’ll see each name after the “SSID #” listing; you can ignore the other “Network type,” “Authentication,” and “Encryption” entries.)
Once you’ve done that, you can then type this into the command prompt:
netsh wlan add filter permission=block ssid="[[[NAME]]]" networktype=infrastructure
Obviously, you’ll want to replace the [[[NAME]]] part with the name of whatever wifi network you want to hide. Keep the quotes.
If you ever want to look up what wireless networks you added to this blacklist (of sorts), you’ll use this command:
netsh wlan show filters
And to remove a wireless network from your filter, you’ll use this command:
netsh wlan delete filter permission=block ssid="[[[NAME]]]" networktype=infrastructure
Same deal as before; make sure you’re using the actual SSID you blocked in place of [[[NAME]]], but keep the quotes. Also, case is important—the name of the SSID has to match exactly what’s on your filter.
If you want to get even wilder, you can also use filters to block every wireless network that isn’t one you’ve specifically whitelisted. This only really makes sense if you plan to use your laptop or desktop in the same space forever.
Otherwise, this is going to be a complete pain in the arse the next time you take your laptop anywhere and need to connect to a new wifi network.
If you want to go down this route, first add the various wifi networks you want to a whitelist by using this command:
netsh wlan add filter permission=allow ssid="[[[NAME]]]" networktype=infrastructure
Then, use this command to block everything else:
netsh wlan add filter permission=denyall networktype=infrastructure
Once you’ve realised how bad of a decision this was, you can revert your foolishness with this command:
netsh wlan delete filter permission=denyall networktype=infrastructure
Also, I should note that this filtering is system-wide. Not only will you see (or not see) various wifi networks when clicking on the usual icon in the lower-right corner of your desktop, but these network will also appear and disappear from any wifi-scanning apps you might be using:
Comments