I confess, I’ve never really used Windows 10s Game Bar, because I’m probably the last person who should be broadcasting their gaming habits on an online service. I’m terrible at Fortnite, I min/max in Pillars of Eternity, and I play a lot of Idle Champions of the Forgotten Realms — not exactly the sexiest of titles to stream, unless you like watching me click on all the things.
Still, I love that Microsoft has made it so simple to create content around your Windows 10 gaming sessions. Screenshots? Easy. Movies? Even easier. Broadcasting your dream of getting to 100 deaths without a single Fortnite kill? With a few clicks of the mouse, you’ll be online and mock-able by all your friends with k/d ratios higher than zero.
To start, all you have to do is hit the Windows Key + G when you’re in a game. That’s it. Hello, Game Bar. But resist the urge to do that just yet; it’s worth taking a little time to explore a few Windows 10 settings for gaming, first.
Playing with settings is almost as fun as playing a game
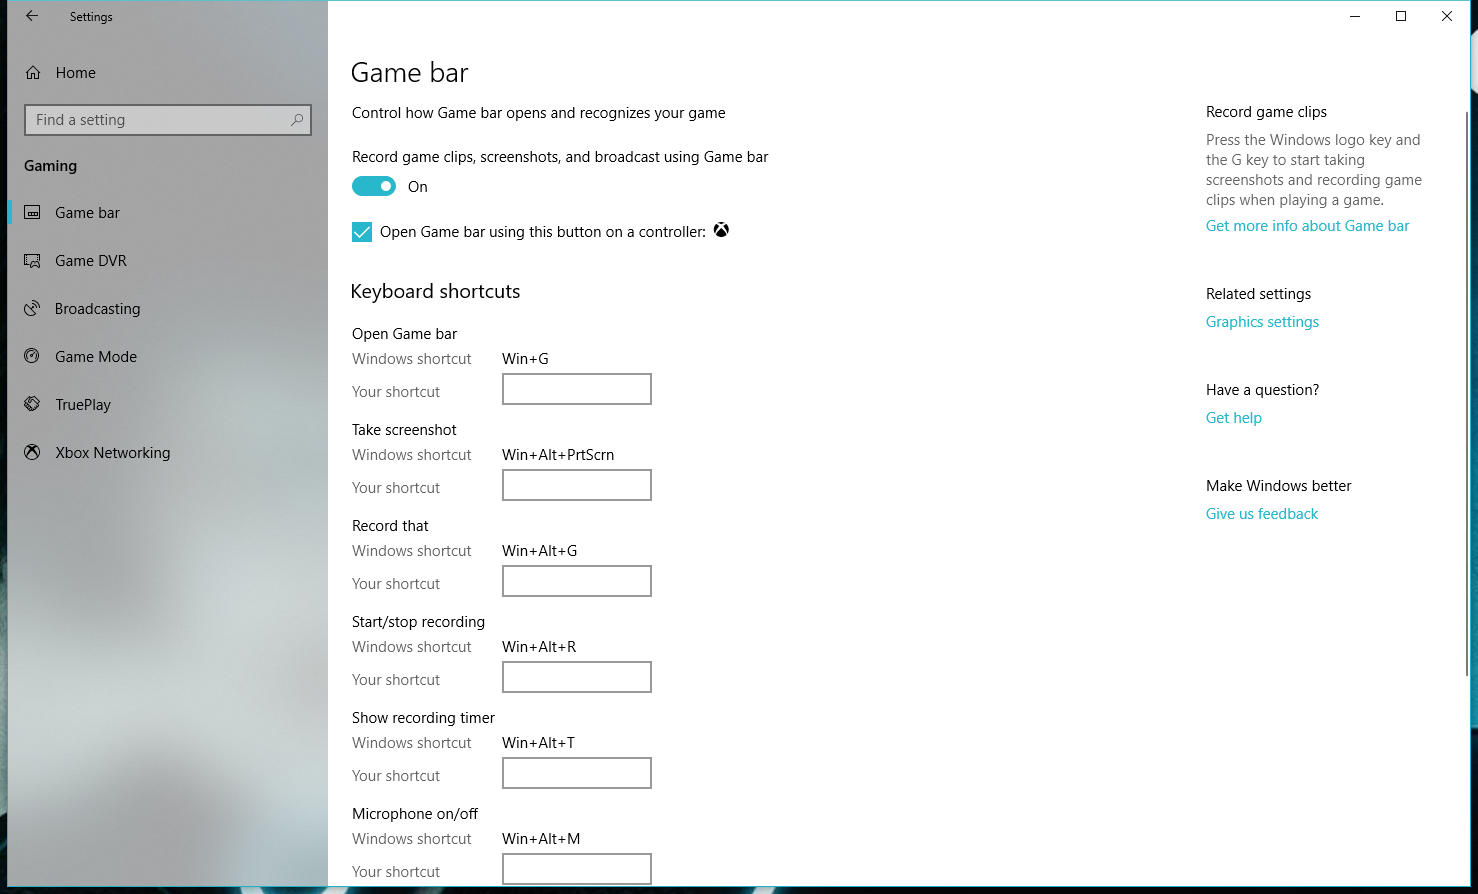
Click on the Start button and type in Settings, click on the first result that pops up — Windows’ Settings app — and click on the Gaming option. The very first setting you’ll see, “Record game clips, screenshots, and broadcast using Game Bar,” should be enabled by default. If it isn’t for whatever reason, make sure you flip the switch so you can actually use the Game Bar in your games.
Game DVR
On the sidebar, click on Game DVR. Enable the feature, and Windows will record all of your gaming in the background so you can quickly capture highlights after you’ve accomplished some amazing feat. Just tap either Windows Key + ALT + G or the “Record that” button on the Game Bar when you’ve done something in your game that’s worth saving for later.
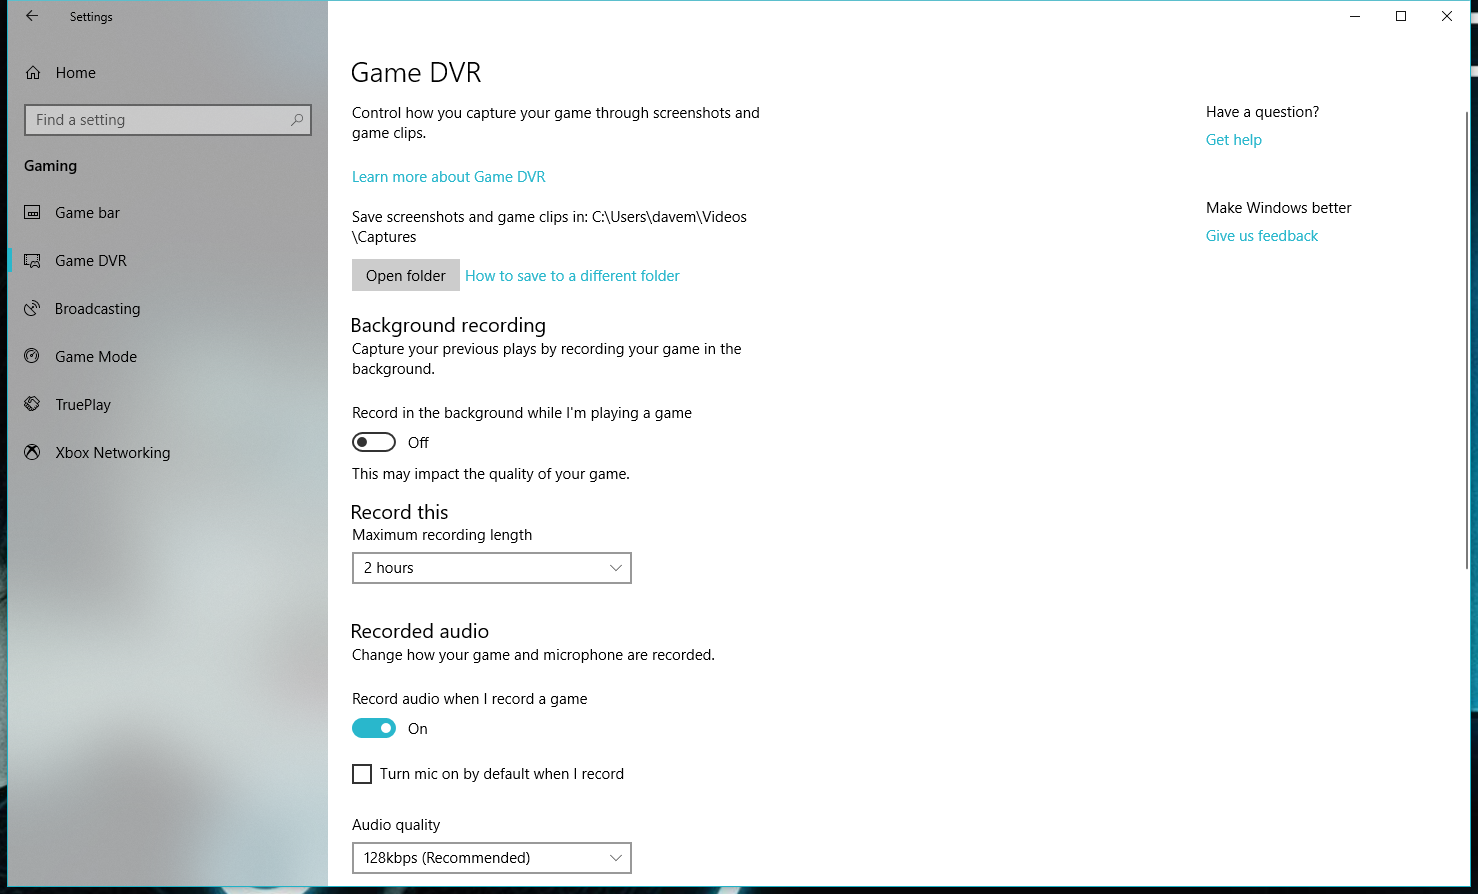
Within Game DVR, consider adjusting the maximum recording length for the video Windows 10 captures in the background. If you don’t think you’ll need that much of a buffer for your gaming, because you’re just using the DVR to capture highlights instead of making a recording every time you’re playing a game, feel free to bump down to a recording length of 30 minutes. You can also max the DVR recording out to a full four hours, if you really marathon your gaming sessions.
I recommend making sure that Windows is also recording audio while you game, or else your video is going to be really boring. It’s up to you whether you also want Windows to capture audio from an attached webcam or microphone. While that can be useful if you’re really trying to make a “talk to the viewers” kind of video, nobody is going to want to watch you play World of Warcraft while you talk to your cat… I think.
You can adjust the quality of the recorded audio, but your listeners might not notice a difference above the default 128Kbps. You can also adjust the frame rate of the video itself — either 30fps or 60fps. I recommend going 60fps if your system can handle it, since that will result in a smoother-looking recording. Also, set the video quality to high, because nobody likes ugly gaming videos.

Broadcasting
You’ll want to make similar tweaks on the Broadcasting section of Windows 10's Gaming settings. Set whether you want Windows 10 to record audio during your streams — probably a yes — and whether it should automatically turn on your microphone when you start a broadcast. Even if you don’t toggle this setting, you can always easily flip your microphone on and off within the Game Bar itself, so you don’t have to fret very much about this option.
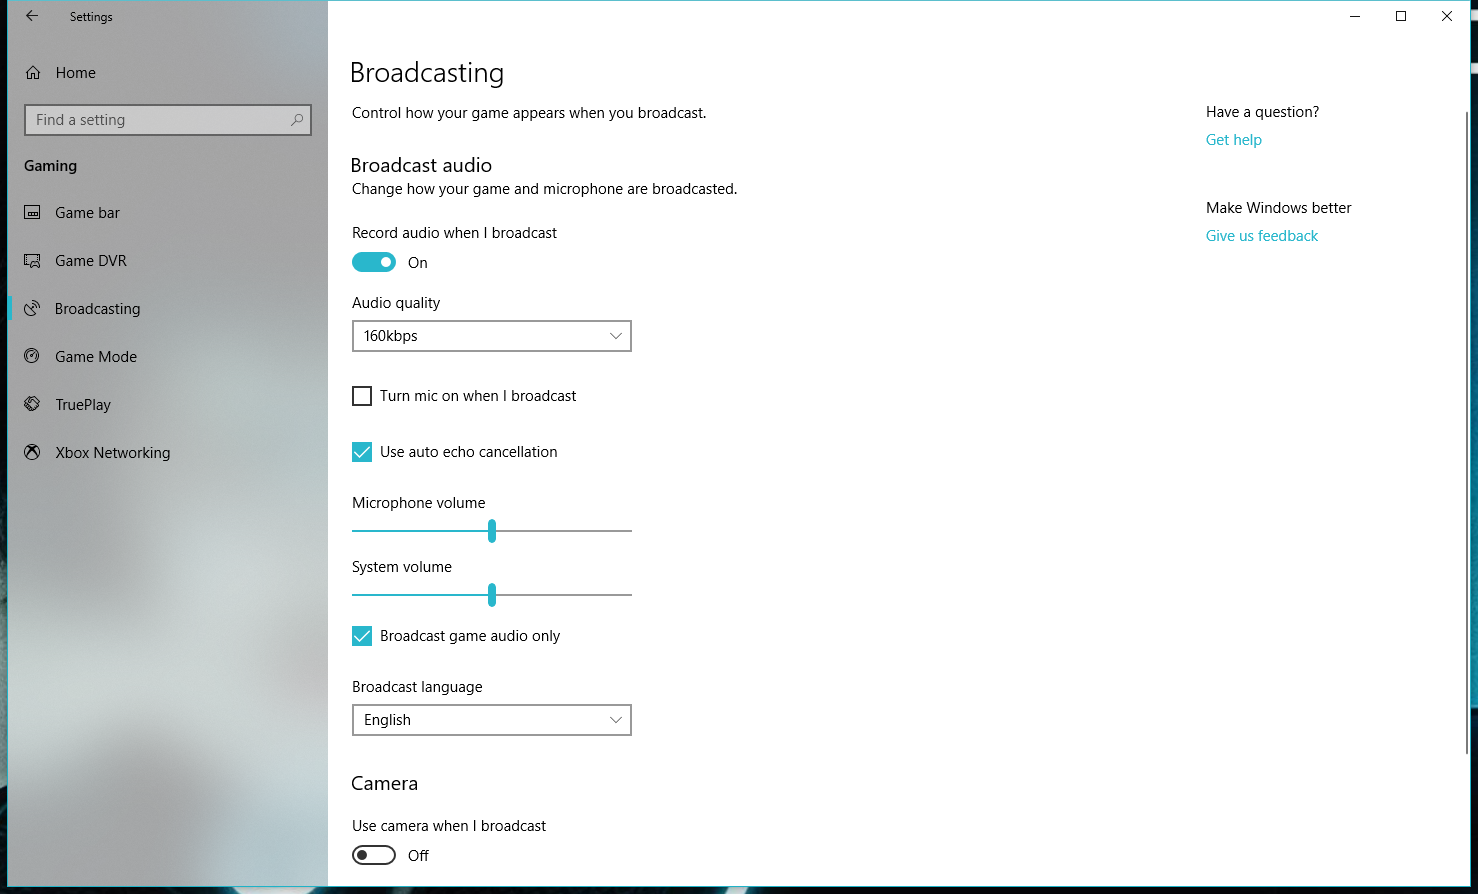
Consider the same advice if you’re looking to slap a webcam video over your game’s stream. You can tell Windows to automatically use your webcam when you’re broadcasting, but that’s also easy to trigger on the Game Bar.
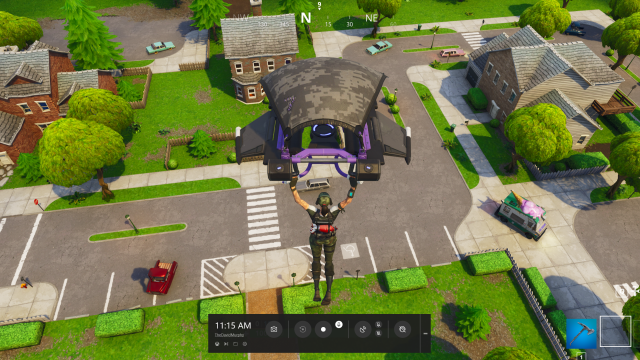
How to pull up the Game Bar in a Windows 10 game
When you’re ready to start actually using the Game Bar during, you know, a game, just smash the Windows Key + G. The translucent, rectangular bar will appear toward the bottom of your screen. You can ignore the tiny icons under your Xbox gamertag. The ones you’ll most want to care about are the huge icons that Windows 10 splits into four sections.
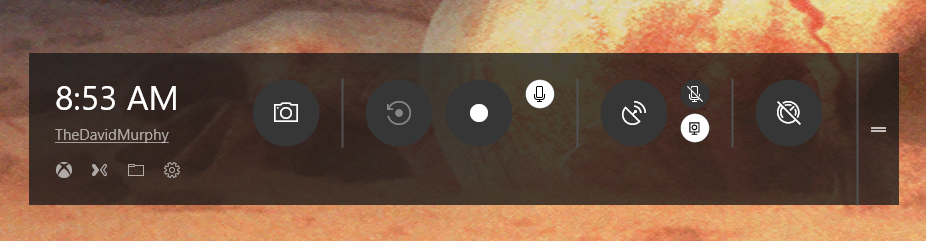
Taking Screenshots
The first icon takes a screenshot. Easy. If you’re in the middle of a frantic firefight, you’ll probably just want to hit the Windows Key + Print Screen instead, which saves you the step of having to load up the Game Bar and click the screenshot button.
Recording Videos
To the right of that is the Game Bar’s “Record that” button, which makes an automatic video from your last 30 seconds of gameplay. The button that looks like every other recording button ever — big dot and all — is what you’ll use to tell Windows 10 to start recording a video of whatever it is you’re playing. (And you can turn your connected microphone on and off using the tiny button in the upper-right corner.)
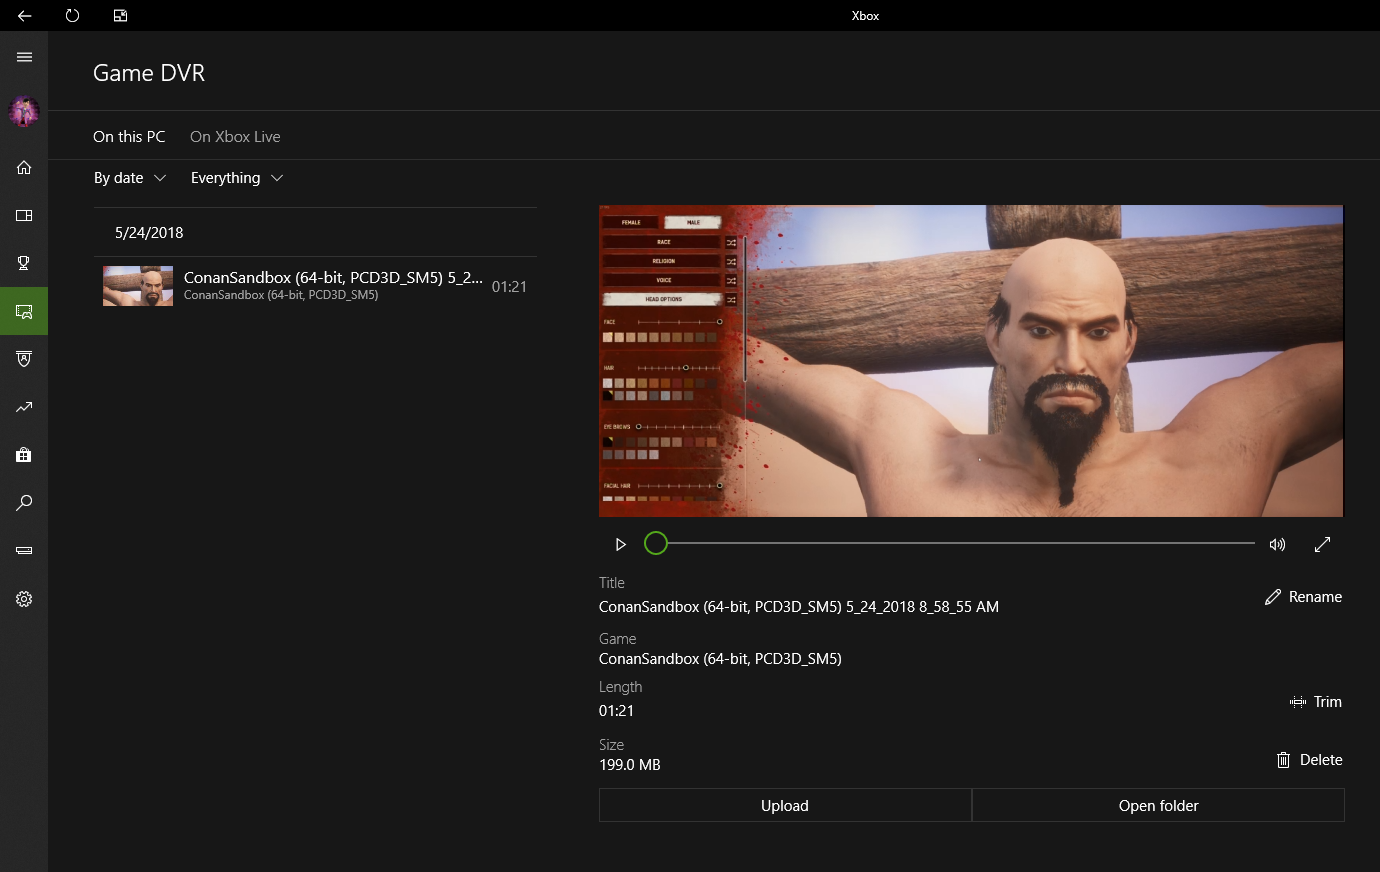
When you’re in your game and you stop your recording, Windows 10 will bump you out to its Xbox app — specifically, the Game DVR section — where you’ll be able to edit the title of your video, trim it to only the most interesting points, and upload it to Xbox Live.
Streaming your game
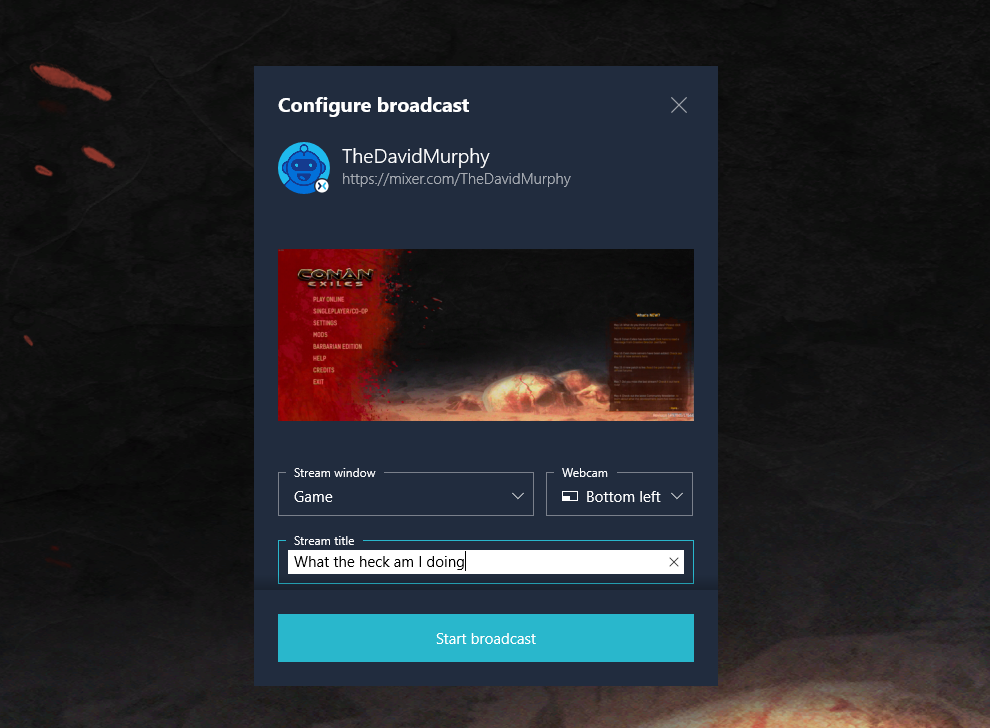
To broadcast, hit the next button to the right — the one that looks like a radar dish of-sorts. Windows will connect you to Mixer, Microsoft’s streaming site, and you’ll be asked to provide a name for your channel (which you can change at any time), pick what you’d like to stream (your game, I hope), and pick where your webcam’s feed should go, if you’re using that feature.
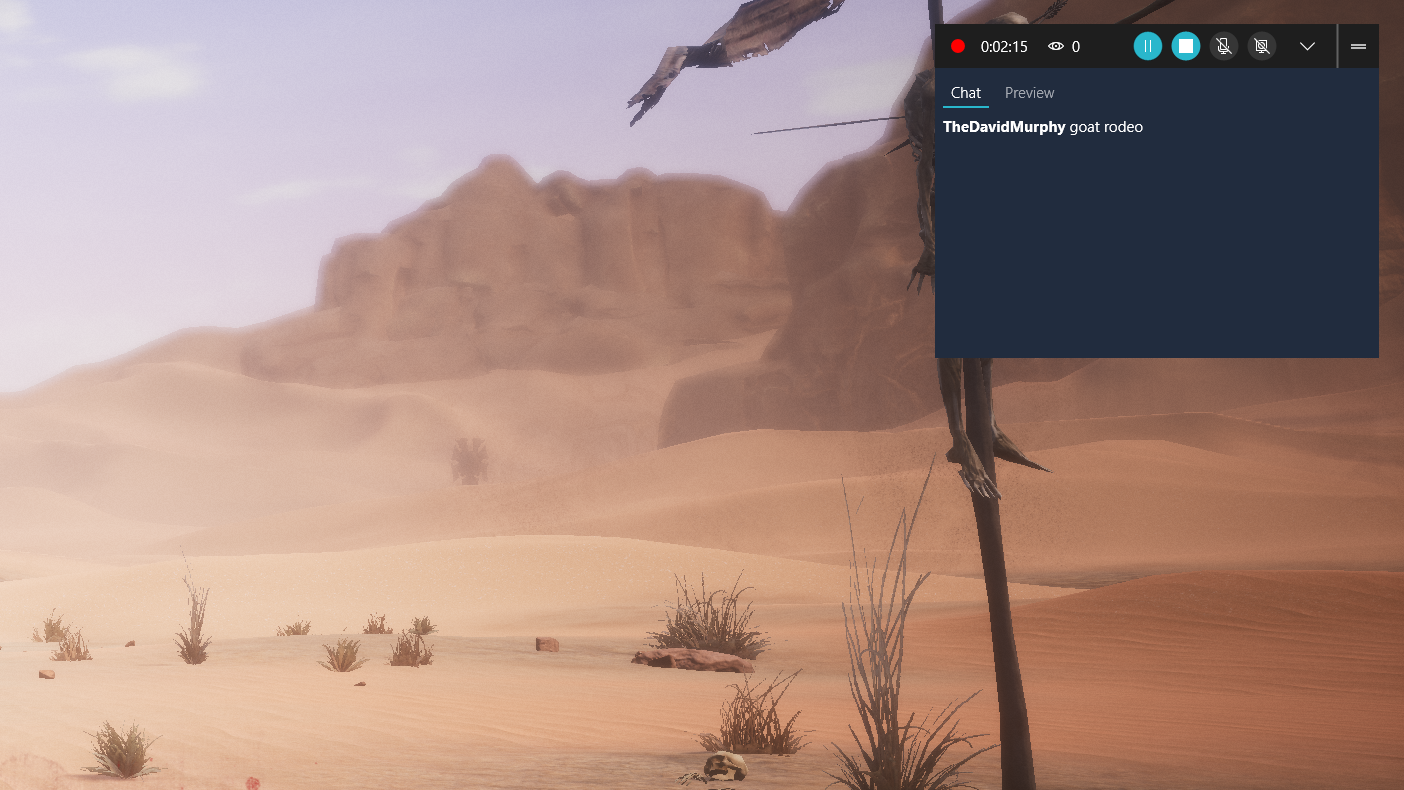
Once the broadcast starts, you’ll see a preview in the upper-right corner of your game (which you can minimise, if you want). This preview window lets you quickly toggle your microphone and webcam on and off, and you can also click on the “chat” link to see what people are saying about your terrible Fortnite death streak.
While it’s a little annoying that you can only use the Game Bar’s broadcast feature to stream to Mixer and not another service (like Twitch or Facebook), the Game Bar is still an incredibly easy way to get started streaming without having to fiddle with any third-party apps or headache-inducing settings.
The Game Bar button that might do nothing at all
Finally, let’s chat about the fourth button on the Game Bar real quick. It has nothing to do with content creation. Rather, clicking it enables Windows 10’s somewhat-mysterious Game Mode, which may or may not give your game’s performance a boost depending on your PC’s prowess. Give it a shot if you feel like your system is struggling, but you can probably wave off if you aren’t noticing any quality issues.
Comments