Strava’s community makes it the de facto fitness app for many athletes. Sadly, its social features are often at odds with your privacy. If you tend to start and end your workouts near your home, you could accidentally be revealing your home address to strangers.
There’s a trade-off between privacy and usability here. Some of Strava’s best features, such as Heatmaps, won’t work well if everyone makes their fitness data private. But you should review the following options and decide the level of privacy you’re comfortable with. It’s not unlike the deal you make to snag a free Apple Watch or Fitbit from your insurance company: you need to balance your personal data with the benefits of the service.
Restrict who can see your workouts
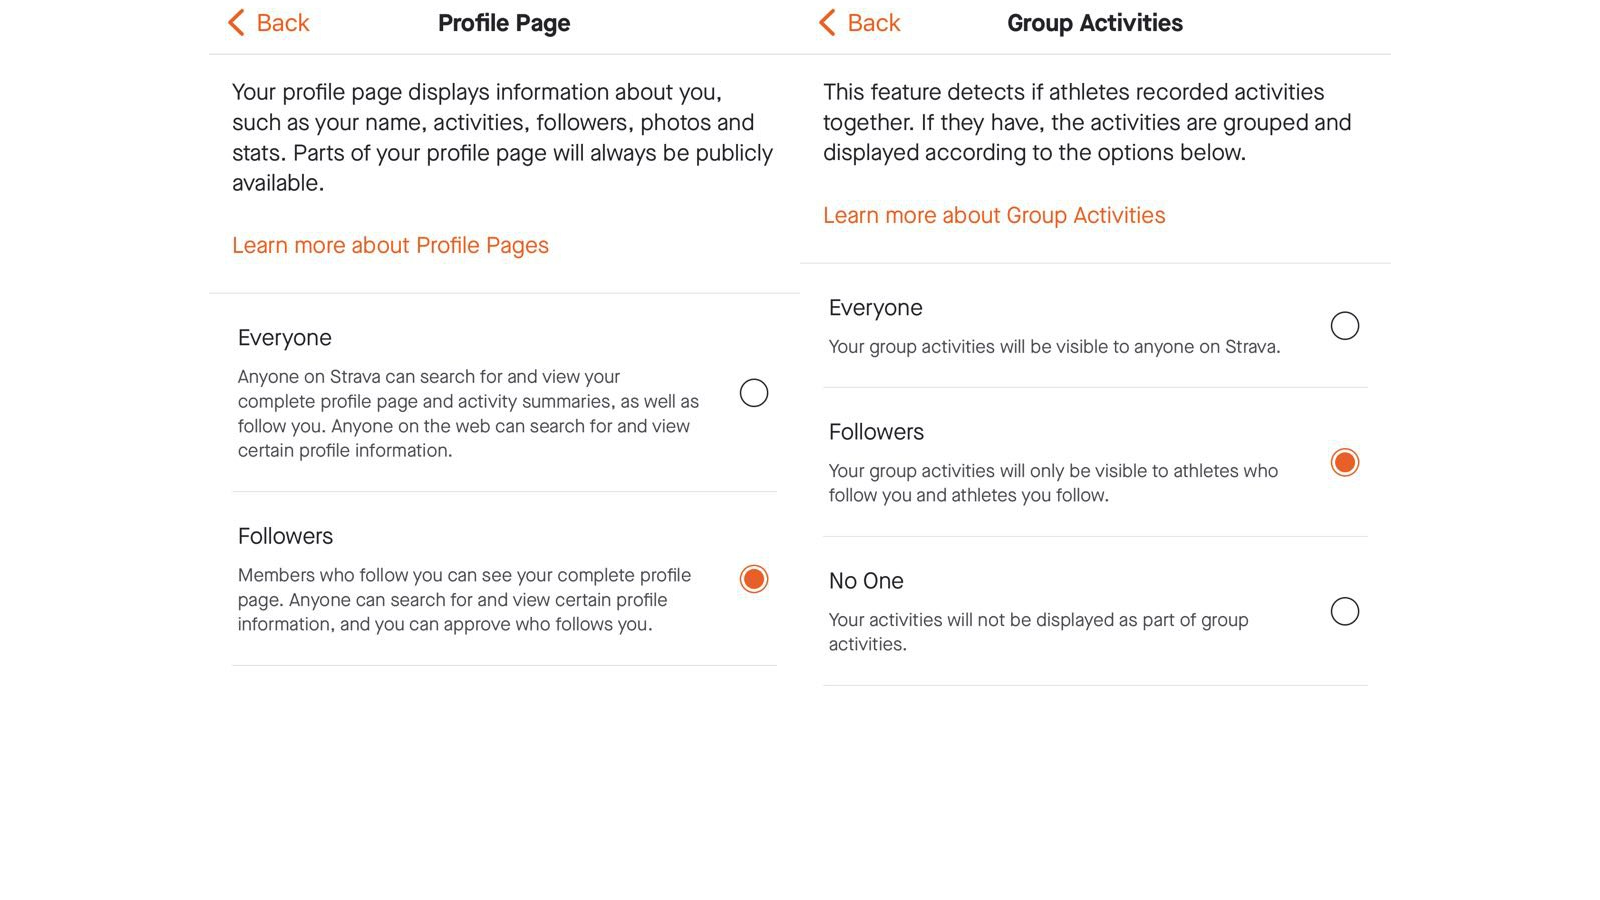
Everyone can see quite a bit of information about you and your activity from your profile page on Strava. You can restrict this to an extent by going to Strava’s privacy settings page. You can select Followers, No One, Only You under these sections:
- Profile Page
- Activities
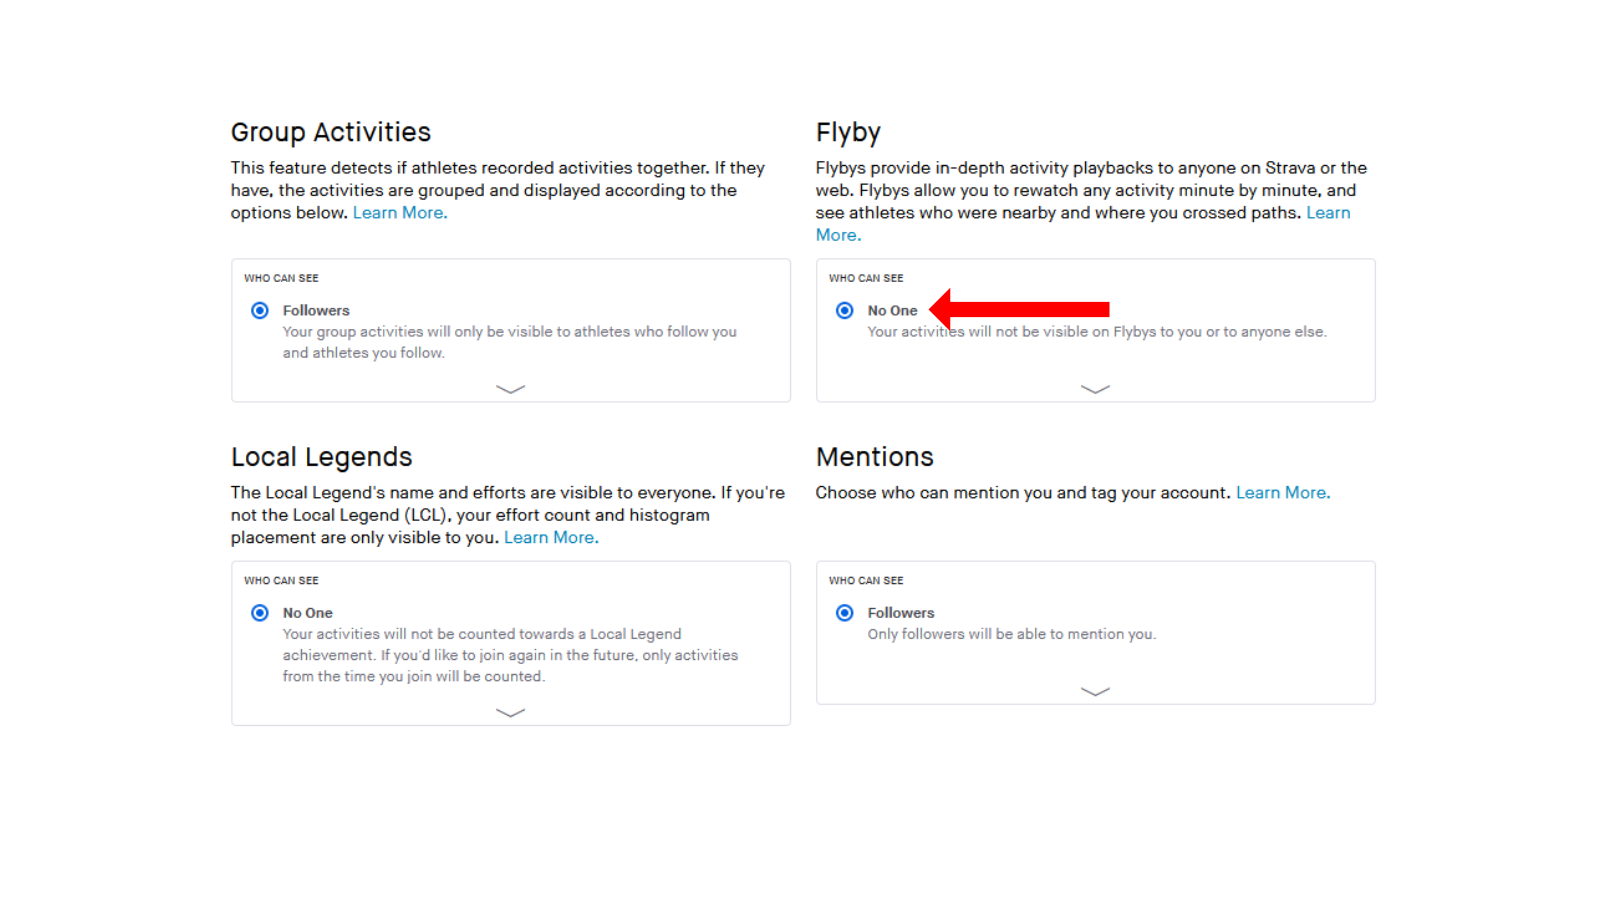
- Group Activities
- Mentions
This will stop strangers from tagging your Strava account, and hide all of your workouts from people who don’t follow you on the app. Your profile page will still be visible to everyone, along with the number of activities you’ve recorded. They’ll lose access to data from individual workouts of yours, though.
Hide previous activity data from public view

If you haven’t paid attention to what you’ve been sharing on Strava so far, you can quickly review your older workouts and hide them from public view. Go to Strava’s privacy settings page and scroll down to Edit Past Activities. Select Activity Visibility and Heart Rate Visibility, and then click Next.
You can now select Update all past activities to “Only You” or Update all past activities to “Followers” and click Next. Do the same thing once again for your heart rate data and click Next. Strava will ask for a final confirmation, which you can grant by clicking Next and then OK.
Doing this has the unfortunate side effect of removing your achievements from Strava. If you care about things like being the segment leader for a workout, then you should keep your workouts public.
Stop strangers from seeing your Flybys
Strava’s Flyby tool lets you revisit your workout, or the workout of people near you, to gain insights into your performance. It’s useful if you’re trying to see where you slow down or speed up during an activity, and how you fare against other people in your locality. By default, this data is kept private.
If you’ve enabled Flyby at some point and forgotten about it, you can go to the privacy settings page on Strava and select No One in the Flyby section to disable it.
Strava also periodically sends your followers notifications about your activity. You can disable this option, too, on the privacy settings page. Scroll down to the section labelled Sharing my activities with my followers and select Do not send these notifications.
Avoid Local Legends
A big part of any social fitness app is the ability to compete with others. In Strava, this feature is called Local Legends and it rewards you for completing a specific segment the maximum number of times during a 90-day period. If you do that, you become the Local Legend and more of your workout data becomes public.
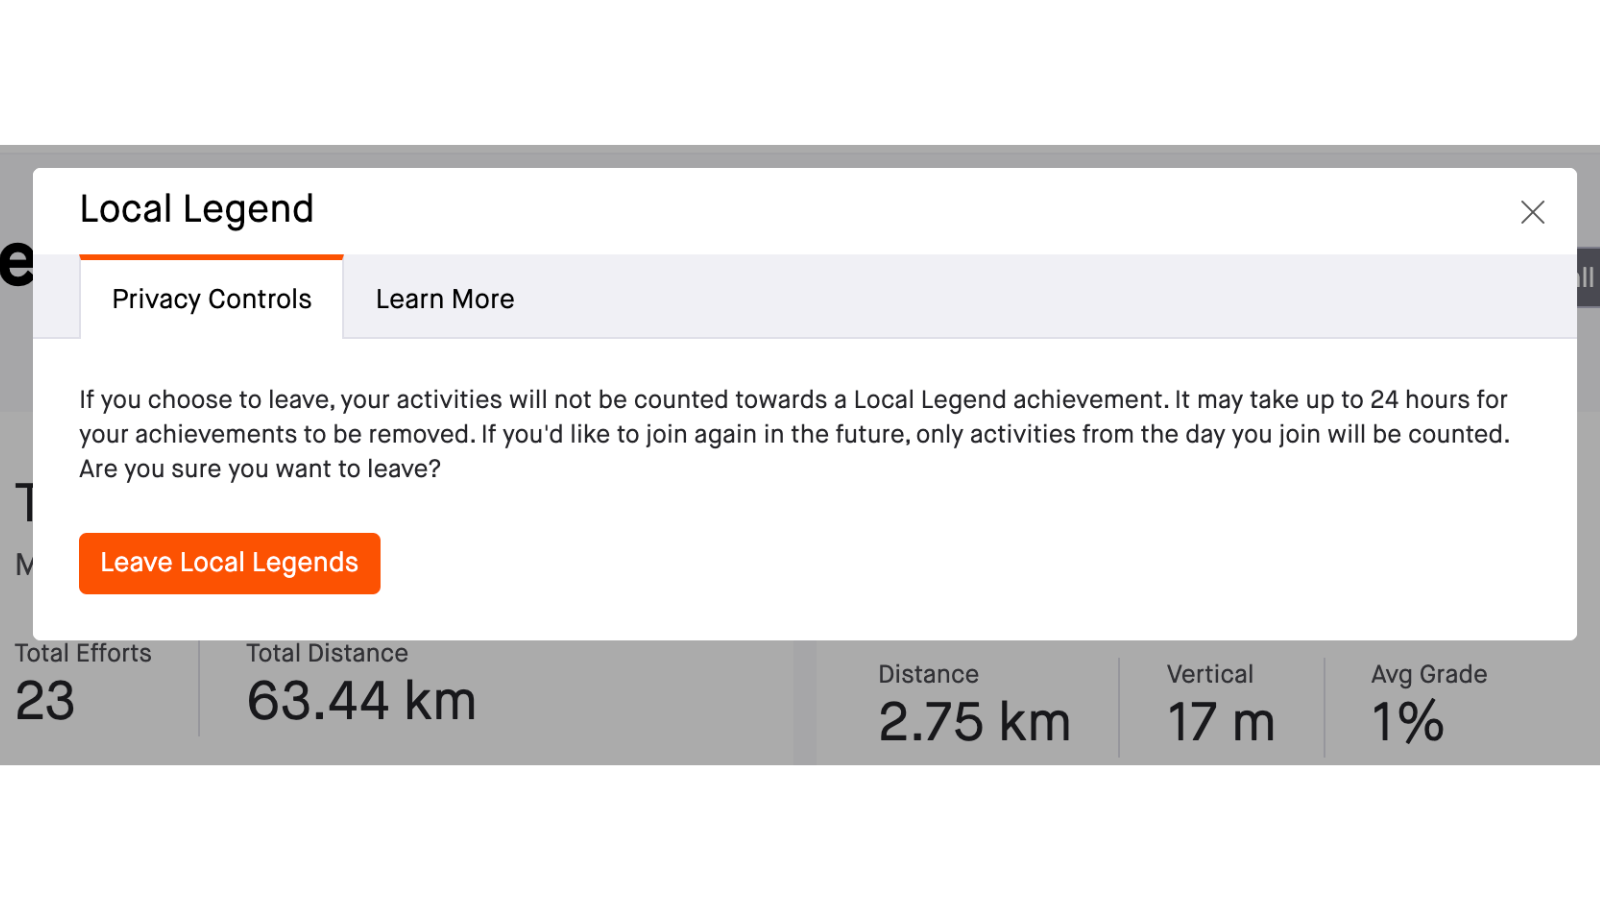
To avoid that, you can visit Strava privacy settings and select No One under Local Legends. If you make this change, you will no longer be able to participate in Local Legends competitions. You can make this setting public to return to the competition.
You can also visit a segment page and go to Explore > Segment Explore. Then click a segment and select View Details > View Local Legends Stats. Now select the three-dots icon in the top-right corner and select Leave Local Legends.
Hide your activity maps from others
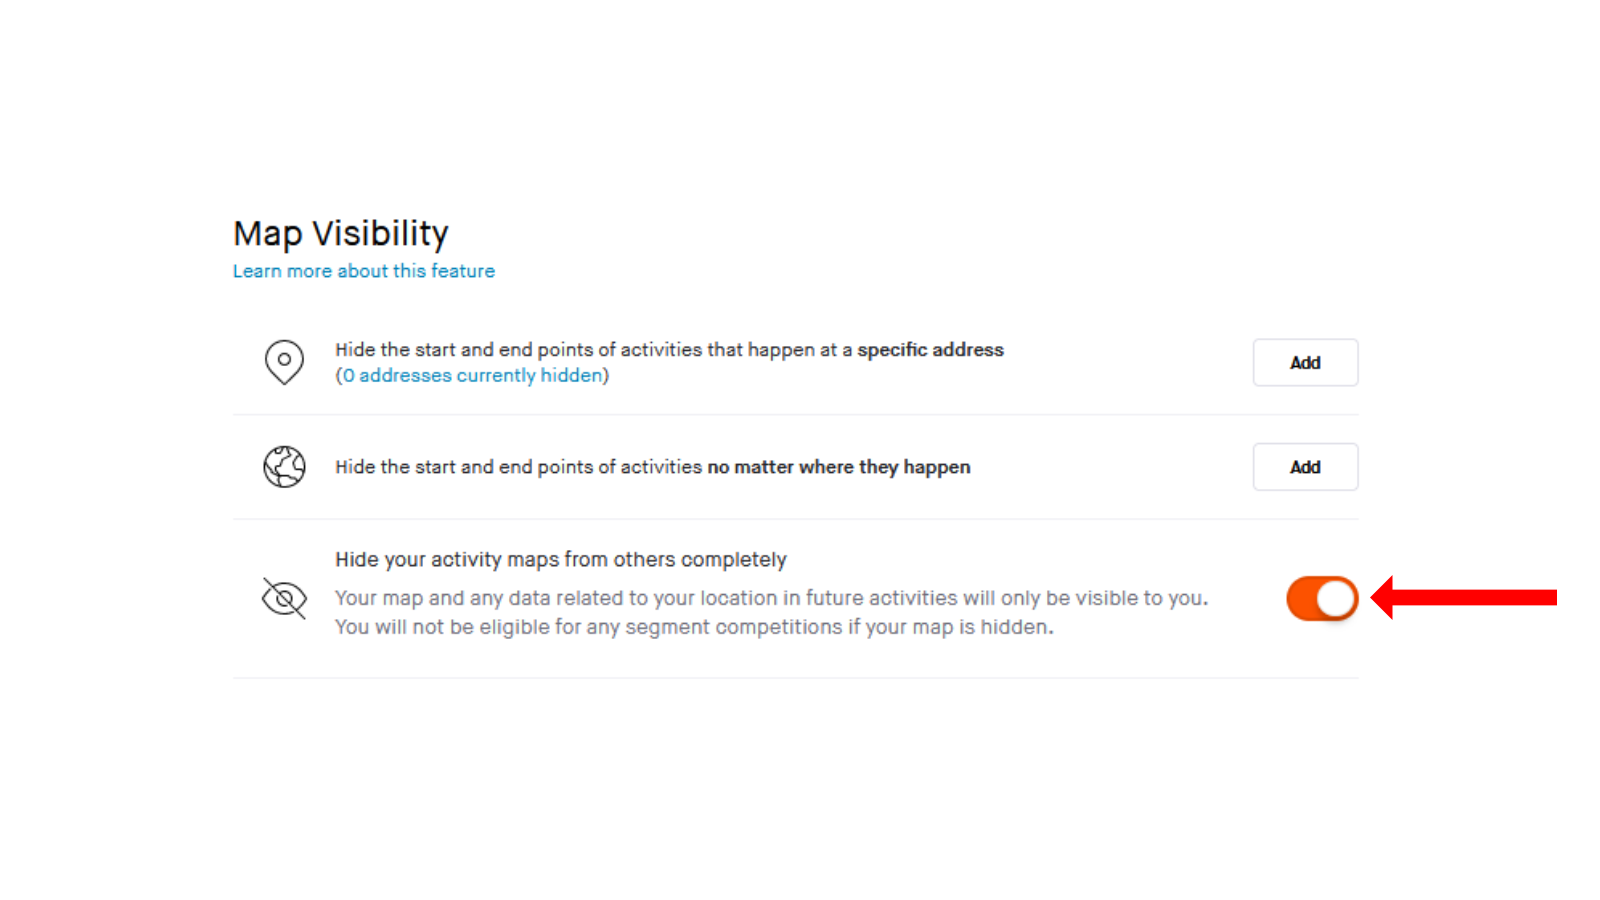
If you’re ok with being away from segment competitions on the app, you can choose to remove all data related to your location from your future Strava workouts. This means that your map data in workouts will be visible only to you. To make this privacy change happen, go to the privacy settings page and select Hide your activity maps from others completely.
Remove yourself from Heatmaps
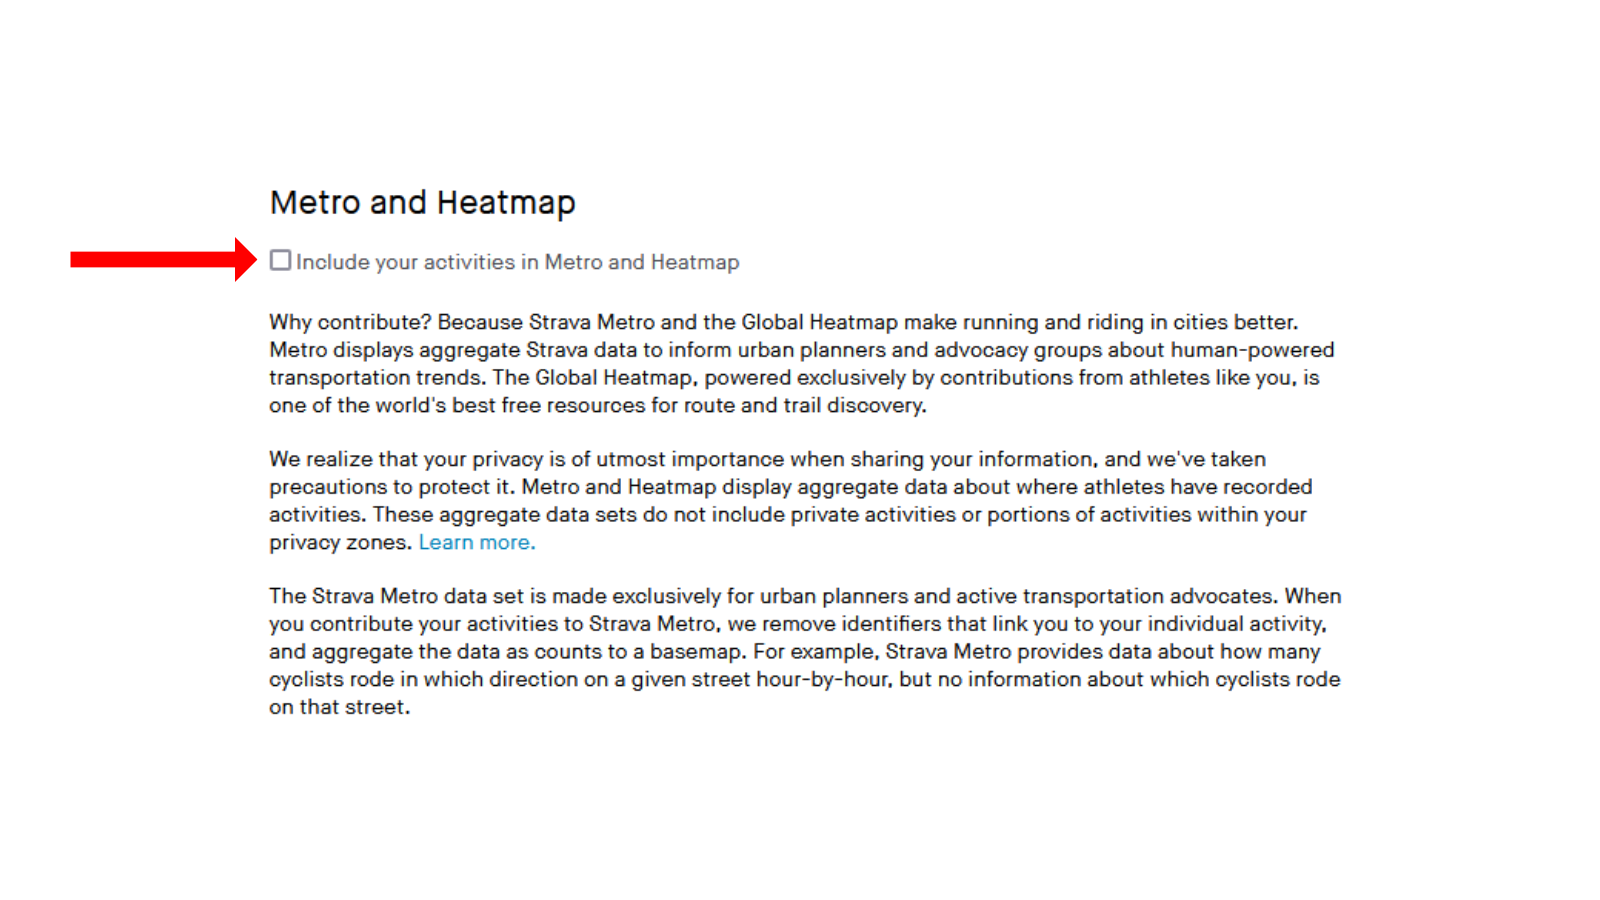
Strava uses your workout data to identify the most popular workout routes in your locality. This feature helps other people find popular workout locations quickly, and Strava says it uses anonymised data to help urban planners and transportation advocates make cities better for running and riding.
In case you’ve decided that you’d rather not contribute your data to this pool, go to Strava privacy settings and scroll down to Metro and Heatmap. Uncheck the option called Include your activities in Metro and Heatmap.
Review your health-related data permissions
If you aren’t using Strava’s premium features to analyse your performance, you can stop Strava from collecting health data from paired devices such as heart rate monitors. To do so, go to Strava’s data permissions page and click Deny Access.
Check which apps can access your Strava data
Most people end up linking various fitness apps and devices to Strava, and if you’ve done that before and lost track, you should review if those apps or devices still have access to your Strava account. You can go to the My Apps page on Strava and click the Revoke Access button next to the services you no longer use.
You can also visit the Social Connections section on this page to unlink social media profiles from your Strava account.
Reduce email spam from Strava
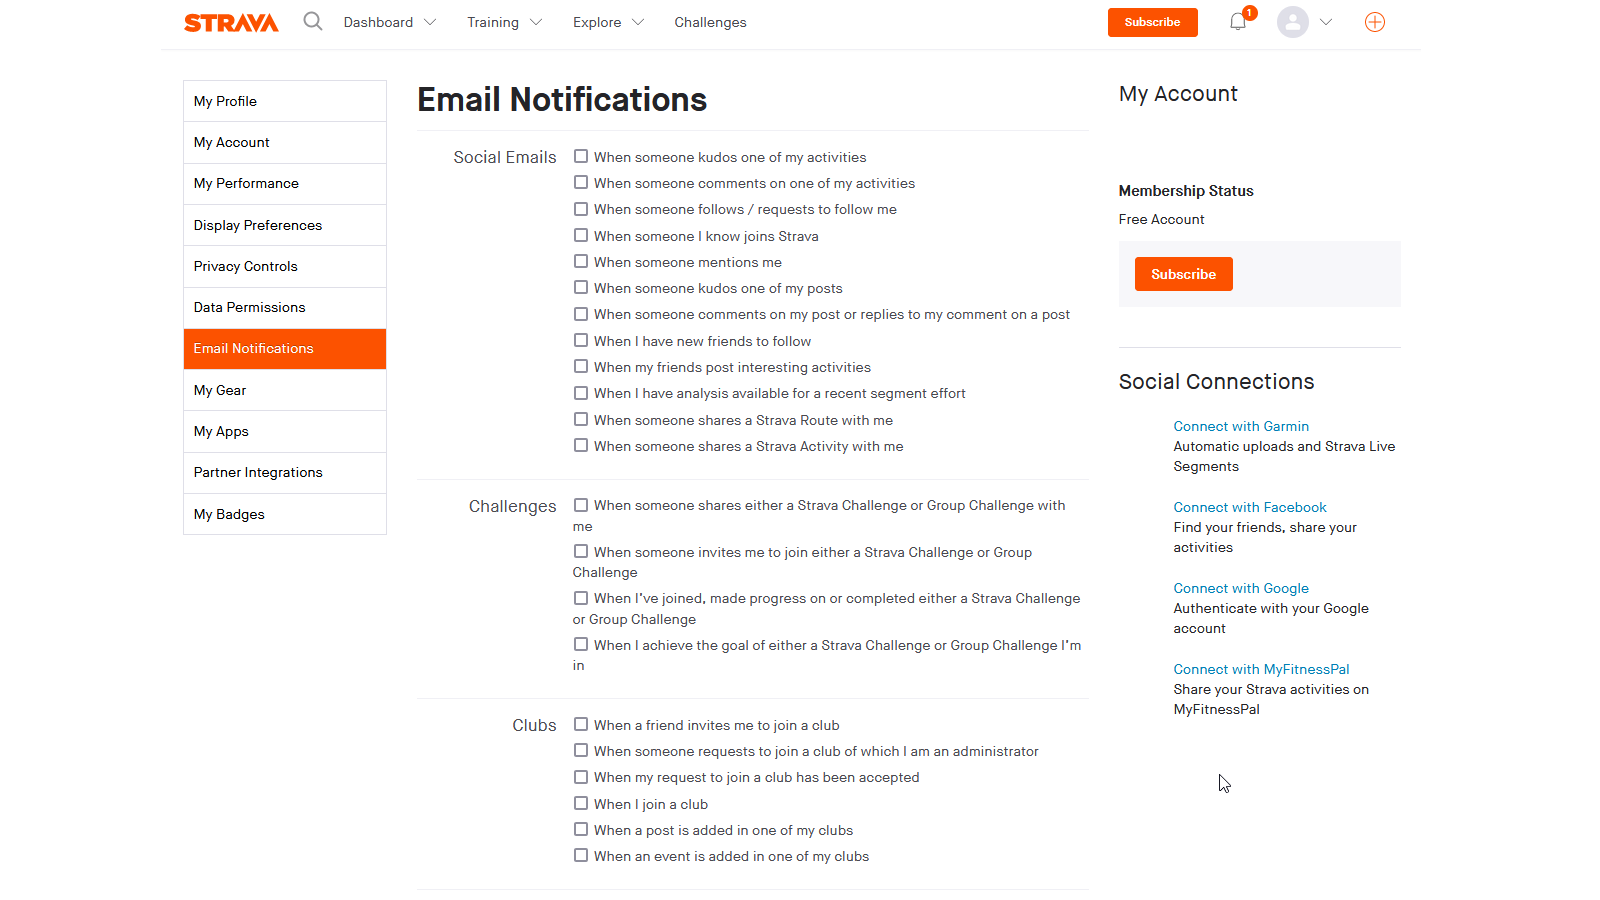
Like most other social media services, Strava tends to send one email too many. You can reduce the number of emails you get from Strava by visiting the app’s email notifications page. Uncheck everything you don’t need, and don’t forget to opt out of Strava research and newsletter emails, too.
Leave a Reply
You must be logged in to post a comment.