
Garlic is a crucial ingredient in various cuisines around the world. Maneul jangjji is a popular pickled garlic side dish on the Korean table, Egyptian kushary is a beloved garlic-forward meal, and French style confit garlic is wonderful on just about everything. The most common way for me to show garlic some love is with a sprinkle of Thai gratiam tod (fried garlic pieces) — it makes every savoury dish better.
I call gratiam tod “garlic chips,” because they’re usually sliced flat-ish, but this seems to confuse people and they expect me to dump a handful of potato chips on my omelette. So let’s just call it fried garlic. If you love garlic already, I should hardly have to convince you to make this. For folks that aren’t sure if they want to prepare it in advance — it’s dead simple, and even a small batch makes quite a bit for you to keep on the counter. Then you can deliver a quick, distilled flavour of garlic to finished dishes whenever the mood strikes. Furthermore, it’s a two for one deal. You get fried chips of garlic and garlic infused olive oil.
Although you can certainly buy a container of fried garlic (I usually do), you might not be ready to commit to a large jar, and even if you are, there will be times when you’re between containers. As alarming as that is, it doesn’t have to stop you from enjoying pure fried garlic on every meal. Making gratiam tod is so easy that the “hardest” part is peeling the garlic. Heat two tablespoons of olive oil in a small frying pan over the lowest heat you can achieve. If you have a “warm” setting, use the heat setting just above that. The frying pan should be small because you want the oil to just cover the bottom, but it shouldn’t be very deep.

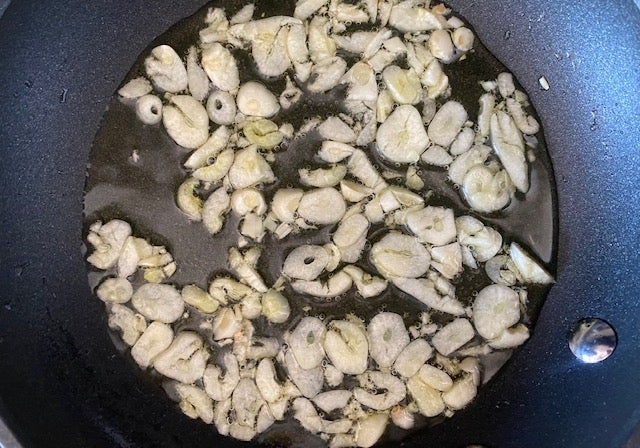
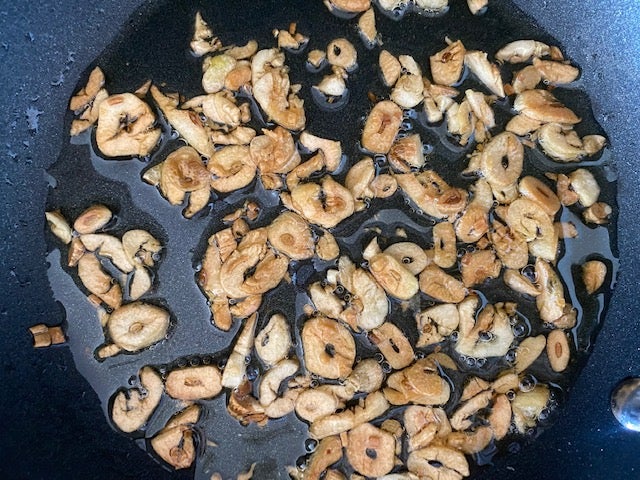
Peel about eight to twelve cloves of garlic using any method you like. If you smash-and-peel, that’s fine, just understand you might have some broken slices or bits. Slice the cloves thinly and evenly. The thinner the slices are, the faster it will fry, but this isn’t something you should break out the mandolin for. Add the garlic pieces to the heated oil in an even layer. Try to keep the pieces from overlapping so they all can access the hot oil. Let garlic slowly fry over the course of 25 minutes. Every 10 minutes or so, give the pan a shake and stir it up to flip some garlic pieces. The first time you do this, the garlic will still look white. Next time, they will start to take on colour. As we strive for garlic toasting equity, you may need to use two forks to pull apart any garlic pieces that are stuck together. Do this, and it will pay off in the end with evenly browned garlic. When you near the end of the cooking time, keep an eye on the colour. You don’t want to burn the garlic, so anything blackened or very deeply brown is worth tossing.
After the garlic has fried to an even golden brown colour, take the pan off the heat and dump it (oil and all) into a clean, dry container or jar that you can seal tightly. Leave it on the counter, and easily access a spoonful whenever you’d like.
These flavorful morsels exhibit an almost caramel-garlic flavour that’s powerful, toasty, and slightly bitter. Before you panic at the “B” word, remember that bitter isn’t bad. It’s one of the five flavours (sweet, salty, bitter, sour, and umami), and great dishes find a way to balance all five. Besides providing your bitter note, these garlic bits also supply the crunch-factor for a textural surprise. Enjoy gratiam tod as a topping on eggs, soups, pasta dishes, dips, and everything savoury (but I won’t be surprised if there’s a sweet function for it, too). Serve it in a bowl on your Thanksgiving table so guests can sprinkle at will. Homemade fried garlic in oil will keep in an airtight container for about a month at room temperature.
Gratiam Tod (Thai Fried Garlic)
Ingredients:
- 2 tablespoons olive oil
- 8-12 cloves of garlic, peeled and thinly sliced
Heat the oil in a small frying pan over low heat. Add the sliced garlic, and spread the pieces out in an even layer so they don’t overlap.
Fry for 25-30 minutes, stirring to flip pieces every 10 minutes. Take extra care to flip and separate pieces in the last 10 minutes as they finish browning. The garlic is done when all of the pieces are evenly golden brown. Store the garlic and oil in an airtight container on the counter top for up to one month.
Leave a Reply
You must be logged in to post a comment.