You don’t always want to take a snap of your Mac’s screen immediately after you hit the screenshot shortcut key — sometimes you might want to give yourself a few seconds to set things up just right before capturing your screenshot. Fortunately, your Mac allows you to do that, and we’ll show you how.
The built-in screenshot capture tool is all you need to do the job, so that’s what we’re going to focus on. The first step involves opening screenshot options on Mac. To do this, use the keyboard shortcut Command + Shift + 5. When you press this key combination, a floating menu with screenshot options will open on your Mac.
In the screenshot menu, select one of the three icons next to the close button — Capture Entire Screen, Capture Entire Window, or Capture Selected Portion. It doesn’t matter which one you select, as long as you click one of these three icons. When you’ve done that, you will see an Options button on the right side of the floating screenshot menu.
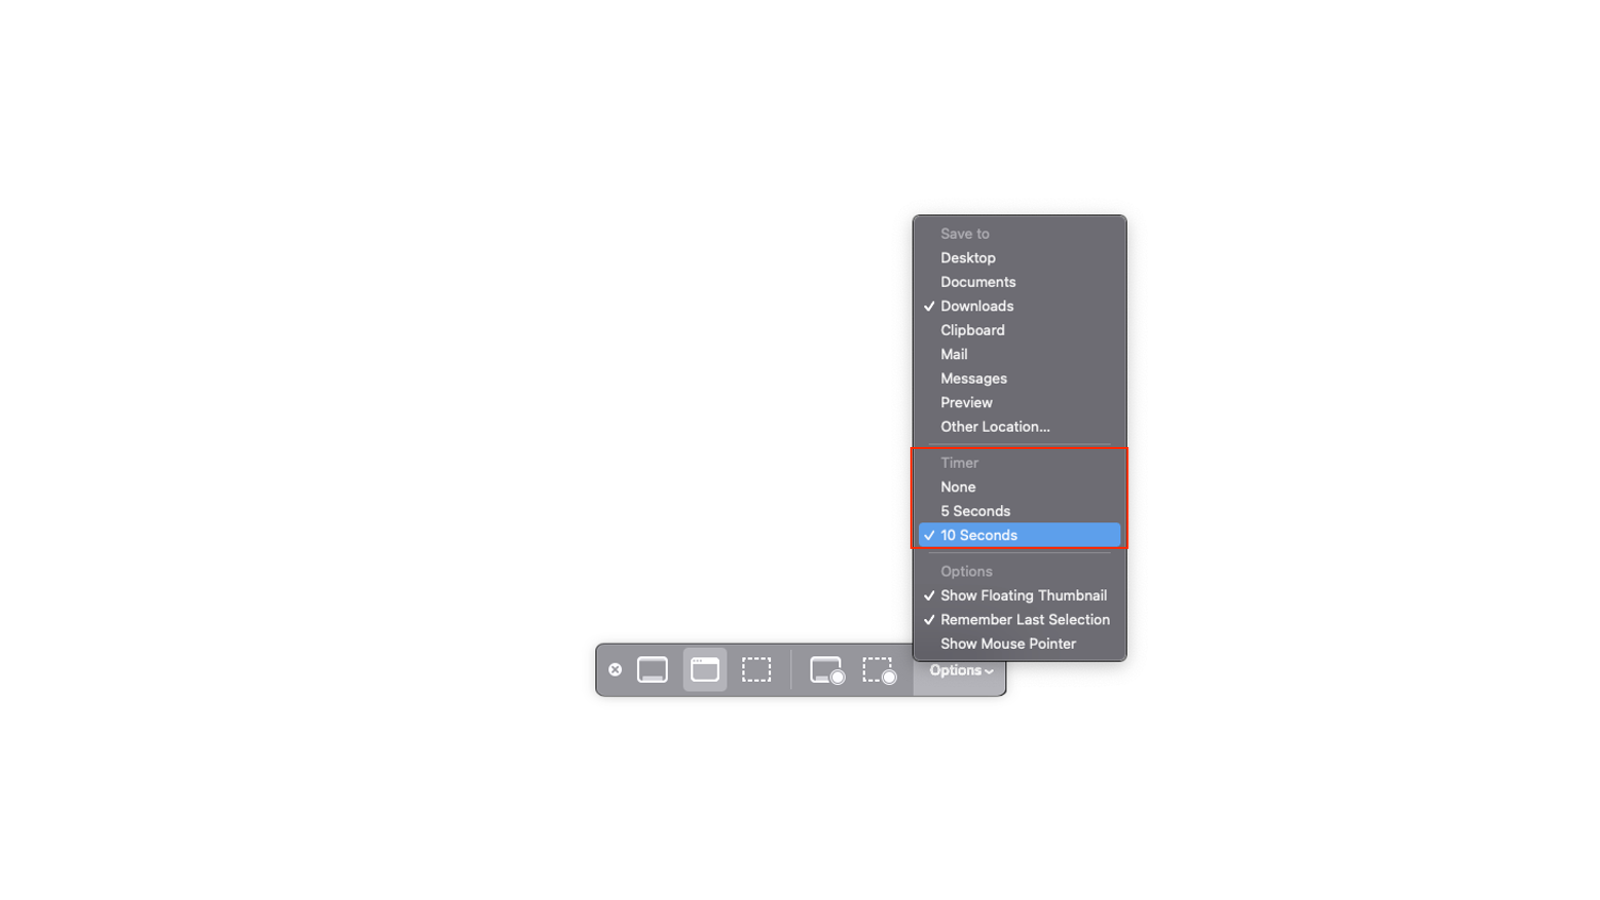
Click Options to open up another menu, where we’re going to check out the Timer section. There are three options under Timer: “Off,” “5 Seconds,” and “10 Seconds.” If “Off” is selected, screenshots will be captured immediately on the Mac. To set a screenshot timer on the Mac, select 5 Seconds or 10 Seconds. This will add a delay of five or 10 seconds to each screenshot you capture and you will see the countdown in a small floating menu on the screen.
Note that this timer remains in place until you choose to disable it. If you want to add a timer just for this one time, you can do that too. Hit Command + Shift + 5 again and select Options. Now uncheck Remember Last Selection under Options. This will ensure that screenshot timers are added only for the next screenshot you capture. After that, screenshots will be captured immediately once again.
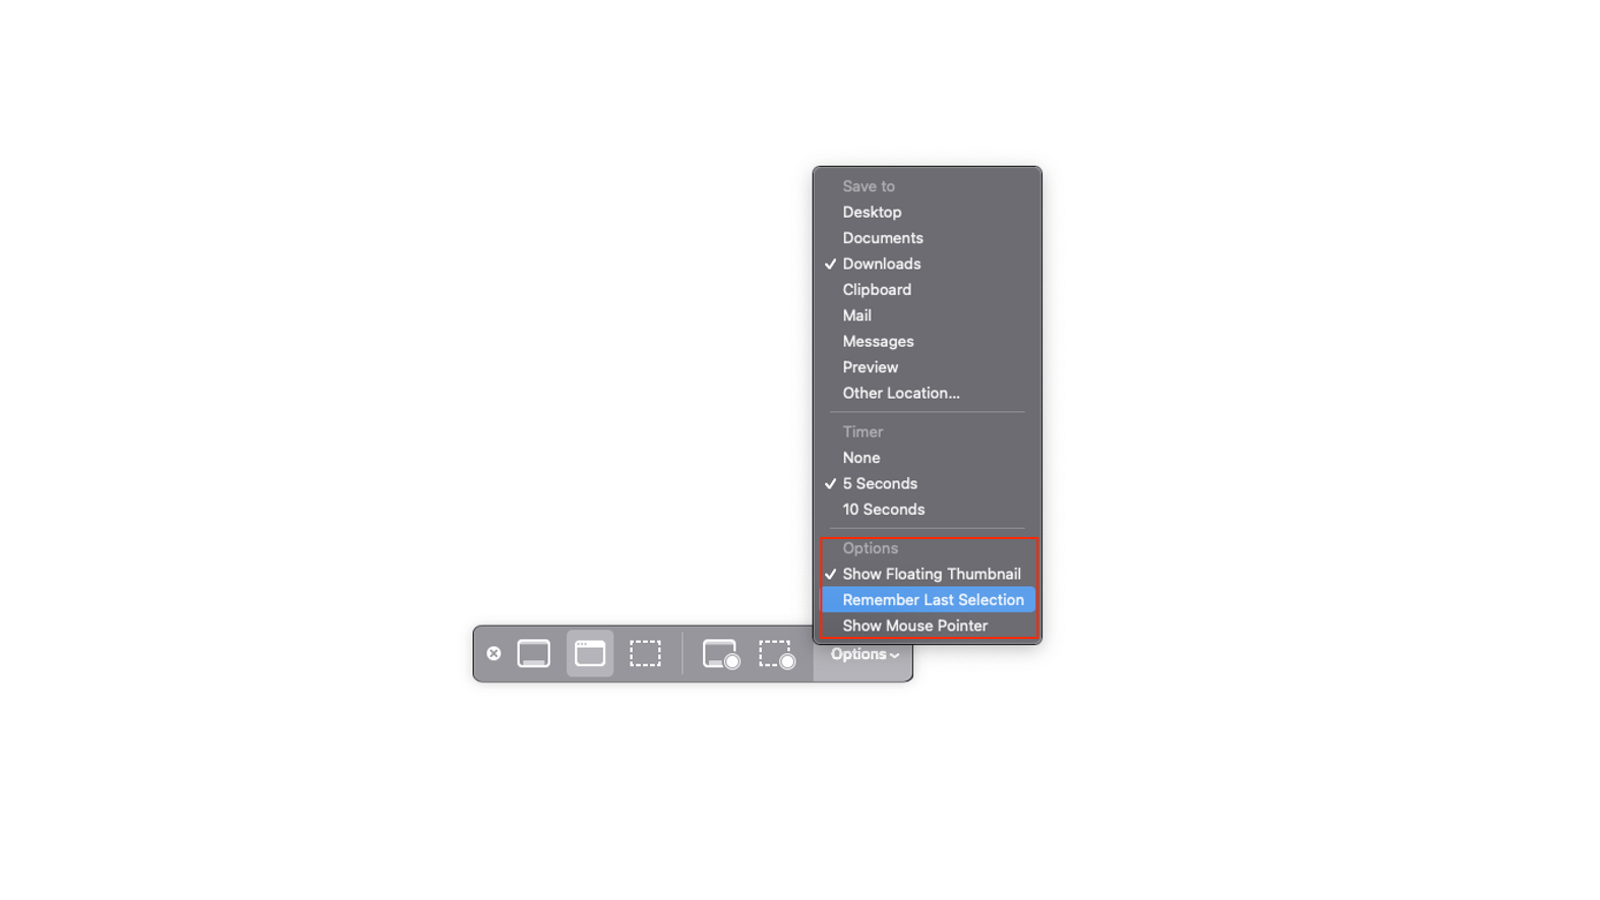
However, Remember Last Selection is an incredibly convenient option to have because it allows your Mac to remember your screenshot preferences. That’s why we highly recommend that you keep it enabled.
While you’re fiddling with screenshot options on your Mac, you might want to consider tweaking a couple more useful settings to change the default location where screenshots are saved and using a nifty trick to add the mouse pointer to your screenshots.
Leave a Reply
You must be logged in to post a comment.