Your Mac makes it pretty easy to take screenshots, but soon enough you’ll end up with a desktop that’s overflowing with them. That’s because the default save location for Mac screenshots is the desktop. But if you’re like me, you like to keep your desktop clean, and to do that you have three choices: Stop taking screenshots on your Mac, keep moving or deleting old screenshots, or change where your screenshots are saved. Our focus is going to be on the third choice today as we’re going to learn how to change where your Mac saves them.
How to avoid screenshot clutter on your Mac
The easiest way to avoid screenshot clutter on the Mac is by saving screenshots to your clipboard and pasting them inside other apps. Effectively, the screenshot won’t be saved on your Mac, which helps you avoid all that clutter. If you take screenshots of casual conversations and send them to your friends, or if you’re looking for a quick way to send screenshots to your photo editing app, this is definitely the best way for you to go.
On the Mac, use the keyboard shortcut Command + Control + Shift + 3 to take a screenshot of the entire screen and save it to the clipboard. You can then use Command + V in other apps to paste the screenshot wherever you want to. Similarly, Command + Control + Shift + 4 lets you take a screenshot of a part of the screen. After hitting the shortcut, click and drag around the portion of the screen that you want to snap. When you’re done, paste the screenshot wherever you like.
How to change where your screenshots are saved on Mac
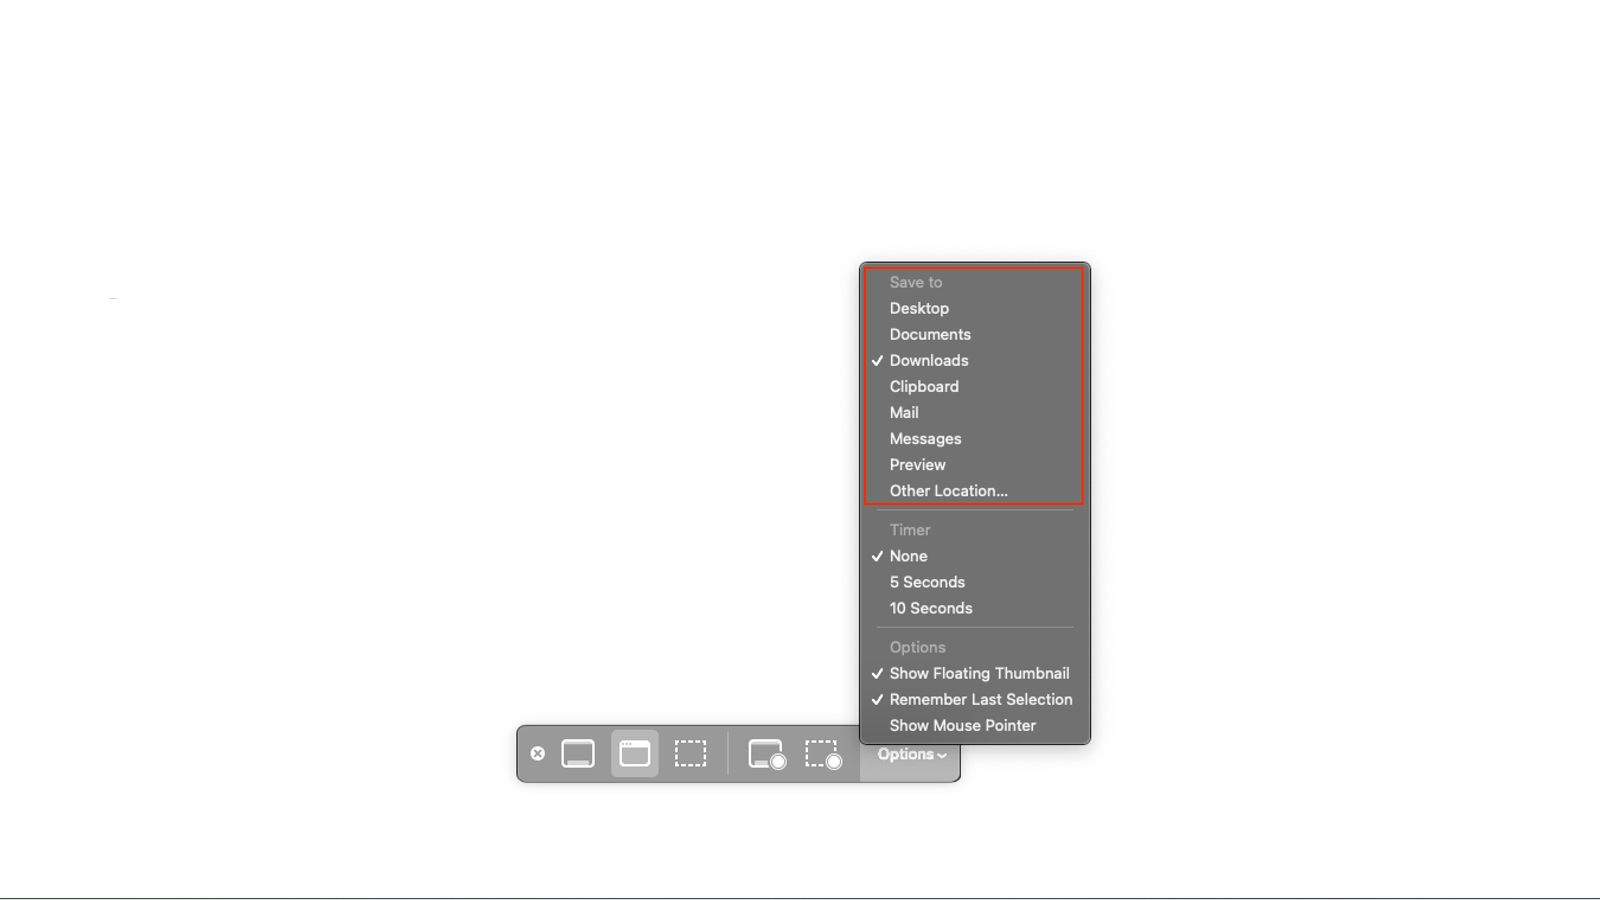
If you like saving screenshots, you can easily change the save location by using the Command + Shift + 5 keyboard shortcut and clicking Options in the floating screenshot menu. Now check the Save to section at the top and choose any folder that you like. If your preferred folder isn’t listed, click Other Location and save it wherever you need.
The next time you take a screenshot with Command + Shift + 3 or Command + Shift + 4 on your Mac, it’ll be saved to the new location that you just selected.
Leave a Reply
You must be logged in to post a comment.