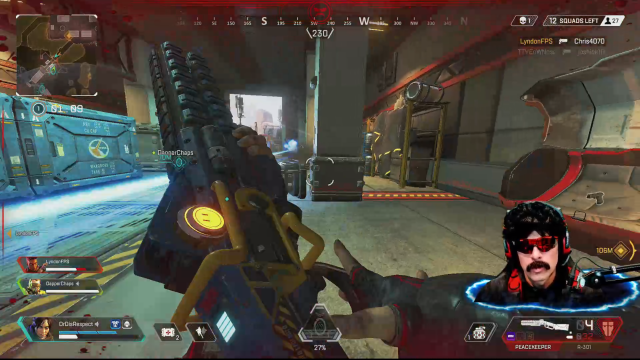
As much as I’ve wanted to give game-streaming a try, I’m always tentative to jump into the Twitch waters for two reasons: I don’t have a solid background behind my gaming desktop’s chair, which would make it tricky to key out everything but my face, and I don’t have any neat animations that would keep all 10 viewers engaged with my stream.
If you’ve ever spent time watching streams on Twitch, Mixer, YouTube, Facebook, or whatever, you’ve probably noticed all the fun ways that streamers announce new subscribers (and tips). Typically there’s some kind of announcement animation and some silly sound — a musical riff, a quote from some science-fiction movie, et cetera.
Overlays and animations can be super fun, but they’re not the kind of thing you’ll find baked into most streaming software (like OBS, XSplit, GeForce Experience, and so on). You have to either create them yourself, using a tool like PhotoShop or After Effects, or you’ll have to download them from somewhere else and integrate them into your stream.
For those who are getting started with streaming—and who want to make their streams look slightly better than the simple “head in the corner” setup you typically see — I recommend checking out Player.me.
While there are plenty of places where you can find free overlays, I like the fact that Player.me’s setup is based in the cloud. You get a generous helping of standard overlays to pick from (for “starting soon,” “taking a break,” and in-game moments), and you can tweak these premade overlays to add new information (or widgets) with the site’s easy-to-use online editor.
Getting started with Player.me’s overlays
Once I created a free account on Player.me, I immediately jumped to its overlays browser and began scrolling through the service’s selections. They won’t wow you — not if you’re looking for some wild and original animation you can use whenever someone subscribes to your channel — but the basic offerings are a big step above nothing, so there’s that.
I found an overlay that had the trifecta (a separate look for starting your stream, your in-game activity, and any breaks you take) and selected it. This added it to Player.me’s “My Overlays” section, which you can use to keep track of your favourites.
You can hold your mouse over any of the overlays to get the hyperlink to the default look (which you’ll drop into your favourite streaming app to incorporate it into your broadcast). Otherwise, you can send the default overlay directly into Player.me’s cloud-based editor.
I love this editor, first off, because it slaps a screenshot from a game directly into the editing window, which is great for helping you visualise what your viewers will see as you’re customising your look and animations.
You can tweak the various on-screen widgets, like selecting a different fade-in or fade-out animation for when you receive a tip, or adjusting the length of the animation. You can also resize the various widgets, choose what text you want to display (your social media callouts, basically), and add just about anything you want: more text, images, progress bars, alerts, counters, your follower or tip goals, and even a horizontal-scrolling ticker.
The only major element you can’t add — which should come as no surprise — is one of those handy little timer setups that help you chart your progress through speedruns.
If you want to get wild, Player.me’s editor also comes with a special “Advanced Mode.” Toggle that and ignore the scary warning:
While you might not notice what has changed at first glance, you’ll now have finer control over the sizing and positioning of your on-screen elements, as well as their contents. You’ll be able to write your own text for widgets like your tip alerts, for example, and adjust font size, colour, and capitalisation. You can even mess with the widget’s background colours and transparency.
Once you’ve tweaked your overlay to your specifications, don’t forget to set up important parameters like your tipping (by linking a PayPal account); your various streaming-service integrations (Twitch, Mixer, YouTube, and StreamLabs); and any other third-party apps you want to work with your overlay (like XSplit Broadcaster, for easier positioning of your webcam window, or Razer Chroma, if you want your supported peripherals to blink along with alerts that pop up during your stream).
I love that Player.me also allows you to test out your overlay at any point in the customising process. You can send simulated actions like tips and subscriptions to see what your widgets look like, and the service will even trigger any audio files you’ve previously uploaded and associated with actions.
When you’re ready to integrate your overlay into your streaming software, Player.me provides detailed instructions for both OBS and XSplit, as well as a standard link to your overlay that you can copy and paste into any other streaming software you might use. If you’re feeling especially proud of your creation, you can even share it to Player.me’s community for others to use (and tweak).

Comments
One response to “Create Free Overlays For Your Game Streams With This Site ”
Zlad!?