The Linux operating system has evolved from a niche audience to widespread popularity since its creation in the mid 1990s, and with good reason. Once upon a time, that installation process was a challenge, even for those who had plenty of experience with such tasks. The modern day Linux, however, has come a very long way. To that end, the installation of most Linux distributions is about as easy as installing an application. If you can install Microsoft Office or Adobe Photoshop, you can install Linux.
Here, we’ll walk you through the process of installing Ubuntu Linux 17.04, which is widely considered one of the most user-friendly distributions. (A distribution is a variation of Linux, and there are hundreds and hundreds to choose from.)
Ubuntu also enjoys some of the best hardware recognition available — so, chances are, it will have no problem recognising your hardware (network/sound cards, displays, printers, etc.). Another reason to opt for Ubuntu is that it’s simply very easy to use — such that nearly anyone (with any experience level) can immediately get up to speed. Below, we’ll walk you through how to download and get set up on Ubuntu:
Download the ISO Image File
The first step in installing a new linux distribution is downloading the necessary ISO image. This image is a special kind of file that can then be used to create a bootable CD/DVD or USB drive — one that will allow you to install the operating system to your computer. Each Linux distribution offers its own ISO file, so you have to make sure to download the ISO file for your distribution of choice and then “burn” the file onto either a CD/DVD or USB drive.
In order to do this, we need an application that can convert the ISO file into a bootable system (that will be placed on the USB drive), and the best tool for the job is called UNetbootin. UNetbootin is a user-friendly, self-contained executable tool that can convert your ISO file and create a bootable USB drive. Since most laptops and desktops are sold without CD/DVD drives, this is the most logical tool for the job.
Assuming you are using Windows to create the bootable media, all you have to do is download the self-contained UNetbootin executable and double-click on the downloaded file. Unetbootin will run (without the need to install anything), ready to create a bootable USB drive.
For this process, the first step is to jump right in and download the ISO image of Ubuntu 17.10. While that is downloading, insert your USB drive into the machine and then download UNetbootin on your Windows machine. Running UNetbootin is only a matter of double-clicking the downloaded file to start the application. Once the UNetbootin window is open (Figure 1), click on the Diskimage button and then click the … button to open up your file manager. Navigate to where you’ve saved the Ubuntu image, select the image, and click Open.
Figure 1
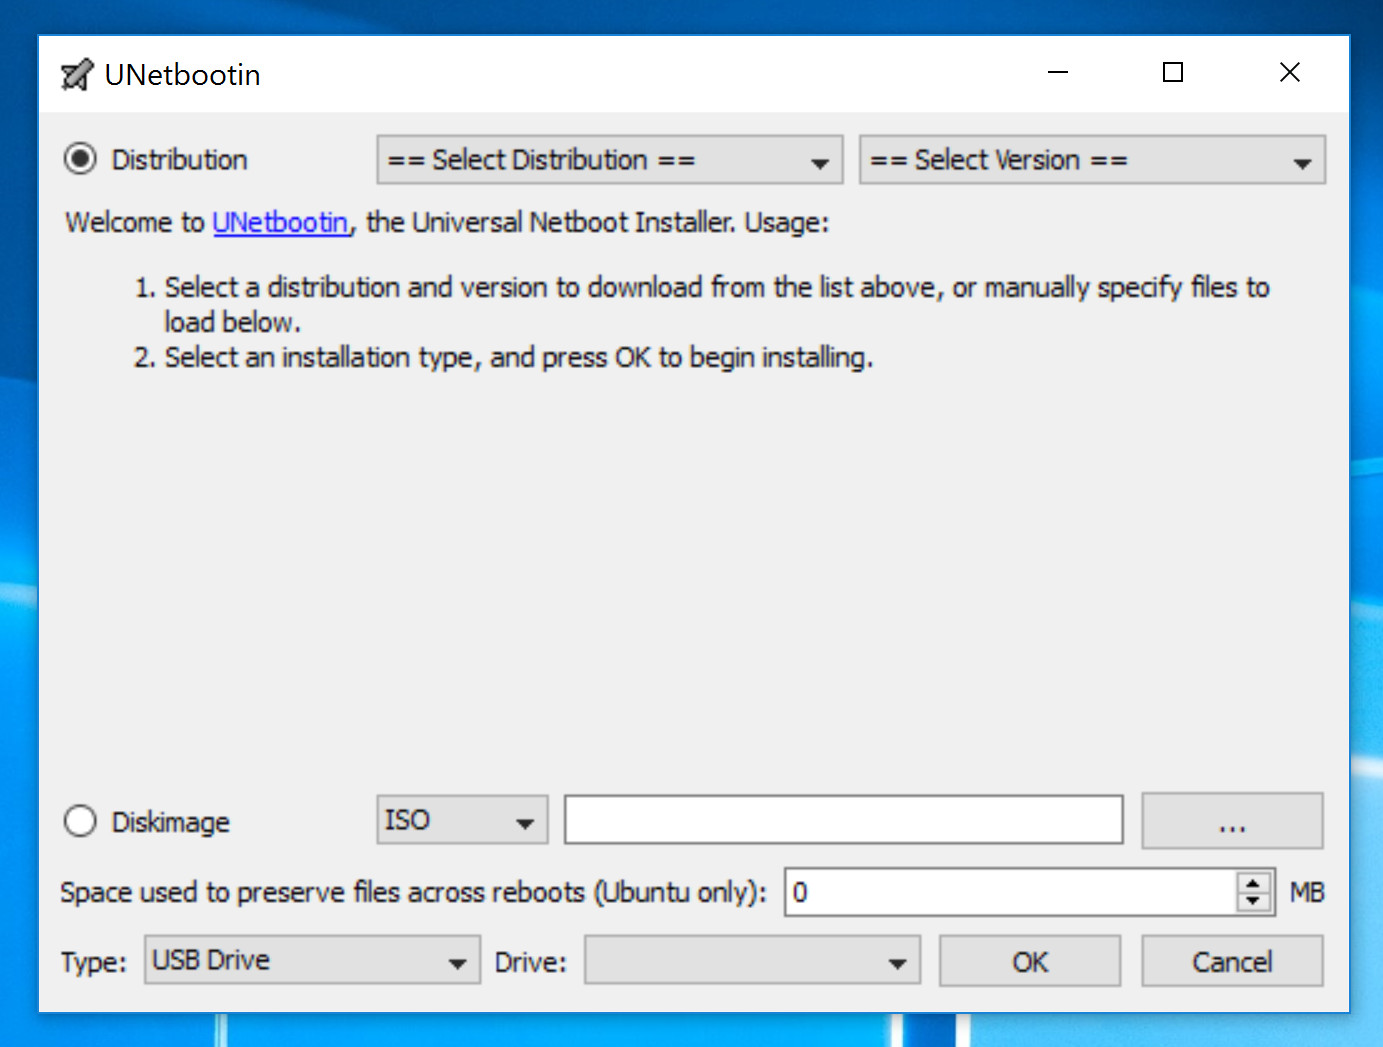
The UNetbootin main window.
In the Type drop-down, select USB Drive and then make sure the correct USB drive is selected in the Drive drop-down.
Once you have the above options taken care of, click OK to write the Ubuntu image to the flash drive. This will take some time (depending upon your hardware, between 2-5 minutes). When the process completes, close out UNetbootin and safely remove the USB drive.
Installing Ubuntu
Plug the flash drive into the machine (i.e. your computer, if that’s what you’re working with) that will house Ubuntu and boot the machine. Most modern computers default to booting directly to the hard drive and do not automatically present a boot menu. If your computer doesn’t present you the means to select a boot device, you might have to gain access to the boot menu in order to instruct the machine to boot from the USB drive. For example, on my System76 Leopard Extreme, I have to press and hold down the F8 button as soon as I turn on the machine. That will give me access to the boot menu, where I can select the flash drive as the primary boot location.
If your computer doesn’t present you with a boot menu, you’ll need to either consult the computer documentation or do a Google search for Computer Make/Model boot menu (Where Make/Model is the actual make and model of your computer).
Once you’ve managed to get your machine to boot from the USB drive, you will be greeted by the boot screen, which will automatically launch the Welcome screen (Figure 2).
Figure 2
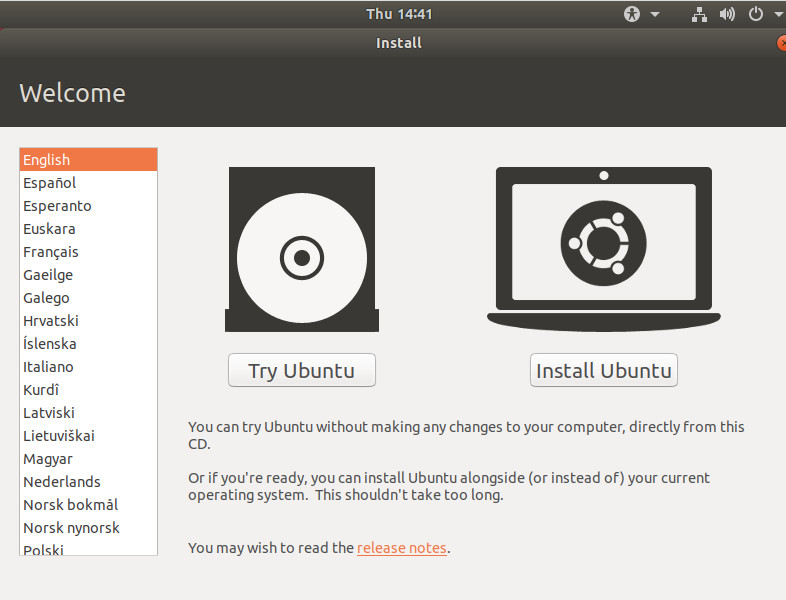
The first window of the Ubuntu installation.
You have two options:
- Try Ubuntu — this will boot into the live instance of Ubuntu, where you can test it out, without making any changes to your hard drive. From this live desktop, you can also start the actual installation process if the trial convinces you that you’d like to use Ubuntu longer term.
- Install Ubuntu — this will go straight to the installation process.
If you opt to go the Try Ubuntu route, you will get a good idea of how Ubuntu will run on your desktop (as well as the lay of the land with the GNOME Desktop Environment — the User Interface that allows you to interact with the computer). Either way, when you begin the installation process, the steps are the same.
If you do opt to go the Try Ubuntu route, and don’t like what you see, simply shut down your computer, remove the flash drive, and restart. Your computer will automatically boot from the hard drive and you’ll be back to where you were before you took Ubuntu out for a spin.
The installation process will walk you through a few windows. The first asks if you want to download updates while installing Ubuntu and if you want to install third-party software. Check both of these options and click Continue (Figure 3).
Figure 3
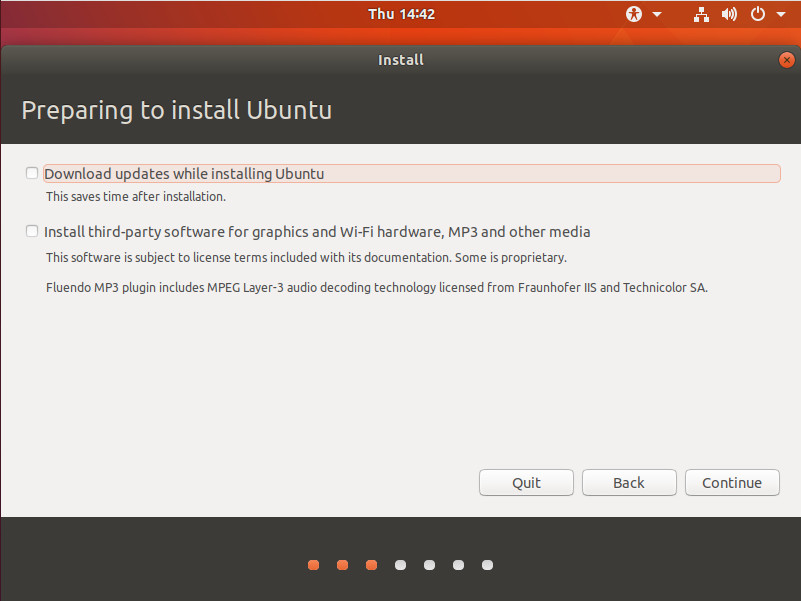
Making sure to update and install third-party software.
The next window (Figure 4) requires you to select the installation type. You have a few different options:
- Erase disk and install Ubuntu — this will erase everything on your disk and install Ubuntu as the only operating system. If you already have an operating system installed, it will also give you the option of installing Ubuntu alongside the current OS (called “Dual booting”).
- Encrypt the the new Ubuntu installation for security — for anyone who is paranoid about security, this is a good option.
- Use LVM with the new Ubuntu installation — this option allows you to take snapshots (for backup purposes) and more easily resize partitions (should the need arise).
For new users, I highly recommend Erase disk and install Ubuntu. It’s the least complicated route to installing Linux on your computer. If you have Windows on your system, you can install Ubuntu alongside Windows, for a dual boot configuration — that way, you can switch between Linux and Windows by rebooting and selecting which operating system to boot. You should also note that erasing the disk and installing Ubuntu will delete all of the data on your computer. If you have files that need to be saved, you should first boot into Windows, back up all of your files to an external drive, and then (once Linux has been installed), you can move the data onto the newly installed operating system.
Figure 4
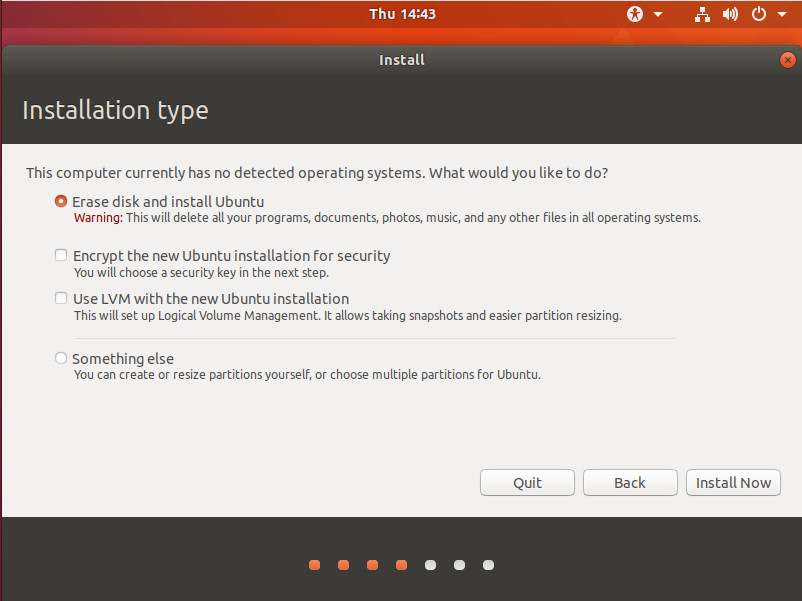
Selecting the installation type.
In my example, I do not have a previously installed operating system, so I will select Erase disk and install Ubuntu. You will then be prompted to click Continue so the changes can be written to the disk.
The next window (Figure 5) requires you to set your location (for time zone purposes). Type your state and city or click on the map to select your location.
Figure 5
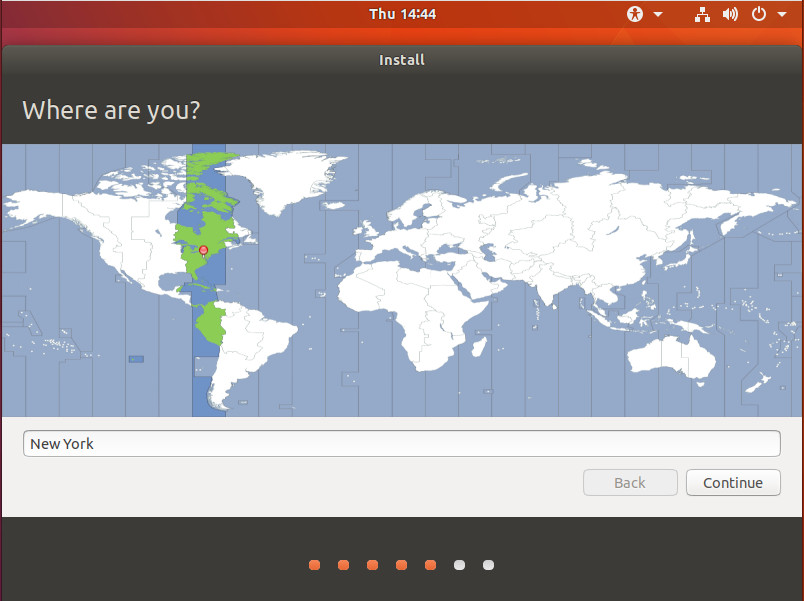
Selecting your location.
Once you’ve set your locale, click Continue to move on to the next step, which requires you to select your keyboard layout (Figure 6). You can have the installer auto-detect your keyboard, or you can select from the list. If necessary, click on the Type here to test your keyboard area and start typing. If your keyboard is correct, click Continue.
Figure 6
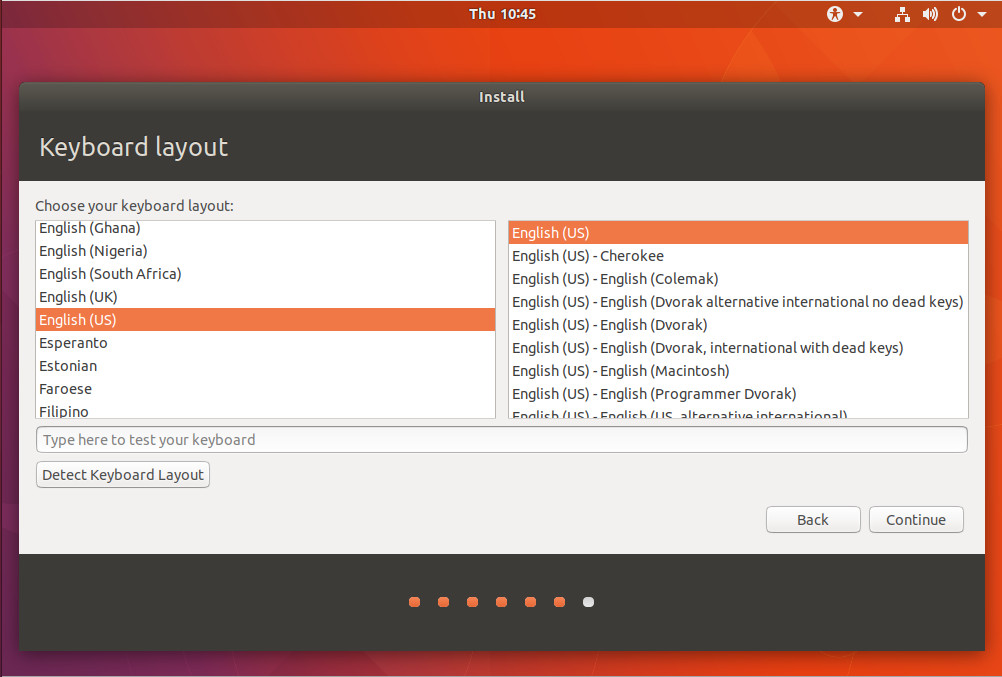
Selecting your keyboard.
In the next window, you must create a user. Type your full name, a name for the computer, a username (which will be auto-generated after you type your full name — you can use that or type whatever you like), and type/verify a user password (Figure 7).
Figure 7
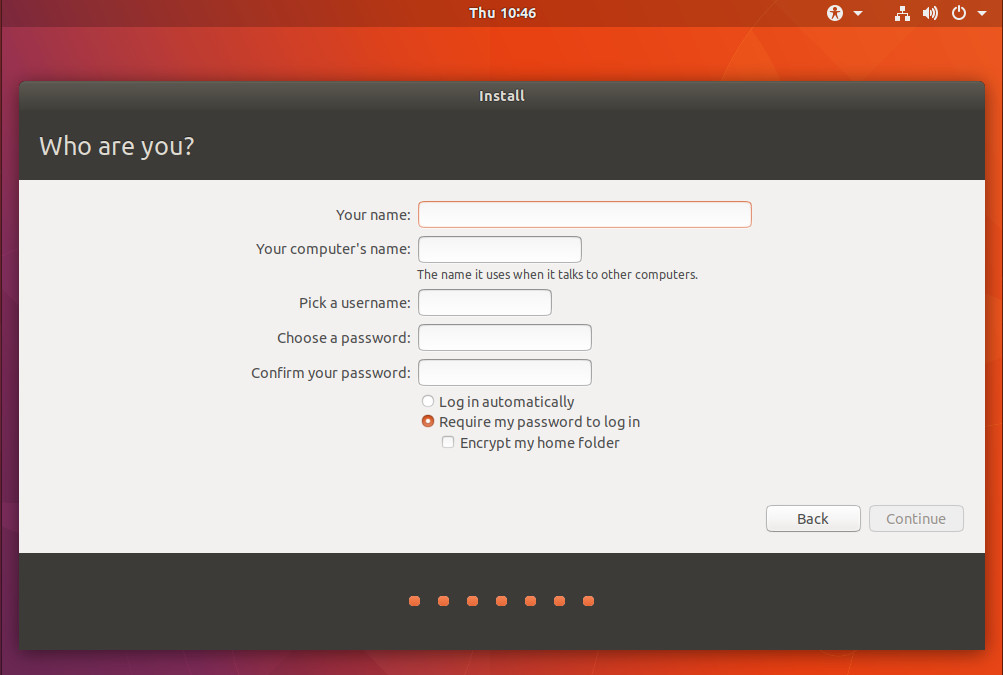
The user creation window.
In this same screen, you can also select to automatically login, require a password to login, and/or encrypt your user’s home folder. If you are particularly concerned about security, I’d recommend encrypting the home directory.
At this point the installation will continue and complete with no more interaction. When the process finishes, it will prompt you to reboot the machine (Figure 8).
Figure 8
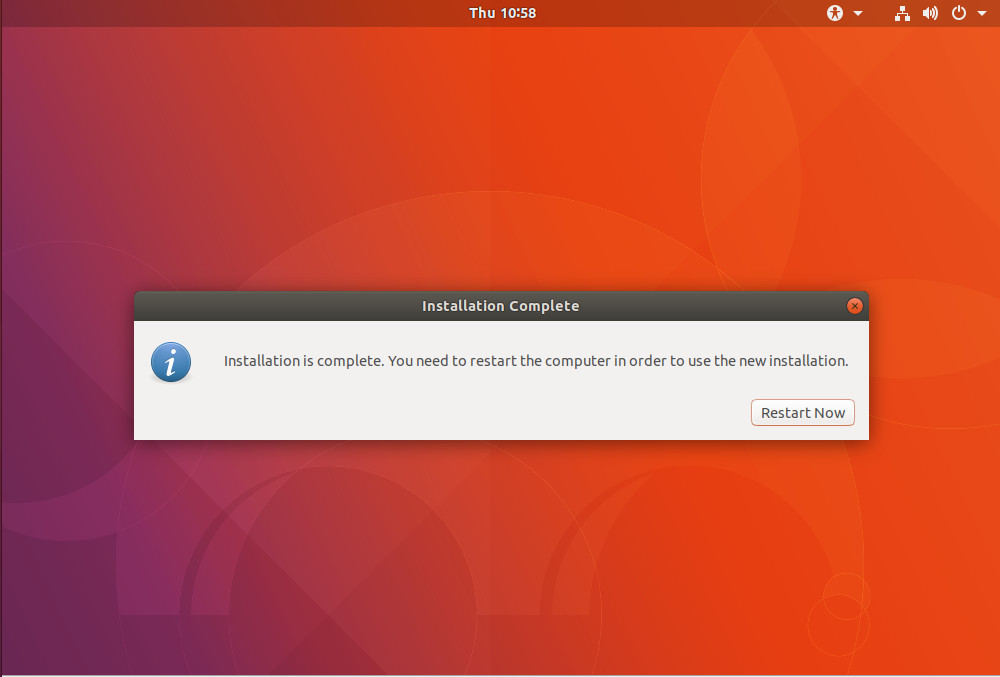
All done!
Once the machine boots into Ubuntu Linux, you can login with your username/password you created during the installation and start enjoying your new desktop operating system.
Comments
One response to “How To Get Started With The Ubuntu Linux Distro”
Why does the dual-boot option include erasing the disk? That’s not going to end well.