Adding a solid-state drive (SSD) to your computer is simply the best upgrade at your disposal, capable of speeding up your computer in ways you hadn’t thought possible. But as with any new technology, there’s plenty to learn. Here’s everything you should know about your SSD, whether you’re interested in upgrading or just like to know the ins and outs of your hardware.
This is an updated and expanded version of a guide we published back in 2012.
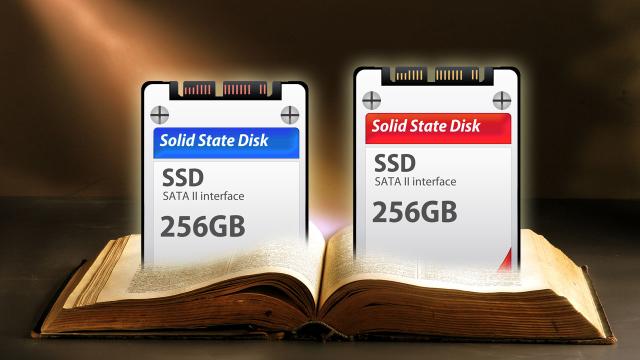
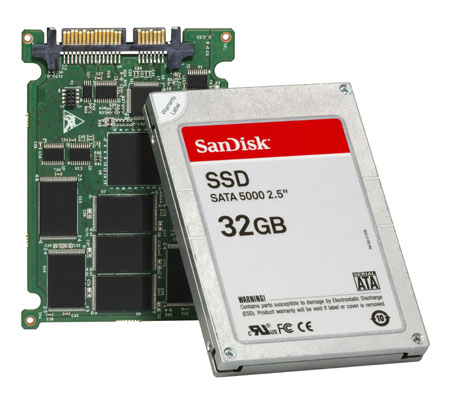
Photos by Z-River (Shutterstock), Friedrichan (Shutterstock) and Amazon.
What Is a Solid-State Drive (SSD)?
A solid-state drive (SSD) is a data storage device for your computer. In everyday use, it provides the same functionality as a traditional hard disk drive (HDD) — the standard for computer storage for many years. In fact, you wouldn’t even know whether you’re using an SSD or HDD if it wasn’t for the differences in how they operate.
HDDs store their data on spinning magnetised platters, and whenever your computer wants to access some of that data a little needle-like component (called the “head”) moves to the data’s position and reads or writes the information. The head moves constantly to locate the data, which can slow the process down.
SSDs use flash memory (the same memory you’ll find in USB memory sticks and in smartphones), and don’t use moving parts. When the computer wants some of that data, the SSD just says “ok, here it is.” The faster performance of flash means the information can be accessed much more quickly.
Speed is the primary advantage of an SSD over a traditional HDD. This makes an SSD the single best upgrade for your computer if you’re looking for a way to make it operate faster.
A new SSD can speed up your computer in several ways:
- Boot times will be significantly reduced.
- Launching applications will occur almost instantly.
- Saving and opening documents won’t lag.
- File copying and duplication speeds will improve.
- Overall, your system will feel much snappier.
SSDs have their downsides, however. The most obvious is than an SSD won’t hold as much data per dollar as an HDD. For around $100, you could buy either a 128GB SSD or a 2TB HDD — the latter is roughly 16 times the size. That means you’re paying around 83 cents for every gigabyte on an SSD versus five cents for every gigabyte on your HDD. That’s a huge difference in cost, and the gap only grows bigger as you compare larger drives.
Luckily, it’s not an all or nothing proposition. In the days of cloud storage and streaming media, SSDs provide plenty of space for most people. For those who need more storage than is affordable with an SSD, SSDs and HDDs can coexist on the same system (we’ll discuss that approach in depth a bit later), so you can enjoy the speed benefits of an SSD without sacrificing your requirement for storage space.
In this post, we’re going to walk you through everything you need to know about getting started with your first solid-state drive, from buying the one that suits you best to getting it set up and running efficiently in your computer. We’ll also take a look at a few advanced techniques for those of you who are ready to do even more with your super-fast storage device.
How To Choose The Right SSD
The process of choosing an SSD can seem a little overwhelming with so many brands available. In this section, we’ll show you what you want to look for when choosing a drive and offer up a few recommendations that have worked well for us.
All SSDs are fast, and will feel like a great upgrade from a HDD, but when you’re spending significantly more money on a drive that provides less storage you want it to be one of the best. You also want a reliable piece of hardware, and that can be hard to gauge if you have little experience with the technology. Here are the qualities you want to look for in an SSD when you’re shopping around:
[clear]
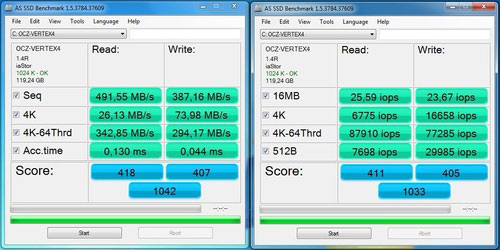
- High maximum speeds: Maximum read speeds are around 400MB/second, and maximum write speeds are around 300MB/second (note: that’s megabytes per second). These numbers do not have to be exact. A little faster or slower won’t make a significant difference.
- Good real-world speeds: The SSD manufacturers generally will not provide real-world read and write speeds, as they’re guaranteed to be slower than the maximums. Fortunately, many online reviews contain speed test results. On Amazon, you can often find users who’ve posted screenshots of their test results (here’s an example). Seeing this data can often be discouraging because the real-world rates are quite a bit lower. If the test results reveal read and write speeds of about 2/3 of the maximum (in the sequential and 512KB block tests) you’re good to go. If you apply this to our maximum speeds above, that comes out to read speeds of about 265MB/second and write speeds of about 200MB/second. If you want to figure out if a more expensive SSD is worth the money, its real-world test speeds will be higher than 2/3 of its reported maximum capabilities.
- Multi-Level Cell (MLC) NAND flash memory: When shopping for SSDs, you’ll run into two kind of memory: multi-level cell (MLC) and single-level cell (SLC). The primary difference is that MLC memory can store more information on each cell. The advantage here is that it is cheaper to produce, and SLC is often cost-prohibitive for the average consumer. The downside is a higher rate of error, but an SSD with error-correcting code (we’ll discuss this shortly) can help prevent these problems. (You can read more about MLC here.)
- SATA III Support: Most SSDs use the Serial ATA (SATA) interface, but not all use the latest version, and this can limit the performance of your SSD. This is because SATA I can transfer data at 1.5 Gbps, SATA II at 3.0 Gbps, and SATA III at 6 Gbps. To ensure your SSD has enough bandwidth to transfer data as quickly as possible, you want it to be compatible with SATA III. You’ll also want to make sure your computer is SATA III compatible as well. SATA III-capable drives will still work as all versions of SATA are backwards-compatible, but you may not get the most out of your SSD if your computer doesn’t support the most recent SATA specification.
- ECC memory: Error-correcting code (ECC) memory refers to the ability to detect and correct common types of data corruption so you don’t end up with unusable data on your drive. An SSD with ECC memory is more reliable. (You can read more about ECC memory here.)
- A history of reliability: Reliability is a very hard thing to gauge, but there are a few tricks you can employ to get a good idea. First, look for an SSD that is made by a manufacturer who has been in the business for a while (I like OCZ and Crucial). The technology is fairly new, so you don’t want to go with just any company who has recently decided to jump on the solid-state bandwagon. Additionally, look at the rating each SSD receives in online shopping reviews. If it is rated a 3.5 out of 5.0 or higher, this often points to a reliable drive. When the ratings are lower, you may want to look elsewhere. Even reliable companies make unreliable SSDs sometimes, so keep an eye on reviews to avoid buying a lemon.
How To Install Your SSD
The installation method for your SSD will be different depending on your computer, so we highly recommend looking up a guide for your specific model of laptop or desktop. That said, if you have a desktop, our guide on building a computer should at least steer you in the right direction.
More important is figuring out where all your data will go. Most HDD owners are accustomed to having at least 500GB of storage, if not upwards of 2TB. Downsizing to 240GB or less — the most affordable and popular SSD sizes — can be a tough job.
If you’re using a desktop, you can use your SSD for your operating system and another hard drive for your data. If you’re using a laptop, you can either try to fit everything on the SSD, or use an external drive for the data that won’t fit (like music and movies).
Once you’ve figured out a plan, it’s time to actually switch to the SSD. Here are your two options for doing so:
Option One: Start Fresh And Copy The Essentials
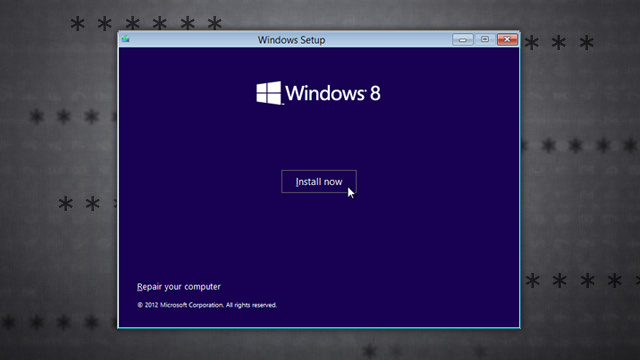
When upgrading to an SSD, the most obvious option is starting fresh with a new install of your operating system. While this might require a little more of your time, you’ll have everything configured perfectly when you’re done. Here are the steps you need to follow:
- Install your operating system of choice on the new SSD.
- Copy the contents of your personal folders from your previous HDD to your new SSD. If you can’t fit everything, start with the essential system files and settings, then migrate the media you have room for.
- Go through the list of applications on your old HDD and install them on your new SSD. Run any updates, or save yourself some time by downloading the latest versions from their respective sources. Windows and Linux users can employ Ninite to get the latest versions of popular free software titles for their machines. Mac users can head to the Mac App Store to download the latest versions of their previous purchases.
- Copy any important documents (or other files) you have room for on your SSD.
- Put the old HDD in an external enclosure (like these), if you haven’t already, and keep it handy for a month or two. This will help you see what files you use often and which ones you don’t. If you find you’re using something often, copy it to the SSD. If not, leave it on the external HDD for occasional access.
Again, this method requires more work but also handles the task of cleaning up your system at the same time. It may be more tedious, but it is an efficient way to solve two problems at once.
Option Two: Migrate Your Data From Your Old Hard Drive
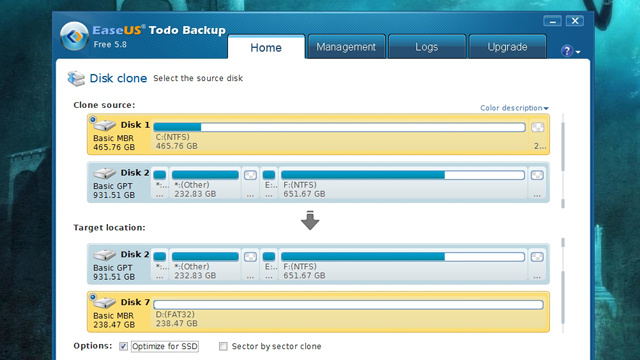
If you don’t want to start with a fresh installation of your operating system, you can migrate your OS (and other data) to your new SSD. Chances are, however, that you’re not going to be able to fit everything. That means you’re going to have to start deleting files on your main drive until it is small enough to fit on your SSD. Because you don’t want to lose that data forever, start by making a backup of your drive. Once you have a complete backup, you’re ready to get started.
Windows users can follow our SSD migration guide for the complete instructions. It may seem like a complex process, but shouldn’t take too much time. You also won’t have to reinstall Windows. Mac users can follow our MacBook SSD installation guide. While the guide focuses on installing an SSD in a MacBook Pro’s optical disc drive bay, if you skip to the second half you’ll find instructions on performing a data migration as well.
Use An External Drive And The Cloud To Combat Storage Constraints

Regardless of the size of your SSD, it’s never going to beat the storage capacity of a HDD. If you don’t have a secondary hard drive installed in your computer, you’re going to need to store your excess data elsewhere. An external HDD and the cloud are two of the best ways to get around the storage limitations of your SSD.
Unless you have enormous collections, an SSD with a 240GB (or higher) capacity should be able to house your operating system, documents, music, and photos without issue. It’s when you get into the business of music creation, video editing, professional photography, and other work that produces large files will you regularly run into a storage ceiling. An external drive is often the easiest solution, so you’ll want to pick up one with a large-enough capacity to suit your needs.
When an external drive won’t do the trick, and you really need to downsize your space-hungry media collection, the cloud can come to the rescue. Most of the best solutions come from Google because they’re both simple and free. Google Play Music allows you to upload your entire audio collection, and doing so will allow you to delete any songs you rarely listen to (or at least move them to an archival hard drive) while still maintaining direct access to them from anywhere you have an internet connection. Picasa can do the same thing for your photos. (Personally, I prefer Flickr, but it isn’t free.) When it comes to other data, you have plenty of options. Google Drive is great for various files, Simplenote for text, and Evernote for rich text and PDFs. It doesn’t matter so much which services you use, but rather that you start making regular use of the cloud if you have heavy data needs that can’t be adequately served by an external or secondary internal drive.
Optimise Your SSD For The Best Performance
For the most part, there isn’t much you have to do to optimise your SSD. It’s already really fast and should do its job without any adjustment. That said, you can achieve better performance and longevity with a few adjustments.
Enable TRIM
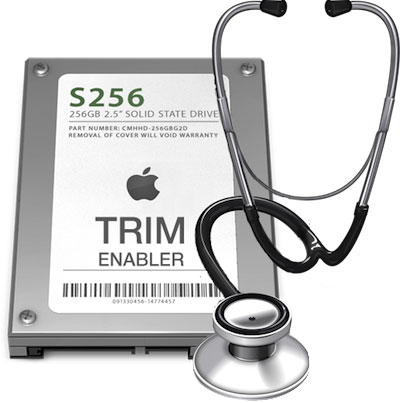
The very first thing you should do after installing and setting up your SSD is enable TRIM. What is TRIM, exactly? Wikipedia offers a concise explanation:
TRIM is a command [that] allows an operating system to inform a solid-state drive (SSD) which blocks of data are no longer considered in use and can be wiped internally.
Basically, it prevents your SSD from being overused. Just like any component, SSDs have limited lifespans. TRIM helps keep your solid-state disk alive a bit longer, so you want to have it enabled if your drive supports it. Here are our instructions on how to find out and enable TRIM in Windows and Mac.
Don’t Defragment Your SSD
When data is stored on a drive, it often ends up in various locations across the drive. This is called data fragmentation. It slows down HDDs because the drive’s head needs to move from place to place to read all the little bits of information. This can be fixed using a process called defragmentation, which is built into recent versions of Windows (7 and higher) and OS X. Because the location of data on an SSD is largely irrelevant, as it can quickly access any of it regardless of where it is, defragging a SSD is not only unnecessary but bad for the drive as well. SSDs have a limited lifespan that’s determined by how much they’re used. While most will last as long as you’d ever need, defragmenting the disk involves reading and writing data unnecessarily and those actions will shorten your SSD’s lifespan. WIndows and OS X should detect when you’re using an SSD and turn off defragmenation automatically. That said, it’s important to remember not to defragment your solid-state drive. It provides no real benefit and can shorten its life.
For more tricks on getting the most from your SSD, check out our guide to taking full advantage of its speed. Now that you have an SSD, certain things — like hibernation — are much faster than they once were, and are really worth using.
You should now be well on your way to a better, faster computer with your solid-state drive. Most of us here at Lifehacker have been enjoying the benefits of SSDs for a few years now and can’t imagine going back to a traditional hard drive. Despite the limitations and the cost, they’re one of the best investments you can make. We hope you enjoy your SSD as much as we’re enjoying ours!
Comments
18 responses to “Solid-State Drives: Everything You Need To Know”
Windows 7 and 8 both support trim. It replaces defragmenter and runs similarly as it appears the same.
When talking about desktop or home use, going by benchmarks is bad, you’ll never see the benchmark throughput. Realistically any SSD will be better than a spinning drive if your computer can handle it. SSD on a sata 2 computer will not see benefits, at least not any noticeable.
SSD on sata 2 definitely makes a huge difference! It’s like supercharging your old computer. I’ve extended the life of my main desktop by 2 1/2 years by switching to SSD from a mechanical drive using sata 2 bus.
It makes a huge difference. At least on the dozens of computers I’ve made that upgrade on at both home, and work.
If you’re running Win7> Trim will be on automatically, so don’t sweat it….
I always transfer everything from the Users/(name) to my backup drive, right click/options from “users” on will show a “move”option, just change the drive letter to the new drive letter and it does it for you…
TRIM setting is worth checking though if you are imaging from a spindle drive to an SSD, TRIM may not be enabled on the spindle drive, so when you copy, it won’t automatically be enabled as it is set at OS install time. I always tell my friends to do a fresh install though as the first option.
How to check TRIM guide is here:
http://forum.corsair.com/v3/showthread.php?t=86403
If you can’t decide between a large HD and a small SSD because of the money, consider a hybrid drive also known as a SSHD. Seagate makes a 500GB which sells for $88 and 1 1TB for $139, and they are much improved over the older Momentus versions. Look for reviews – they are pretty good.
Agreed I recently upgraded to a 120GB SSD for my OS and primary programs. Whilst also adding a 2nd 2TB Hybrid drive. Makes a huge difference.
These drives are brilliant – for not much more than a HDD, these hybrid drives are fantastic. I use a 750Gb version it in my HTPC, Windows 8 boots in seconds, in the time it takes to go from pressing the on-switch on my HTPC to the sofa. Applications and data that you always use are stored in the SSD area, making it act as if you have a SSD. I could probably remove the splash screen and save even more seconds off the boot sequence.
Before installing the OS on the SSD, it’s a good idea to check your BIOS/UEFI and ensure that the SATA mode setting is set to AHCI (and not IDE, doesn’t apply if you are setting up a RAID) to get the most out of the SSD. Most newer motherboards should default to AHCI.
I did manage to run into an unusual instance with Windows 7 (x64) and a GA-H77M-D3H motherboard, where AHCI was enabled in the firmware, only to find that the SSD’s Hardware ID reported IDE (rather than SCSI, when AHCI is enabled). The issue promptly resolved itself after installing the Intel RST drivers (the chipset drivers were installed properly) and two restarts.“First, look for an SSD that is made by a manufacturer who has been in the business for a while (I like OCZ…”
NO! lol i avoid OCZ myself now due to the issue’s they’ve had with SSD. Purchased one myself a few years ago and it failed pretty quickly. Just google OCZ and SSD failures and you’ll quickly see that they havent had much luck with them. high failure rate etc
OCZ drives did have a high failure rate due to crappy firmware and some of their drive lines were super crappy as well. I had a OCZ Petrol SSD Drive and it failed after 3 weeks…returned it and was given a OCZ Agility 3 and hasn’t failed on me yet
Well OCZ went bankrupt late last year and was brought out by Toshiba so hopefully their failure rates reduce
I’ve got 3 of the late generation ones (2 x Vertex 4’s and an Agility) and haven’t had a problem yet.
I’ve got 2 vertex2 and 1 vertex3 no dramas at all.
They made my 4-5 year old laptop feel new again, lightning fast!
Plus win7 or win8 its like a new laptop…
does anyone disable virtual memory then?
Virtual memory is to do with ram allocation. And using disk space instead of ram. With an ssd virtual memory performance would increase
at work we used to use 520 series intel ssds. awesome hardware and also comes with a a great bracket to help it fit into 3.5 inch bays.
now we get samsung 840 pro series, slightly better price point then the intel drives and just as quick if not quicker in some applications. but, really, you can go wrong with either, ive never had a failure yet and we’ve probably installed and used around 20 – 30 of each brand over the last 2 years.
Have been doing a bit of research on the matter as am looking at breathing new life into my mid 2010 iMac after having a Vertex in my last 17″ mac pro, great performance and no issues.
My initial concern was the difference between SATA 2 and 3 as looking at the Samsung Evo 840 which seems to be the best buy at the moment.
Real world tests seem to show that in terms of start up application load times and most daily use there is no difference between the SATA 2 and 3. The main difference is noticed when copying large data between two SSDs on the different interfaces. Check out http://goo.gl/zG1nID
The iMac upgrade is a no brainer for me, as running OSX server so start up times are becoming Window-esk on the 7.2k drive.
Would you advise trying to move the Evernote database off of its default location on an SSD to an HDD (from the perspective of minimize consumption of read/write cycles on the SSD)?
I’m tempted to try to do it any way just for capacity reasons (I have Windows 10 and programs on a 256 GB SSD, and data on a 3 TB internal HDD), but I can’t find a clear consensus on whether it’s possible or advisable to try to mess with the Evernote database to minimize wear on the SSD.