Once a year, everyone I know becomes a farmer. They plan ahead, pack a picnic, grab a hat and head to a farm to pick strawberries. Flats fill up with the sweet fruit you don’t eat in the field, people gain a little appreciation for farm workers after spending the day hunched over, and we all end up making big berry plans and dreaming sweet berry dreams. Mostly though, people go home, gorge on fresh berries and/or make jam.
I don’t know who eats all that jam, and I hate giving away jars, so I have a raft of ideas for what to make instead, starting with my very popular strawberry vinegar. I’m going to offer two ways to make it — beginner and advanced.
Why is strawberry vinegar such a good idea? You use more vinegar than you think. There’s salad dressing, sure, and marinades, but brightness is a thing your cooking could use more of, and flavoured vinegars (good ones) are expensive, so they don’t see as much use as they should. Making it yourself means you’ll have an endless supply, and can afford to pop a little into your soy sauce, add a little to your gazpacho for some sweetness, or toss a bit with your grilled veggies for an instant brightness that illuminates the Maillard effect on the vegetables. You can also use it to add a tangy sweetness to all your potato salads or coleslaw. Next time you sauté some vegetables on the stove, give it a splash of vinegar to make the flavour brighter. Point is, when you’re not thinking about how expensive the pretty bottle was, you’ll find a lot more uses for flavoured vinegar in your kitchen.
Quick strawberry vinegar
What you’ll need:
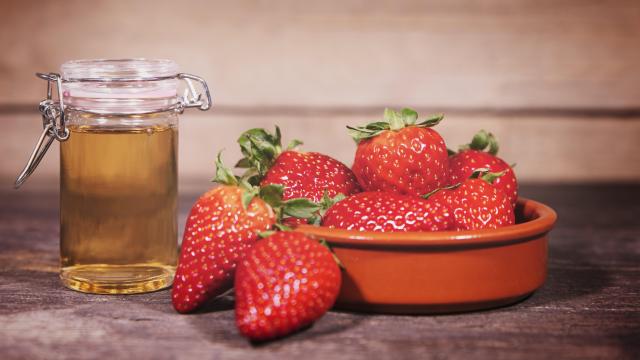
- 1 quart of apple cider vinegar
- 1 pint of very ripe strawberries
- 1 teaspoon of sugar
Directions:
- Destem the strawberries, and add everything to a blender. Blend for 30-45 seconds (or more), as needed to get the mixture as blended as your blender will allow. Allow the mixture to sit for 6 hours, then pour it through a sieve or strainer into a bowl. Bottle it, and it should be shelf stable, because of the acid content.
- This process produces a vinegar that has a distinct strawberry flavour, but still has the sharpness of the cider vinegar, which is softened a little by the sugar. All we’re doing here is flavoring the apple cider vinegar, instead of making real strawberry vinegar, which I’ll explain how to do below.
Strawberry vinegar, the long way
What you’ll need:
- 3 pounds of strawberries
- 2 pounds of honey
- 1 quart of water
- 1 package of wine yeast (You can use any yeast you like, sometimes I use champagne yeast, sometimes I use sour beer yeast, but this is not bread yeast, to be clear.)
- 1 vinegar mother
- 1/2 campden tablet
- 1 gallon carboy or jug, with airlock
Directions:
- In this case, you’re making strawberry wine, then letting that wine turn to vinegar. To start, you’re going to take clean, de-stemmed strawberries and put them into a heavy stockpot, with the honey and the water. Let it come to a boil, then simmer for 20 minutes. You want to ensure the honey is dissolved. The strawberries will break down, but they don’t have to do so entirely. Let the mixture cool down to room temperature, then crush your ½ campden tablet with the back of a spoon or a mortar and pestle, and add it to the mixture. Give it a good stir, cover it, and walk away for 24 hours.
- When you return, you’ll pitch your yeast into the mixture. Simply open the package and sprinkle the yeast on the top. Give it five minutes, then mix it in. Now it’s time to get this into your carboy so it can ferment. Use a funnel to pour it into the clean carboy, then fasten your airlock on top of it. Set it in a dark and cool space. Within a few days, you’ll see it bubbling, causing the airlock to burp. This will continue for a few days or up to a week. You want to wait for it to stop bubbling entirely.
- If you have a refractometer or a way to measure ABV, now is a good time to check that yours is under 10%, but if you don’t, that’s OK, too. You’re usually in the right range.
- Remove the airlock and add your vinegar mother, then place some cheesecloth on top of the jug, and tie it onto the top. This is so the wine is exposed to air, but bugs can’t get in. Let the wine sit for 3-4 weeks, then give it a taste. You can continue to let it age this way, mellowing out and evaporating along the way. The longer you age it, the better it will taste. I usually let mine sit for about three months.
Now, you can use it as you’d like, decanting it a little at a time. Making it from scratch is riskier, it could go south because fermentation is risky and this has a lot of steps. If you start to see green or blue mould, it’s gone bad. If you see white mould, that’s just Kahm yeast, which isn’t a problem but doesn’t taste great, so you need to strain, boil and restart from where you left off (boiling gets rid of all yeast, so you’d need to add it back in). But its also a mostly hands off process that is so deeply rewarding, and results, if you do it right, in a far more delicious and smooth vinegar in the end.
Also, let’s be honest, you were never really serious about making strawberry ice cream.
Leave a Reply
You must be logged in to post a comment.