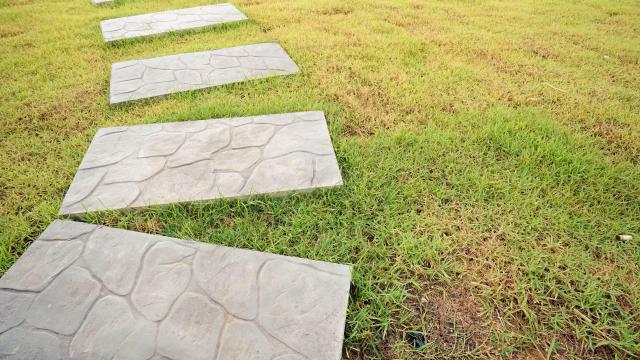
For a patio build, stepping stones, or pathways, concrete tiles can be an affordable option — and some ambitious DIY enthusiasts even make indoor floor tiles themselves. Making your own concrete tiles can give you lots of latitude on your design; you can use a pre-made mould or make your own sand mould from a tile you like. You can choose the shape, size, colour, texture, and design of your tiles to make them fit your style and needs — and you can save money by doing it yourself.
Materials you need to make concrete tiles
To make concrete tiles, you need:
- A bucket to mix your concrete
- Concrete
- Gloves
- Concrete tile molds (or a box larger than the tile you want to use to make your mould from)
- Play sand
- Mould-release
- A stir stick
- A tarp
Begin by finding a flat area to set up your molds and spread out your tarp so you don’t get concrete anywhere you don’t want it. Once your area is prepped, make sure to have some fresh water on hand or a hose to deal with spills.
How to add colour and texture to concrete tiles
If you would like to add a special texture to your tile, you can add aggregate, or differently sized and coloured rocks to the inside surface of your mould. There are also a variety of colours you can add to concrete, so you can make it look like terra cotta or stone. For best results, you should do a test run of just one tile to make sure it will come out of the mould looking the way you want before wasting a bunch of time and concrete.
How to pour pre-made molds
For pre-made molds, mix the concrete per manufacturer specs with water and stir well. Once you have the right mixture, spray the insides of your molds with mould-release. This will help the tiles come out of the mould easily without damaging the mould and the tile. Concrete molds are usually made from silicone, which is malleable and stretchy, so make sure to set them on a steady surface for pouring. Once the mould is filled all the way to the top, shake it back and forth a little bit to get rid of any trapped bubbles and allow the concrete to set overnight.
How to pour homemade molds
If you opt to make your own mould, you’ll need to get your box and play sand. Fill the box with enough play sand to accommodate the tile and pack the sand down so that it’s firm. Once you have the object you want to make a mould from, make a loop of tape on the back side to use as a handle. Then, press the tile face down into the sand and remove it. Pour the concrete into the impression left behind and allow the concrete to cure overnight. It’s important to do this step gently to avoid changing the shape of your mould accidentally.
Turn out your tiles
Once your concrete is set, you can release it from the mould. For pre-made molds, turn the mould upside down with your hand underneath for support. For trickier molds that don’t release right away, you can turn them gently onto your tarped surface and gently tap them to release. For homemade molds, remove the tile from the sand and brush away any loose grains. If you plan to make multiples of the same tile, you should always start with the original tile to get the clearest impression.
Leave a Reply
You must be logged in to post a comment.