
There are many reasons to move away from Spotify. Apple Music now has lossless audio at a cheaper rate. If you use Amazon Prime, Prime Music comes free; if you have an Echo smart speaker, it’s the cheapest way to stream your music. Spotify doesn’t have music by Neil Young or Joni Mitchell. No matter the reason, there’s never been more competition between music streaming services.
Sadly, streaming services aren’t exactly eager to make it easy for you to export your library so you can take it with you — but there are many third-party websites, apps, and services that can fill that gap.
Use SongShift to switch from Spotify to Apple Music
If you use an iPhone or an iPad and are moving from Spotify to Apple Music, use the SongShift app. The app has been a go-to solution for the past couple of years, and it’s still the best. More importantly, it’s fast and it’s free.
Well, sort of. While SongShift puts a limit of 100 songs per playlist transfer, its Library Transfer feature is free. So if you’re OK moving all your music to Apple Music and then recreating your longest playlists, you can get away with using the free tier. SongShift supports Spotify, Apple Music, Amazon Prime Music, Tidal, YouTube Music, Deezer, and Pandora, and you can even export in JSON or text files. If you’ve spent a lot of time creating playlists, it might be worth paying for the $US4.99 ($7)/month subscription, moving all your playlists, and then cancelling it.
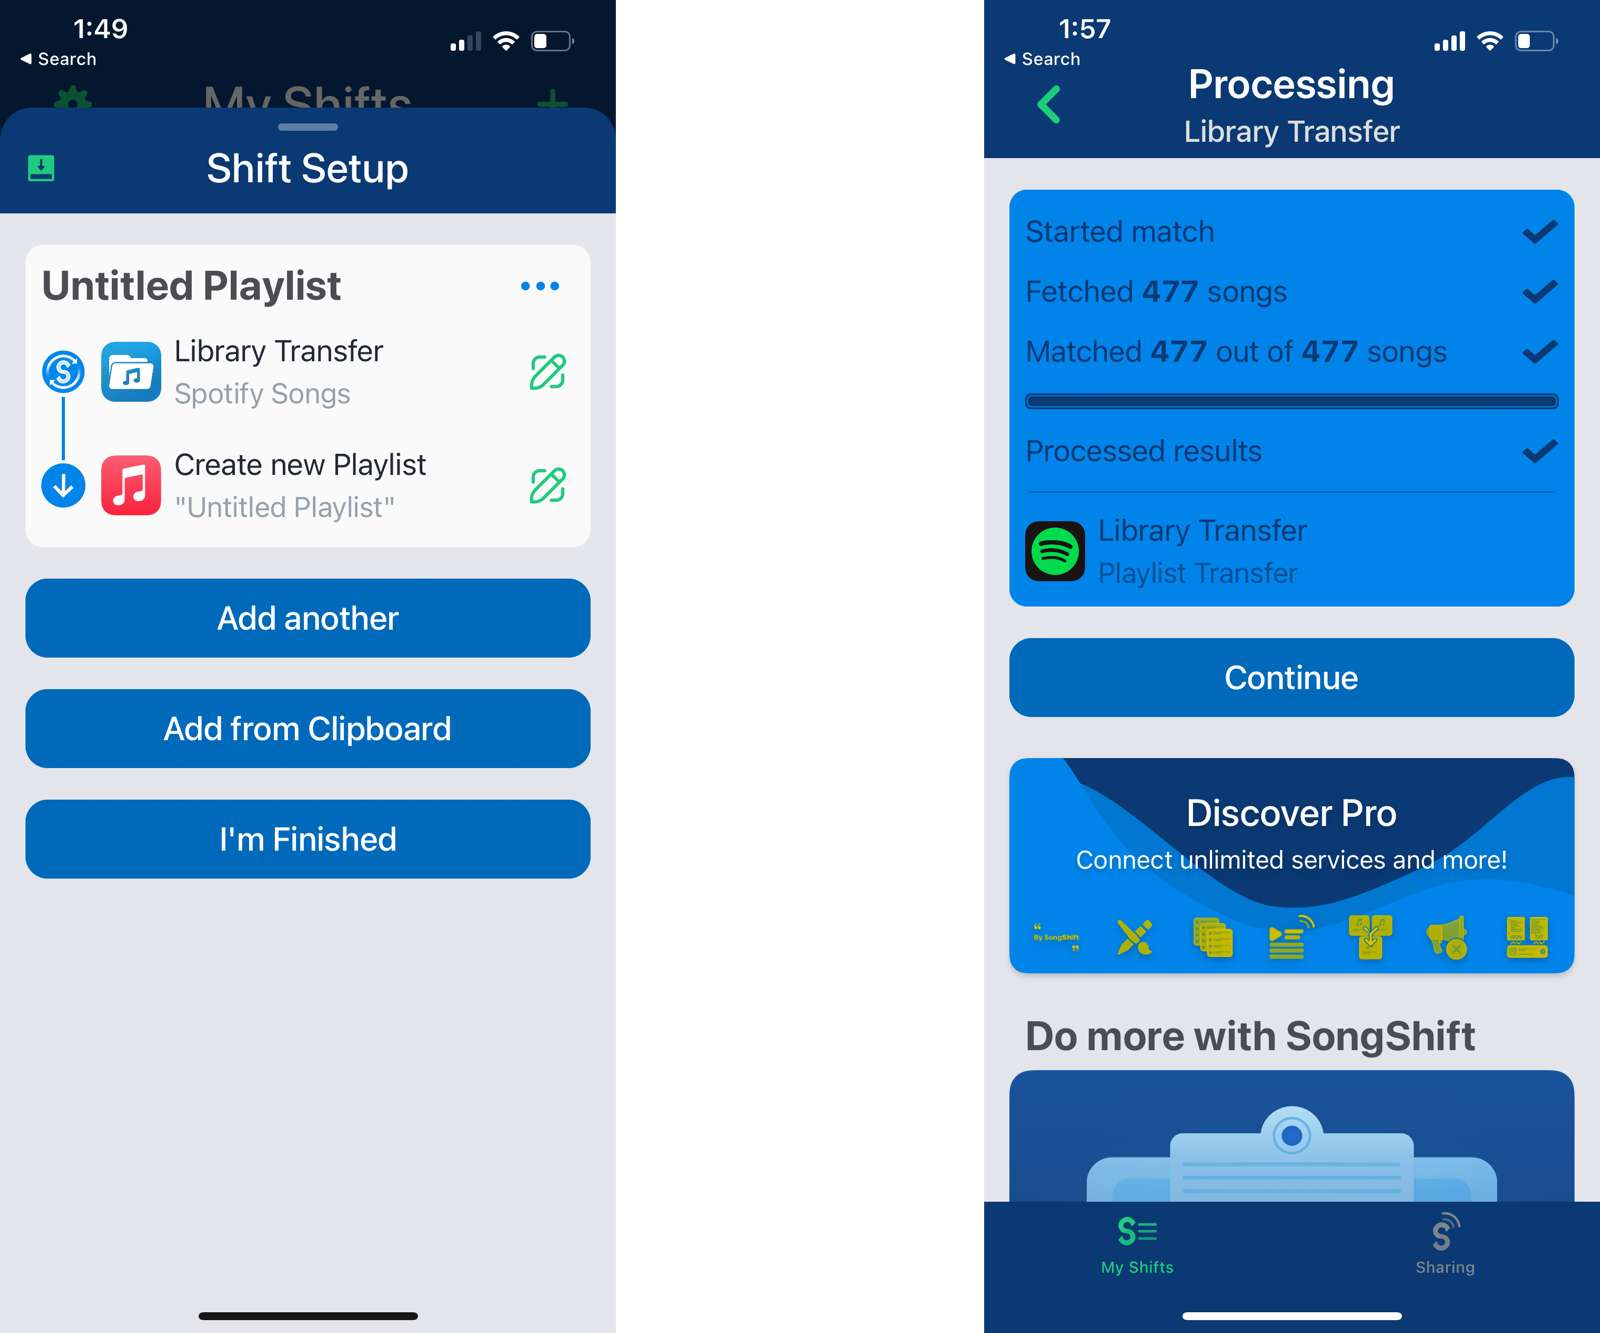
To get started, open the SongShift app, and connect both Spotify and Apple Music accounts to the app. Then, tap the Plus button from the top. Tap “Setup Source,” choose “Spotify” from the “Songs” tab, and from the selection page, go with the “Full Library Transfer” option.
Next, tap “Setup Destination” from the “User Library” tab, and go with Apple Music. Tap “Continue,” and select “I’m Finished.” Now, let SongShift do its thing.
After the process is done, you’ll find your music in Apple Music, or any other music streaming service.
Use TuneMyMusic on the web
If you don’t use an iPhone, or if you want to use a web-based service that works on any platform, go with TuneMyMusic. It lets you transfer playlists and your entire library between Spotify, Apple Music, YouTube, YouTube Music, Deezer, Tidal, Amazon Prime Music, Pandora, and more. You can transfer 500 songs for free. To transfer more songs, you’ll need to use the $US4.50 ($6)/month premium plan.
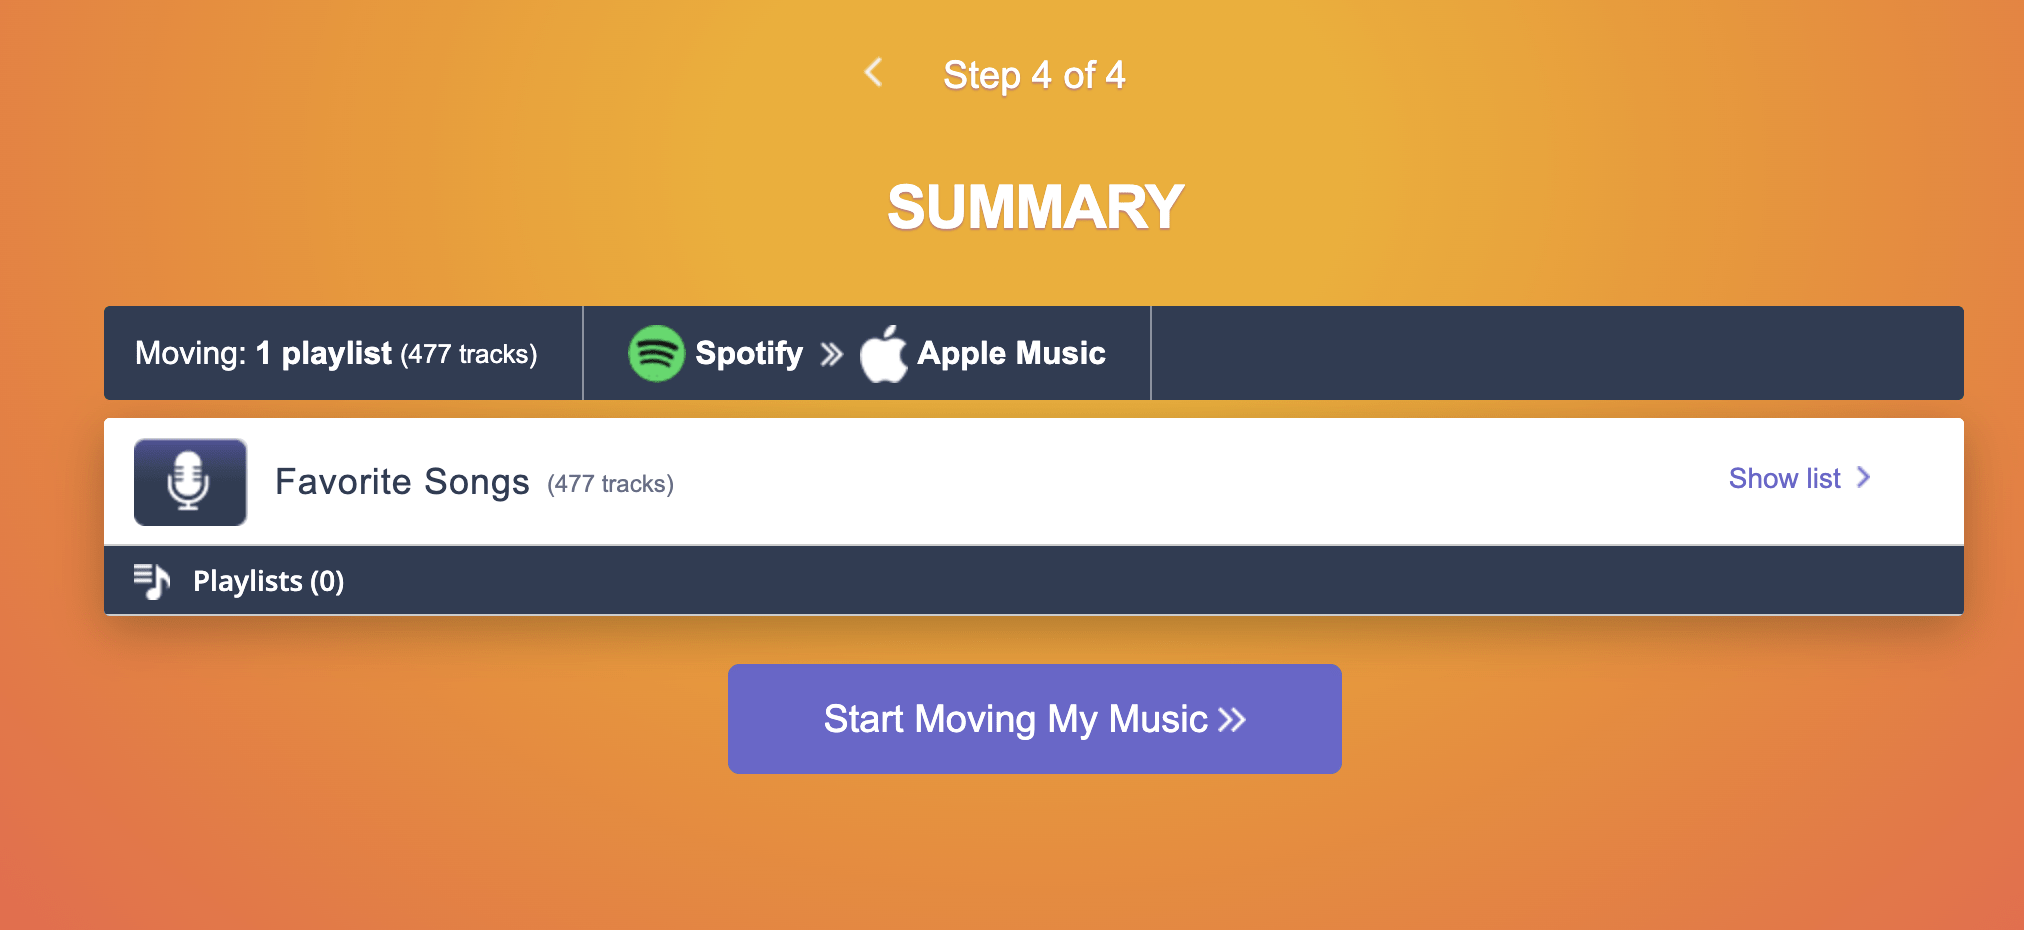
Open the TuneMyMusic website and click the big “Let’s Begin” button. Then, choose “Spotify” from the source list, connect your account, and click the “Load from your Spotify Account” button. Here, you can choose different playlists, or you can use the “Favourite Songs” option to transfer your Liked Songs (your entire library).
Then, go to the next page, and choose your destination service. Connect the service and click the “Start Moving My Music” button to start the process.
Use FreeYourMusic for free song transfer on any platform
If you don’t like the TuneMyMusic service, and you don’t mind using an app, try out the FreeYourMusic service. It’s available for Android, iPhone, Windows, and Mac. It offers unlimited song transfers for free.
Leave a Reply
You must be logged in to post a comment.