If you are a podcaster, musician, or actor working during the pandemic, having an in-home recording studio of some kind could be essential to your business. This year, the majority of recording work has moved into our homes, but often still demands professional-grade sound. Unfortunately, creating a home studio is not the most intuitive DIY project. In fact, you may feel completely lost without a professional to guide you. But with a little investment and ingenuity, you can produce studio-quality sound from your home. Here are some steps to follow to get the best sound quality from your makeshift space.
Soundproof a small space
Soundproofing is essential when it comes to producing clean, clear audio. Bigger spaces have larger surface areas for sound to travel, and rooms with bare walls or high ceilings will create an echo that will be picked up by any microphone. Angela Sarakan, Senior Audio Producer at Dipsea, advises, “Capturing quality sound requires more than just a mic — you need to try to absorb as much sound as you can from your surroundings.” Sarakan notes the easiest and cheapest way to do this is to sit under thick blankets with your microphone while you record, or, barring that, in a closet full of clothes that will buffer the sound. From experience, I can say the former method works as a one-off, but it can get hot and sweaty under those covers. For consistent recording sessions, a semi-permanent setup will be much more comfortable.
I spoke with sound engineer Daryl Bolicek of Wild Horse Recording, LLC, who advised me on the best at-home soundproofing solutions. Bolicek notes a closet is, in fact, perfect for outfitting with soundproofing materials — the small space will naturally limit echoing and it will be easier to soundproof. If you don’t have a closet big enough, you can use any regular size room, as long as you can outfit it with the proper sound absorption materials.
[referenced id=”1043607″ url=”https://www.lifehacker.com.au/2021/01/how-to-turn-a-spare-room-into-a-home-theatre/” thumb=”https://www.gizmodo.com.au/wp-content/uploads/sites/4/2021/01/21/mdsxwxdp9znxcgzcfayx-300×168.jpg” title=”How to Turn a Spare Room Into a Home Theatre” excerpt=”Gone are the days of seeing a movie just to feel the leather seats, smell the popcorn, and be with others in the movie theatre. Indoor movie theatres are high-risk locations during the ongoing pandemic, so while we wait for vaccinations, making your own home theatre can be a clever…”]
Use sound absorption foam
If you have a budget to work with, the quickest way to set up your home studio is with sound absorption foam. The material resembles egg crate foam, is thick, and comes in a limited range of colours like black, red, or blue (if you want to incorporate a colour scheme.) It is fairly cheap — anywhere from $30 – $60 for a pack of 12’x12′ panels, enough to cover as much as 4 sq km of space. The good news is you don’t need to coat your walls from top to bottom in foam. “You don’t need to do the whole room. You really want to nail the front back and [walls] that align with the microphone,” Bolicek says. The best way to make sure you are covering your bases is to draw an X on the wall across from the microphone, both in front of and behind you. The Xs mark areas where the sound will hit the wall and bounce directly back into the microphone, so that’s where you most need to install your foam.
A great soundproofing hack when you are short on big closets or spare bedrooms is to use a small storage box. Make sure the box is big enough to fit your microphone first, then line it with sound absorption foam and place the mic inside. This setup works for voiceover gigs, poetry recordings, or emceeing — any recording in which one person is speaking directly into the microphone. I have gone even further to attach the foam to a tri-fold presentation board that covers a larger space, allowing me to record while standing. (A trifold board also allows space for two people to record at once.)
As with any equipment purchase, you get what you pay for. “Unfortunately, the more expensive, the better the foam,” Bolicek says. So if you are investing in your business, getting the better foam will offer better results. Cheaper foams will work, but more expensive ones — when paired with other quality equipment upgrades — can make a noticeable difference. Personally, when listening to podcasts, I’ve noticed tit’s harder to enjoy the subject matter when it is difficult to hear or there is a lot of interference in the audio mix. The better sound quality, the more engaged your listeners will be (especially since there is nothing for them to engage with visually). Higher-quality materials are more important for pro musicians and voiceover actors, as your career will hinge on your ability to produce high quality recordings.
[referenced id=”670994″ url=”https://www.lifehacker.com.au/2015/06/how-to-start-your-own-podcast/” thumb=”https://www.gizmodo.com.au/wp-content/uploads/sites/4/2020/06/06/jr7bvyugvfk4jvj6ewbr-300×169.jpg” title=”How To Start Your Own Podcast” excerpt=”Thanks to the success of shows like Serial, TED Radio Hour and The Nerdist, podcasts have become more popular than ever. Here’s how to create, record, and publish your own basic podcast — and get people to listen.”]
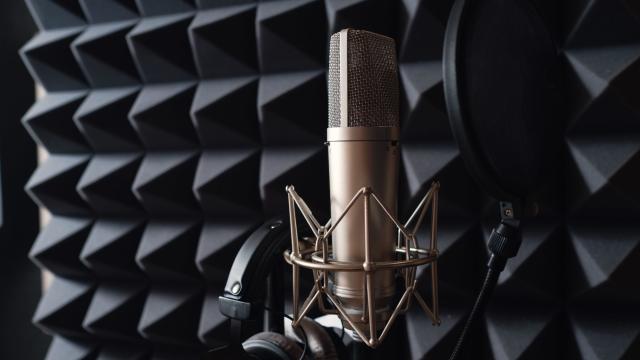
Invest in the right microphone
As with the soundproofing materials, the more money you spend on your recording equipment, the better your end product will be — and you’ll want to start by getting a microphone. You don’t need to break the bank; just make sure you are getting the right microphone for your space, needs, and budget. I use AKG XLR Condenser microphones to record my voiceover gigs and an entertainment podcast. Condenser mics are easy to find, relatively cheap (as microphones go — $130), and provide great quality sound for the price.
However, condenser mics are very sensitive and require a well-soundproofed room to avoid capturing unwanted noises. For this reason, Bolicek suggests investing in a dynamic microphone. Dynamic microphones are not as sensitive and will not pick up as much background sound as a condenser microphone. If you want an excellent dynamic mic, it will cost you significantly more (anywhere from $500 to $650). You can find some for as little as $130, but you’ll want to do your research beforehand to ensure the quality is up to par.
[referenced id=”1038501″ url=”https://www.lifehacker.com.au/2020/12/how-to-fix-audio-level-problems-in-windows-10/” thumb=”https://www.gizmodo.com.au/wp-content/uploads/sites/4/2020/12/02/bmsmqjcpx9fxpvyvnifq-300×169.jpg” title=”How to Fix Audio Level Problems in Windows 10″ excerpt=”Windows 10 includes a custom volume mixer, which sounds like a great idea on paper — who wouldn’t a way to control the volume of individual apps? It’s incredibly useful when you need to dial back your game audio a bit so you can hear your guildmates on Discord (or…”]
Use an external audio recorder
After you have outfitted the space and selected your microphone, you’ll need the proper equipment to capture clean sound. Depending on the microphone you choose, you may be able to connect it directly to your computer with a USB cord, but these cords are less than durable and won’t always offer the best sound quality. Instead, use an audio recorder to capture sound from an external microphone and save it to your computer or an SD card. Programs that turn your mobile phone or tablet into a microphone with recording software are not reliable. Sarakan notes going with an external mic and audio recorder is preferable to using your computer’s speakers or a phone app, as it allows you greater control over the fidelity of the sound (which minimizes risks of sound distortions).
I use a Focusrite Scarlett 2i2 with my condenser microphone for voiceover work. The Scarlett connects seamlessly with Garageband on my computer, and will run you about $US159 ($206) for a model with two microphone ports. When recording our bi-weekly podcast, my co-hosts and I use an H6 Zoom recorder (not to be confused with the video call service — I’m talking about a piece of hardware). The Zoom recorder works better for multiple users, with ports for up to six microphones. (This was more relevant in pre-pandemic times). It’s a bit pricier — about $450 — but older versions (H5 or H4) can be a cheaper option between $300 to $350, and are of comparable quality. Either recorder works very well, but I find the Scarlett to be easier to use when it’s just me and my computer.
Creating a home studio is an investment, so take the time to plan and save up. Recording better sound can provide a great return on your investment.
Leave a Reply
You must be logged in to post a comment.