Hello, and welcome back to Lifehacker’s Chilli Cook-Off. After kicking off the series with a super accessible, beanless, honest Texas chilli, we’re getting a little more involved with Katie P’s Umami Bomb Chilli.
This chilli caught my eye for three reasons: It called for fish sauce, it called for MSG, and it called for a pressure cooker. The aggressive approach to an almost excessive amount of umami-forward, savoury ingredients is very much my vibe, and I was not disappointed. I also like that this chilli contains both beef and pork, because I enjoy eating a wide variety of animals. There’s no reason for me re-type KatieP’s detailed instructions, so I’ll just drop the comment here and meet you on the other side.
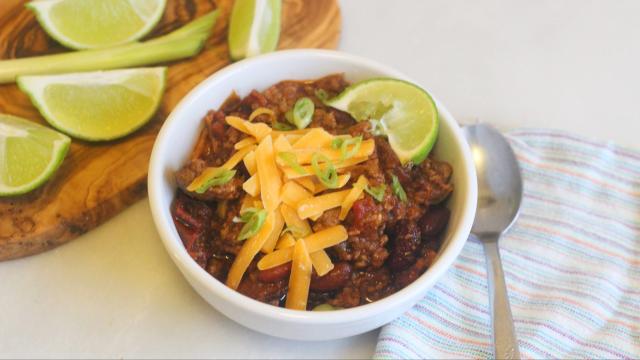
Here’s my Instant Pot Umami Bomb Chili, which has won 1 office chili cookoff and a 2-year finalist at another office!
Allergens: Beef, Pork, Poultry, Anchovy, Cocoa, Soy, Gluten
Adapted from PressureCookRecipes’ “Instant Pot Easy Chili”: https://www.pressurecookrecipes.com/instant-pot-chili/
Ingredients:
- 1 cup chicken broth or stock
- 3 tbsp tomato paste
- 1 can (800 grams) crushed tomatoes
- 1 can (450 grams) dark red kidney beans, drained and rinsed
- 1 can (450 grams) light red kidney beans, drained and rinsed
- 2 tsp unsweetened cocoa powder
- 2 tbsp soy sauce
- 2 tbsp fish sauce
- 2 big pinches of MSG
- 2 chipotles in adobo (I just grabbed two of them from the little can, including sauce)
- 2 Anaheim chili peppers, diced
- 2 Poblano chili peppers, diced
- 900 grams ground beef
- 900 grams ground pork
- 1-2 onions (I cheat and buy the little tub of pre-cut onions from the refrigerated produce case)
- 2 tbsp (5-6 cloves) minced garlic
- 1 tbsp oregano
- 2 tbsp chili powder (can add more if you want!)
- 3-4 squirts Cholula hot sauce
- 2 tbsp lime juice (plus more for serving)
- 2 tbsp brown sugar
- 3-4 good shakes of Lawry’s seasoned salt
- A bunch of kosher salt
- A bunch of black pepper
- 1 package bacon, cooked to medium crispiness and chopped (I love Hormel Black Label Maple Bacon)
- Vegetable oil or other neutral cooking oil
Instructions:
-
Prepare the pressure cooker : Press Sauté button on pressure cooker (or equivalent). Wait until indicator says HOT.
-
Cook the Meat Mix: Season ground beef and ground pork generously with kosher salt, MSG and black pepper. Add enough vegetable oil to coat the bottom of the pressure cooker. Cook until no more pink remains (about 10-15 minutes.) Optional step: about 5 minutes in, drain the meat grease into a small heatproof cup and reserve until step 8.
-
Mix the chicken stock mixture: While the meat mix is browning, mix 1 cup chicken stock, 2 tbsp fish sauce, 2 tbsp soy sauce, 3 tbsp tomato paste, and 2 tsp unsweetened cocoa powder in a 2-cup measuring cup. TIP: use a small whisk to break up the tomato paste and incorporate the cocoa powder into a smooth, slightly thicker stock consistency.
-
Add peppers: add diced Poblano and Anaheim peppers to Instant Pot. Sauté for about 3 minutes.
-
Sauté onion, garlic and spices: add diced onions, minced garlic, chili powder, and oregano to meat and pepper mixture. Sauté for about 5 minutes to bloom the spices. Stir frequently.
-
Deglaze: Pour in the stock mixture and fully deglaze the bottom of the pot by making sure no brown bits are stuck to the bottom.
-
Pressure Cook the Chili: Add 2 cans of drained kidney beans and the chopped bacon. Pour in the reserved meat grease. Mix well. Pour in 1 can of crushed tomatoes with all the juice on top. Do not mix. Season one more time with salt, pepper, and MSG. Add 2 chipotle peppers on top of the tomatoes. Close lid and pressure cook at High Pressure using “Manual” or “Pressure Cook” button for 20 minutes + 20-25-minute natural release. Open the lid carefully.
-
Reduce and Season: If the chili is too runny, give it a quick stir and cook for another few minutes with Saute button on. Taste and season with 2 tbsp brown sugar, a couple shakes of seasoned salt, a couple squirts of Cholula, and 1-2 tbsp of lime juice. Stir and adjust seasoning as needed. TIP: in addition to the lime juice in the recipe, encourage your chili eaters to splash some lime juice on their chili right before they eat it. Do this before cheese/sour cream/green onions/crackers.
KatieP wasn’t lying, folks — this chilli really is a bomb of umami. The fish sauce, cocoa powder, soy sauce, and MSG give it a deep, super-meaty, layered flavour, and the peppers bring a little bit of fruity heat. This recipe isn’t difficult by any means, but is is a little more involved than our first one, and there are a few things you should watch out for when making it.
First of all: the bigger your pressure cooker, the easier this will be. I have the standard, 5.6L model, and there just wasn’t enough room to cook the vegetables with the meat. I had to remove the beef and pork from the pressure cooker insert after it was cooked, then add the peppers, onions, garlic, and spices and cook them until tender and fragrant, then add the meat back in to finish the recipe. This ended up working out fine, but I did need to grab a big bowl to hold the meat while I cooked the vegetables.
Secondly, when choosing your meat, go with a leaner ground beef. The pork will already be providing a good amount a fat, so your usual 80/20 will result in a bit of an oil slick situation. You could also strain the fat away, if 80/20 is all you have. (Oh, and I thought the canned beans were fine! Pressure cooking them gave them a really nice, kind of creamy texture.)
Also, you really want to set up your mise en place with this one. I thought I could be slick and do all my vegetable prep while the meat was cooking, but that was a fool’s errand, and I had to turn the pressure cooker off for a bit and catch up. Read the recipe thoroughly, dice and measure everything out before you start, and this chilli is a breeze to throw together.
Flavour-wise, this chilli is pretty perfect. All the words we throw around when describing meaty dishes — “savoury,” “umami,” “deep,” — you can’t overuse them when describing this chilli. But, given how many umami-packed ingredients you’re using (tomato paste, soy sauce, fish sauce, and chillis in adobo), I recommend a delicate hand when adding the monosodium glutamate.
A little MSG truly goes travel a very long way. I got a little too enthusiastic — sprinkling it on the meat and later on the crushed tomatoes directly from the shaker with wild abandon. This ended up being too much, resulting in the MSG overwhelming my palate and numbing the centre of my tongue (something I’ve experienced before when I’ve overdone the MSG). The fish sauce adds so much flavour and umami, it’s almost a shame to obscure it with too much MSG. I recommend adding just a couple of pinches of MSG to the meat, then adding more if you think you need it at the very end, preferably after the chilli has rested overnight.
Speaking of that overnight rest: It’s key. Both this chilli and the Texas chilli were 276% better the next day. Sharper flavours smooth out and relax, and more mellow flavours move into the forefront. This chilli was still pretty good fresh out of the pot, though. Especially with a squeeze of lime.
Leave a Reply
You must be logged in to post a comment.