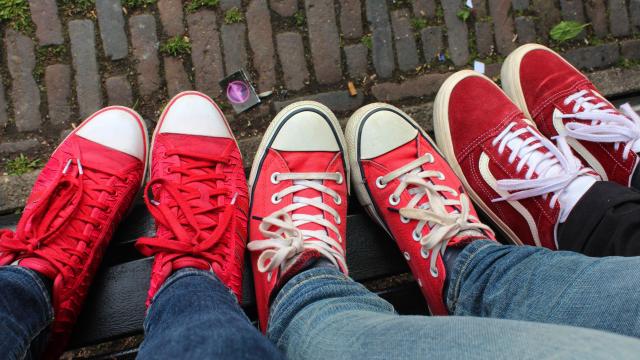
You probably learned to tie your shoes as a kid and haven’t given the method of tying a second thought since then. But if your shoes are always coming untied, maybe we should revisit that shoe-tying lesson. You see, there are two ways to tie the standard shoelace knot, and only one of them will hold reliably.
The best methods of tying shoelaces
The most popular ways of tying your shoes can all be done in one of two ways. We’ll discuss that in a minute, but first, here is a rundown in case you need a refresher:
- The bunny ears method: after tying your overhand (first) knot, you then fold each remaining lace in half. These are your bunny ears. Then, you tie the ears together with another overhand knot.
- The big loops method, which is bunny ears but with a twist: you stick the ends of the shoelaces in the holes before you begin tying anything. Then you make two overhand knots with those big loops.
- The Cheerio method, which is what I always start my kids with. You do an overhand knot, then another overhand knot, slowly tightening the shoestrings until the space between the knots is the size of a Cheerio. Then thread each of the long ends back the way it came, stopping when there is just a small loop remaining. Pull the loops to tighten.
- The Ian knot is a quick method that will impress your friends. You make two loops, and instantly pull each through the other. It’s like magic. (Watch the video.)
- And then there’s the no-name version I learned, where you tie an overhand knot, then make a loop in one hand and then wrap the other strand around it.
No matter how you form the knot you are forming the same basic thing. That thing is: two overhand knots, one right on top of the other. And you may not have realized, but you can either tie them both the same way or in opposite ways. To get your shoes to stay tied, you need the two knots to go opposite directions.
Why the type of knot matters
An overhand knot is the first kind you tie, before you do the thing that ends up with loops. To make an overhand knot, you just cross the two strands—right over left, let’s say—and tuck one strand underneath that cross.
The second step in tying your shoes also makes an overhand knot. It’s just that you form this knot with a doubled loop of the shoelace instead of with a single strand. If you use the “big loops” or “bunny ears” method, this is pretty obvious. If not, well, just know that this is what ends up happening in the end. (The doubling over is just to make it a quick-release knot, so you don’t have to dig your fingernails into a tightened knot just to take your shoes off each night.)
Since you’re stacking two overhand knots on top of each other, you’re effectively making a square knot. Or a granny knot. Which one you get depends on how exactly you tied it.
The difference between a square knot and a granny knot
Let’s ignore the loops in our shoelaces, for the moment, and talk about what happens when you stack two overhand knots in, say, a piece of rope.
You begin the knot by crossing the two strands: either right over left or left over right. Either way is fine.
If you cross the second overhand knot the opposite way, you make a square knot, which locks the two strands tightly together.
If you cross the second overhand knot the same way as the first, you make a granny knot, which will easily slip out.
To review:
- Right over left, then left over right: square knot, good.
- Left over right, then right over left: still a square knot, still good.
- Right over left, then right over left again: granny knot, prone to slipping.
- Left over right, then left over right again: another granny knot!
This video shows the difference between a square knot and a granny knot. Watch how the granny knot easily slips loose, while the square knot holds.
How to know if you’ve tied your shoes wrong
So, let’s say you tie your shoes with the bunny ear method. First you do an overhand knot, right over left; then you make the bunny ears. If you cross the right bunny ear over the left, you’ll make a granny knot and your shoes will always be working loose. If you tie the bunny ears left over right, you’ll get a secure square knot.
There’s another telltale sign of a granny knot, besides the untying: a granny knot is crooked. The bow on your shoe will have one loop pointing toward your ankle and the other pointing toward your toe. A shoe tied with a square knot will have the two sides of the bow pointing to the sides of your shoe.
This applies to any time you want to tie two overhand knots. Securing a bandana around your head? Right over left, then left over right. Tying a trash bag closed? Right over left, then left over right. You get the idea. A bow tie? Same deal as your shoes—a somewhat fussy procedure that ends up as a square knot if you did it right.
If you use a granny knot and can’t figure out how to make a bow going the other direction, just change the way you do your initial overhand knot and then tie the bow the way you always do. So if you normally start with right over left, just make sure to do left over right and then tie your bow normally.
Finally, there’s a saying among sailors and other outdoorspeople: “If you can’t tie a knot, tie a lot.” That means that if you can’t figure out how to make a proper square knot, the next best thing is to take your looped laces and double-tie them. You know, like you did when you were a kid and couldn’t keep your shoes tied. That trick still works today.
Leave a Reply
You must be logged in to post a comment.