If you own a home of some sort, you are familiar with how expensive any sort of renovation or repair can be, so many homeowners try to mitigate that expense with sweat equity — i.e., doing tasks themselves whenever possible. Trading time and effort for money is a solid decision, but can lead to awful experiences. For example: Sanding drywall. This task is hard work and takes time. And then there’s the dust — so much dust. That’s no big deal in new construction or a gut renovation, but if you’re doing repairs to your walls, that thick coat of dust will get everywhere, and when alien archaeologists dig up your house a million years from now they will still be finding it. Even if you drape everything in drop cloths and plastic, that dust will find a way onto everything and it will stay there.
The good news is there’s a way to minimise that dust: Wet sanding. It won’t necessarily make sanding your drywall any easier, but it will absolutely reduce the amount of dust turning your house into a moonscape.
The power of the sponge
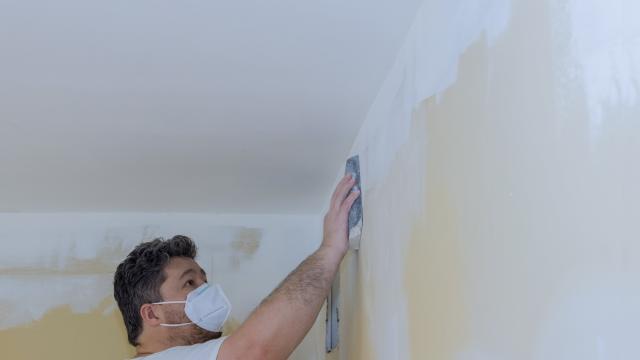
When you sand drywall compound with a block of sandpaper or a power sander, you generate a metric ton of joint compound dust. Instead of attempting to use a vacuum or tent plastic around the area, try wet sanding using a gritted sponge, which reduces dust by dampening it. You dunk the sponge in water, ring it out so that it’s just barely damp, and then sand as normal. The water not only traps a lot of the dust before it can go flying into the air (and your lungs), but it dissolves the joint compound as you go, spreading it thin and smudging it around.
This doesn’t make the work any easier, but it absolutely reduces the amount of dust. This is ideal when you’re repairing something in a finished, furnished room and you don’t want to remove all your furniture and possessions or cover everything just to sand a small area of the wall. To be clear: There will still be dust, but it will be damp and restricted to the immediate area, and a lot of it will be caught in the sponge itself. When your sponge gets overloaded with drywall compound, simply rinse it out and get back to it.
How to wet sand
Wet sanding isn’t complicated, but doing it right will save you a lot of pain and suffering:
- Wet your sponge in water, then wring it out thoroughly. You want “damp,” not soaked.
- Sand your wall using the rough side of the sponge, starting with the high bumps and roughest areas. Rinse when the sponge gets loaded up and repeat.
- When the drywall compound has a consistent surface, rinse your sponge and switch to the smooth side. Dampen and use it to feather the edges of the seams so they blend in with the rest of the wall. You should also go over the rest of the seams with the smooth side to level out the compound.
- Stop after the second pass (with the smooth side). Repeated applications can make the drywall paper wet and deform your seams. If you think you need additional passes to get things perfect, let the area dry out before tackling it again.
Wet sanding caveats
While wet sanding is a much less messy way to sand your drywall seams, there are a few things to consider:
- Finish. Wet sanding with a sponge works differently than dry-sanding. As noted, it sort of smudges the compound a bit, making it damp and pliable. This results in a finish that’s much, much smoother than dry sanding — and that might not match the texture of the rest of the wall, especially if it’s a repair. If the finished texture is the priority, dry sanding might be a better choice. Also, because wet sanding is, er, wet, you can easily overdo it and dissolve too much of the joint compound, exposing the seam tape or undoing your careful repair work. The best approach is to work incrementally and be vigilant.
- Time. Wet sanding takes more time than dry sanding. Using a sponge requires a lot more care and finesse, which slows you down, and it doesn’t remove the joint compound as efficiently as dry sanding. If you’re trying to do a repair quickly, wet sanding may not be the right choice. On the other hand, cleaning up after wet sanding will go much faster because you won’t have drywall dust in extremely surprising places throughout the entire house.
- No tools. Unlike dry sanding, you can’t use power tools when you wet sand, which puts a lot more sweat into “sweat equity.”
Wet sanding won’t necessarily make a renovation or repair easier, but it will make it just a little bit neater and easier to manage. If you have the time and patience, it’s a good way to inject some additional sanity into any project involving drywall and joint compound.
Leave a Reply
You must be logged in to post a comment.