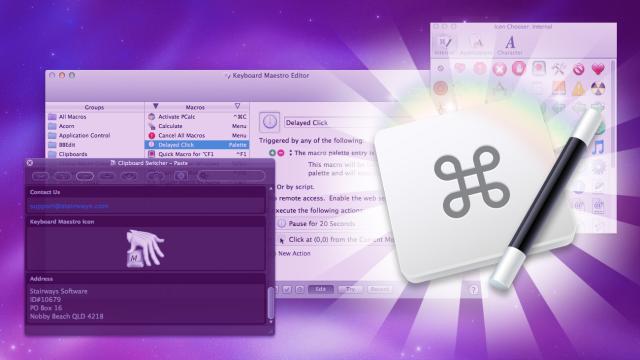
Macs have all kinds of useful automation tools, but Keyboard Maestro is easily the most powerful among them. It lets you automate almost any repetitive task you do on your Mac — from opening web pages at a specific time to rating iTunes songs — with just a little bit of set up. Keyboard Maestro is a little overwhelming at first, so let’s get familiar with how it works and make our first macro.
Music: Rolemusic
What Is Keyboard Maestro?
Keyboard Maestro ($US36/free 30-day trial) is a tool that lets you launch macros (a series of actions you do on a computer) with a single trigger. Despite its name, Keyboard Maestro can automate macros by assigning them to a keystroke, a keyword, a timer, based on specific wireless networks or countless other triggers.
Keyboard Maestro does so much that it’s a bit easier to understand what you can do with it by looking at some examples. You could:
- Hide or quit applications when they’re unused for a set amount of time
- Automatically open specific apps when you sign into a Wi-Fi network
- Automatically dump your password into an application when you open it
- Resize a window when you bring it to the front
- Open your most used documents with a keystroke
- Setup application-specific workspaces
- Add keyboard shortcuts to apps that don’t have them
- Automatically create new to-do lists for projects
Essentially, Keyboard Maestro lets you automate any repetitive task you do. For example, if you always open the same apps in the morning at work, then rearrange the windows, then open specific tabs in your browser, then log into certain sites, you can set Keyboard Maestro to do all that for you with a keyboard shortcut.
Get to Know the Editor
You’ll create these macros in Keyboard Maestro’s editor window. It’s a bit intimidating at first glance, but it’s much less scary once you learn your way around. So, let’s start by breaking down the different parts of the editor and how to use them.
Groups Organise Your Macros

The first panel you’ll notice in Keyboard Maestro is the Groups panel. These groups allow you to set up macros that only work with specific applications. This way, you can use a keyboard shortcut in one program that won’t work in another. For example, if you create a Chrome group, the macros inside that folder will only work with Chrome. Groups are not a way to organise your macros, they’re only there to limit the power of them.
Triggers Launch Your Macros
The triggers section is where you’ll set up what happens that causes an action to launch. Essentially, you pick an event that causes an action to run.
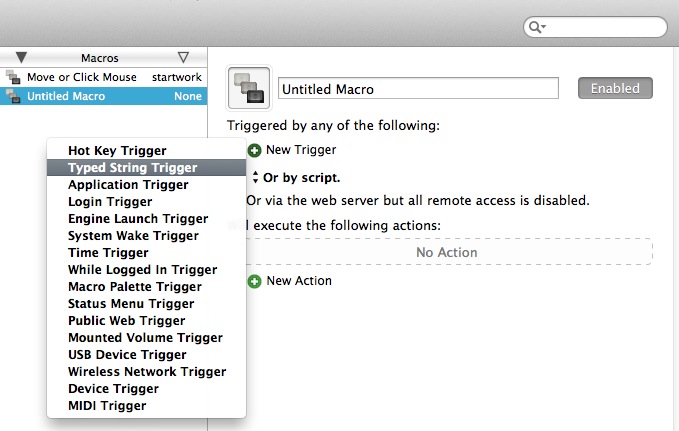
There are 16 different triggers to choose from:
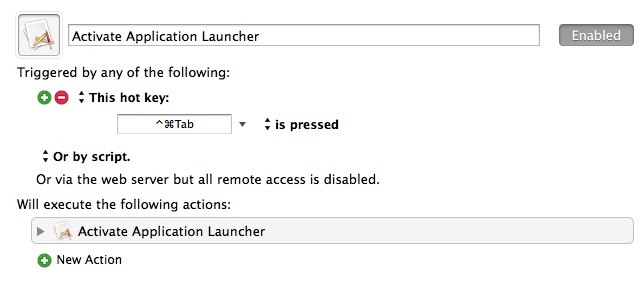
- Hot Key Trigger: This is a keyboard shortcut. Before using this, keep in mind that Keyboard Maestro intercepts global shortcuts, so if you use something like Command+Q, it won’t quit an app, it will run the Keyboard Maestro macro.
- Application Trigger: This trigger launches a macro based on an application event like when an app launches, quits, activates, or deactivates.
- Typed String Trigger: This works the same way as a hot key, except you type in a string of characters. For example, you can set it up so when you type “startwork” Keyboard Maestro will automatically load your work applications.
- Login Trigger: This triggers when you login to your computer.
- Engine Launch Trigger: This triggers a macro when you launch Keyboard Maestro itself.
- System Wake Trigger: This triggers when you wake your Mac up from sleep.
- Time Trigger: You can set this trigger up so it runs at certain times or on certain days of the week. This is handy for running backups, launching apps based on your schedule or running maintenance.
- While Logged In Trigger: This trigger runs repeatedly throughout the day as long as you’re logged into your computer.
- Macro Palette Trigger: This trigger is limited to when the Keyboard Maestro macro palette is open. Just open the palette, and click on the one you want to run.
- Status Menu Trigger: This puts a trigger inside Keyboard Maestro’s status menu, which is handy for macros you don’t use very often.
- Public Web Trigger: Keyboard Maestro has a built-in web server, and this macro can be run remotely or from your computer.
- Mounted Volume Trigger: If a disk is mounted or unmounted, this trigger runs.
- USB Device Trigger: If you connect a specific USB device, this trigger runs.
- Wireless Network Trigger: This trigger runs when you connect or disconnect from a specific wireless network.
- Device Trigger: This trigger takes over your Mac’s modifier keys (like mouse buttons, brightness buttons, etc) to run specific actions.
- MIDI Trigger: If you receive a MIDI note, this trigger will run.
If you’re familiar with a service like If This Then That, then you understand the basics of how Keyboard Maestro works. If you initiate a trigger, then a series of actions runs.
Actions Make Things Happen on Your Mac
As the name implies, Actions happen after you initiate a trigger. This can be nearly anything you do on your Mac, and you can chain actions together. An action can be a mouse movement, launching an app, running a script, or even just opening a specific URL. Thankfully, there are two basic ways to select your actions: manually and by recording what you do.
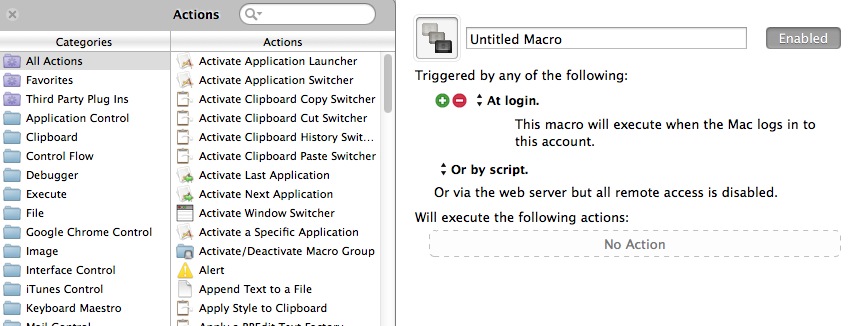
To set up an action manually, you click the “+ New Action” button, and select the action you want from different categories in Keyboard Maestro. Keep in mind the order of events. For example, if you want to launch a specific set of three web pages in Chrome, the order would be:
- New Google Chrome Window with URL (type your URL here)
- New Google Chrome Tab with URL (type your URL here)
- New Google Chrome Tab with URL (type your URL here)
To add actions, just find the action you want on the left, then double-click it.
Alternately, you can just record actions. This is especially handy if you want to move windows to specific places, launch and then minimise apps, or any other similar tasks. The process is super easy:
- Create a new macro in Keyboard Maestro and select your trigger
- Choose the “Record” option at the bottom of the app
- Wait for the countdown, then perform the actions you want to happen, in the order you want them to happen in
- Click the “Recording” button in Keyboard Maestro when you’re done
When it’s complete, you’ll see a list of all the actions you performed when it was recording.
Make Your First Macro
OK, now that the semantics are out of the way, it’s time to make your first macro. Let’s make a macro that opens up all your work-related tools when you connect to the work Wi-Fi.
- Click the “+” button under the Macros section in Keyboard Maestro
- Name your macro “Start Work”
- Click the “+ New Trigger” button and select “Wireless Network Trigger”
- Type the name of your work wireless network, or select if from the drop down list
- Select “Is connected”
- Click the “+ New Action” button
- Select the Open category, then double-click “Open a File, Folder, or Application”
- Pick the app you want to launch. In my case, I picked Adium
- Double-click “Open a File, Folder, or Application” again, and pick another app. Do this until all the applications you need are selected.
If you use a lot of web apps, you can add these to the list too. In that same Open category, double-click “Open a URL” and type the URL you want to open. When you’re done, click the “Try” button at the bottom of Keyboard Maestro. If you did everything correctly, Keyboard Maestro will launch all the apps and URLs you need. You can customise this to also open up specific files or folders if you always start from the same space.
That’s it! You’ve now created your first macro. Check out our list of examples at the top of this post for more ideas — they should be pretty easy to create now that you’re familiar with the basics.
Further Reading
Keyboard Maestro is a deep program and you can extend it to do a ton of different things. With that in mind, here are a few resources and ideas for macros to get you going:
- Buffer’s Guide to Setting up Project with Things: If you use Things to manage your to-dos, this guide creates a template using Keyboard Maestro.
- Flip Martin’s Tips and Tricks for Keyboard Maestro: This guide features more advanced Keyboard Maestro tips, including tricks for managing web popups and reopening windows.
- RocketInk’s Markdown Maestro guide: If you use Markdown for writing, this guide features a lot of different macros to make the process a bit easier.
- RocketInk’s Keyboard Maestro and Evernote Guide: This guide talks about pretty much everything you need to do to make Keyboard Maestro and Evernote work together in harmony.
- Matt Gemmel’s list of Macros for Safari, Mail and Finder: If you’re a fan of Apple’s built-in software, such as Safari, Mail and Finder, this list of macros can help supercharge them a bit.
- Rakesh Kumar’s PC Switcher’s Pack: New to Mac? These macros make things a bit easier on you.
Keyboard Maestro is a bit intimidating at first, but once you start actually using it, it’s surprisingly simple to understand. If you’re struggling to wrap your mind around what you’d use it for, download the trial and start playing around with it. You might be surprised at how many repetitive tasks you can automate on your Mac to make your job a little easier.
Comments