If you’ve recently started making things with electronics, you know how steep the learning curve can be. Fortunately, littleBits are an easy way to start experimenting with all kinds of projects. You can connect real-world components to the cloud instantly, program If This Then That recipes, and even connect it all to an Arduino. Here’s how to get started.
What Are littleBits?
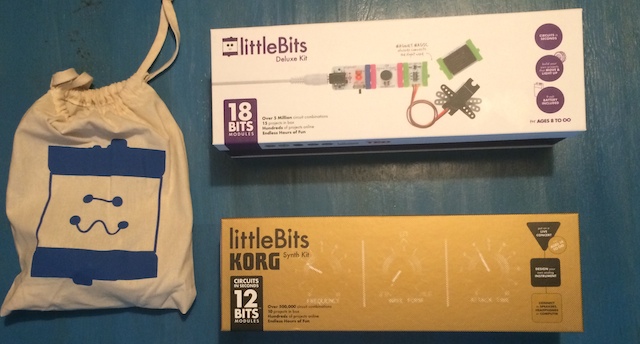
LittleBits are small, open-source, modular electronics components that snap together to form larger circuits. The company was started by Ayah Bdeir with the goal of making DIY hardware available to everyone. They’re billed as a simple way to learn about electronics hardware, and they deliver on that promise. Littlebits come in kits (which range from the $US100 base kit to the $US200 deluxe kit, as well as specialised kits for music and space) or you can buy parts à la carte for around $US20 apiece. It’s a bit on the expensive side for beginner electronics kits, but they do make things a lot easier for beginners (and you can always make your own). They also just introduced bundles for integrating internet applications and Arduino programs with littleBits.
The purpose of littleBits is to provide a system where anyone can build, prototype, and learn about electronics. Each modular component you get is labelled with a single purpose, and as you chain them together with their magnetic links you start to form more complex circuits. If something isn’t working out, just unhook the magnets that connect each module and start over. In the end, you can control everything ranging from sound to actual moving motors, and it’s all powered by either a 9V battery or a power supply.
What You Get in a Box
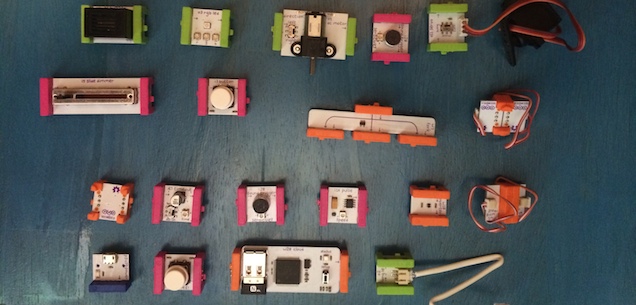
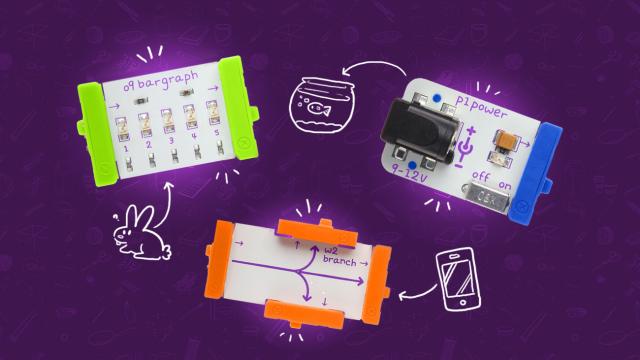
As we mentioned above, littleBits come in all kinds of different kits, but we’re going to highlight a few of the more interesting modules to give you an idea of how they work. Each module is colour-coded and divided into four different categories: power, input, wire, and output. Let’s take a look at a few in each category to give you an idea of how they work and what you can do with them. This list is by no means exhaustive, but gives you a good idea of the basics for what you can do.
Power
- Power: As the name describes, this is the power module you use to connect to a wall outlet or 9V battery.
- Coin Battery: If a wall outlet is too much juice, you can also power your projects with a coin battery.
Input
- Microphone: The microphone input takes outside sound and turns it into a trigger. So, anytime the mic picks up a sound, it sends a signal through your littleBits to trigger your output. This might be triggering lights, motors or whatever else. You can even use it to connect to your smartphone to record then manipulate your own audio.
- Keyboard: The keyboard is part of the synth kit, and offers up 13 switches that make an octave of notes. You can alter the range and behaviour of those keys. It also operates as a simple trigger to control other non-synth based littleBits modules.
- Motion Trigger: As the name suggests, the motion trigger senses motion. So, if you wave your hand over it, it sends a signal down the circuit. It works great for any type of motion alarm system.
Wire
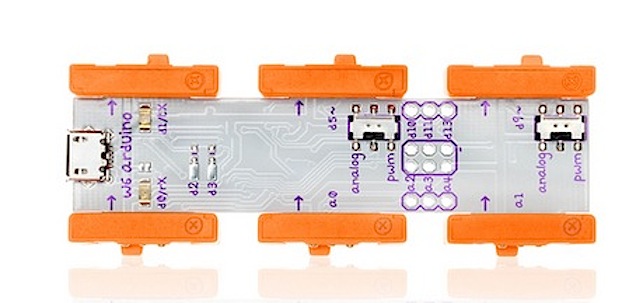
- Arduino: The Arduino module is one of the newest ones, and makes it so you can connect any littleBits input or output using the Arduino programming language. This makes it easy to set up triggers and outputs for Arduino projects of all kinds. You don’t need an external Arduino, the module itself has everything you need.
- Wireless Receiver: As the name suggests, the wireless receiver makes it so your littleBits projects can receive external output from other littleBits modules through Wi-Fi.
- CloudBit: The cloudBit is the newest littleBits module and easily the most interesting. With it, you can connect to all kinds of internet-connected devices. That means you can connect your littleBits to SMS, If This Then That (here are some of the recipes for IFTTT to get you started), the Nest, or a Phillips Hue. The module itself is a single board computer that runs Linux that runs as both a wireless access point and web server.
Output
- Light Wire: This one’s pretty simple: when you get an input, the light turns on.
- Fan: When you connect a fan to your projects, you can use all sorts of triggers to turn the fan on.
- DC Motor: The DC motor is a low-powered motor that rotates. This makes it so you can attach wheels, windmills and almost anything else that rotates in a circle to your projects.
How to Start Making Your Own Stuff
All you need to do to get started making stuff with littleBits is to start putting components together in a reasonable order. It’s easiest to start by experimenting with different circuits, as long as the chain goes something like:
- Power
- Input
- Output
As far as the base components of littleBits, that’s all you need to know. They’re so easy to experiment with that it’s worthwhile to just spend an hour or two playing with different variations of the above chain. You can have multiple inputs and multiple outputs for something more complex.
Things get more interesting when you work in either the cloudBit or Arduino modules.
Get Started with the CloudBit
The cloudBit connects your littleBits project to the internet so you can communicate with all kinds of other devices. Your circuits work about the same with the cloudBit as above, except instead of just outputting to another littleBits module, the output funnels through the internet and to another device (or module). The circuit itself works the exact same as every other littleBit. So, an example circuit might look something like:
- Power
- Input
- cloudBit
- External device (A/C unit, smartphone, etc)
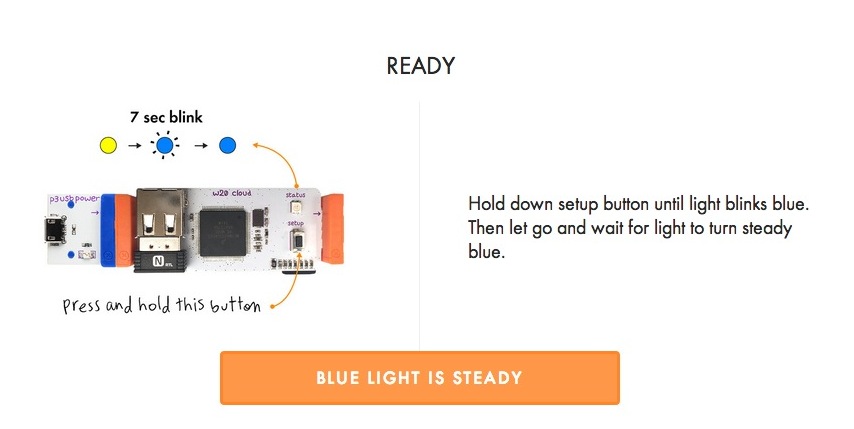
Setup is simple: just head to the cloudBits page, create an account, connect your cloudBit to your computer via USB, and the site will guide you through the rest. Once it’s set up, you can start controlling the cloudBit through the cloudBits page or IFTTT. Again, much like the base set, it’s easiest to get things set up, then start messing around with different configurations to see what happens.
Get Started with the Arduino Module
The Arduino module is the trickiest to set up, but once you understand the basics of how it works, it’s pretty easy to build projects with. Essentially, the Arduino module makes it easy to connect up to three different types of inputs and three outputs to your Arduino. For example, you can have three different inputs trigger different programs on the Arduino, which trigger different outputs on the Arduino module. This provides for an insane amount of combinations, but here’s a simple example of what a complete circuit might look like:
- Power
- Input (button, knob, etc)
- Arduino Module
- Output (lights, moving parts, etc)
Essentially, you can set up a system where you push a button, which tells the Arduino to run a program that affects the output. For example, you can make a basic computer mouse using two dimmer switches and a button as an input, a program on the Arduino to interpret those inputs, then and output to your computer. The setup process is simple and isn’t that different from the initial setup of an Arduino.
LittleBits Projects to Get You Started
Making your own stuff is great, but since littleBits are open source the community of other people making stuff means you have plenty of ways to get started. To that end, here are a few of our favourite projects we’ve seen so far.
Monitor an Air Conditioner Unit from Anywhere
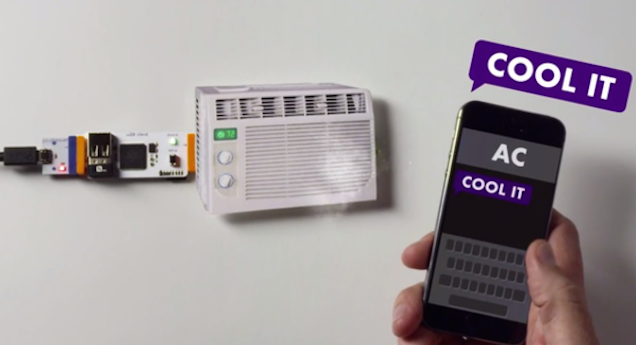
Using a cloudBit, IR Transmitter, temperature sensor and power supply, you can create a circuit that controls and monitors your air conditioner from your phone. The temperature sensor gives you access to the current temperature in your house, while the cloudBit allows you to change the temperature of your air conditioner. Or, if you prefer you can change the temperature from your phone using an IFTTT recipe.
Get an SMS Notification from a Doorbell
Doorbells are obnoxious sounding and don’t do you much good if you’re not at home. Using a cloudBit, an LED, a power module and a button, you can set up a system with IFTTT and littleBits to send you a text message every time someone rings your doorbell. It’s a bit of an over engineered solution, but it’s cool nonetheless.
Build a Real-Time Weather Dashboard
This one’s simple but incredibly cool. Using the cloudBit, the weather dashboard pings Weather Underground to get the weather, then displays the forecast, current temperature and weather conditions. You’ll need some woodworking skills to go along with your electronics skills, but it’s a good-looking finished product.
Build Your Own 8-Bit Jukebox
LittleBits can’t do much in the way of controlling music (yet), but that doesn’t mean you can’t play music. This crazy little machine uses the Arduino module and a bunch of switches to create a little jukebox that plays music from cards. Productive? Not really. But it’s a good way to learn what you can do with the Arduino.
Make Your Own MIDI-Synth
If the Korg music kit isn’t up your alley, Instructables user tubfun created a USB MIDI controller using littleBits and an Arduino (theoretically you could probably do this with the new Arduino module too). The end result is a simple little MIDI controller that uses the littleBits to interface with the MIDI sequencing software of your choice, including Ableton and Garageband.
Comments