Like a moth to a lightbulb, gamers are drawn to Nanoleaf wall lights as if they’re the most incredible things they’ve ever seen. But are Nanoleaf tiles a good idea for renters?
A lot of us aspirational Nanoleaf lovers, to the surprise of nobody, are renters! What a terrible turn of events: wanting to stick high-quality (and very expensive) light tiles to your wall and being worried about keeping your bond when you move out.
Well, as a renter in the increasingly expensive inner west of Sydney, I’m happy to report that I’ve just set up a starter pack of Nanoleaf canvas lights (the square ones) on my apartment walls, for the purpose of science, of course.
We’ve done Nanoleaf reviews before, but we’ve never paid much attention to the renter’s perspective on Nanoleaf products.
That’s what we’re doing today. Because even if you can’t afford your own house, and you’re unlikely to anytime soon, you deserve a comfy home with comfy lights.
Let’s do it: Nanoleaf for renters, everyone.
Nanoleaf lights, easiest to hardest
So before we get really stuck into it, let’s just run down the Nanoleaf product catalogue, from “easiest for renters” to hardest.
We begin with the Nanoleaf Bulbs, which are Bluetooth and thread-enabled smart lights, available in bayonet and screw configurations. These are the easiest for renters to use, obviously, because they can easily be installed and uninstalled from most light fittings.
Then we get to the Nanoleaf Lightstrips, ideal for installation mostly on furniture or on benches, usually to illuminate the undersides or backsides of bulky things (illuminating the surfaces they touch, without the lights themselves being that visible). These are probably the next most ideal for renters, as they’ll usually be the most out-of-the-way and will likely be placed on objects you own in the home.
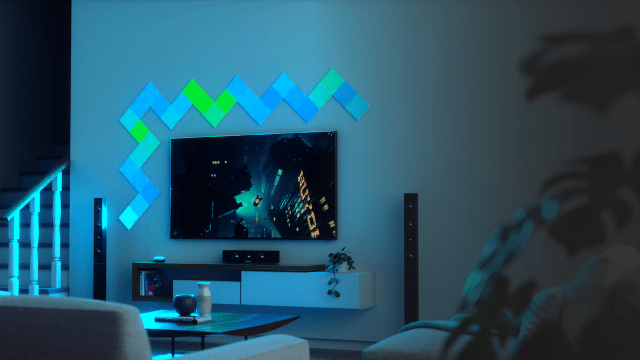
Then, we get to the Nanoleaf panels, where the brand specialises (competition is rife, with Philips and Sengled also making a name for themselves in the space). These come in all different shapes, including square canvas panels, wood-patterned hexagons and RGB hexagons. Because these are applied to the wall with command strips, these can be quite the concern for renters, which is exactly what I was worried about when I was installing them.
After some consideration, I think the best way that we can talk about this is by dispelling our worries with a list.

What renters should know about Nanoleaf tiles
Please think about the wall they’re going on
Don’t f**k around and find out. If you put your tiles up on a wall with weak, easy-to-tear paint (common in many rentals I’ve lived in), don’t use that wall. At best, you’ll tear the paint and it will be used against you when you move out, and at worst, the tiles will fall at some point, ripping the paint and potentially breaking the lights. The rules aren’t the same for Nanoleaf tiles and posters: blu tack will not suffice.

Think about the pattern and the arrangement
Arrange the tiles in the way that you most like, but be aware of the underside connectors. There aren’t connectors frequently on every spot of the underside of Nanoleaf tiles, so make sure your arrangement works and aligns properly between all tiles before committing to putting them on the wall.
As long as all tiles are joined with at least one connector each, they’ll work fine. Make sure the connector modules are firmly in place too, and work out a way to slot them in without much hassle (I simply slotted them into already placed tiles and slid additional tiles on top of them). Additionally, be aware that your layout may change if you flip the design when planning it.
To help you along your way, Nanoleaf offers a “Layout Assistant” in its free app, letting you not only arrange your tiles in the ways you’d like (connector modules included) but also allowing you to place your creation on your wall using your phone’s AR lens (this was a very cool part of the process).

There’s no room for error
When I was installing the Nanoleaf Canvas lights (which I did so with my good friend Claudia), we were pretty unimpressed with how few command strips were provided. There’s zero room for error, which means that you absolutely need to have your arrangement in order before you put it up. If you make a mistake, it’s not the end of the world (if you’re quick you can take the panel off the wall and place it again), but consider buying some more command strips.
Mistakes happen
Though there’s no room for error, you may make a mistake on the fly. There’s no shame in lifting your tiles up and quickly replacing them, especially if they’re in the wrong order or not connected to power, but be quick before you lose the strength of your command strips. This happened to us, but thankfully we were quick.
Be prepared to replace the paint
Unless you want repair costs to be deducted from your bond (in case the paintwork is damaged), renters with Nanoleaf tiles should be prepared to do some painting when you move out. Lifehacker has a great article on that, but do make sure you get the right paint.
Bluetooth and ‘thread’
The last thing I’ll warn you about is the connectivity of Nanoleaf lights. For light customisation, Nanoleaf tiles require a 2.4Ghz modem (5Ghz connections aren’t compatible). Nanoleaf bulbs require a Bluetooth connection to your phone or they can be connected to your modem via a “thread” network, available on some modems. When I switched to my Eero modem’s thread network, my Bulbs worked much faster, with less dropouts.
The connections on these lights aren’t perfect, though: when using Bluetooth connectivity on the Bulbs, the lights were often “unreachable” through the app or linked smart home apps (for some reason, HomeKit seemed to work better for me than Google Home). The canvas panels are also sometimes “unreachable”.
These problems can be resolved by power cycling the devices. Just be aware that you may have to get up and flick a light switch or turn the panels off and on again from time to time. Also, understand that you won’t be able to turn the lights off from outside the house.

That’s about it
We hope we’ve helped out at least a few renters who want to pick up some Nanoleaf tiles. If you think we should include something in this guide, shoot me a message.
Nanoleaf collection
Nanoleaf Lightstrip ($99.99) | Nanoleaf Bulbs ($39.99) | Nanoleaf Lines ($349.99) | Nanoleaf Elements ($429.99) | Nanoleaf Shapes ($189.99) | Nanoleaf Canvas ($349.99)
Comments