iPhone and Android smartphones have made it easy to talk in emojis and GIFs. They come built-in to the keyboard with a dedicated button — Android even has GIF search built directly into Gboard. But when you shift to working on your Mac or Windows PC, you might think you lose out on that ease. But actually, both Mac and Windows come with a built-in emoji picker, and Windows 11, like Android, has its own built-in GIF tool. It’s all there — you just need to know where to look.
How to add Emojis or GIFs in Windows
Windows 10 and Windows 11 come with their own emoji-picker. Windows 11 gets an updated tool with additional, and better-looking emojis, plus GIF support via Tenor. Use the keyboard shortcut Windows + ; (semicolon) and a floating window pops up above your cursor. You can browse emojis and GIFs and when you find something you like, click on it to insert it into your text box.
It’s the same with GIFs: Click the “GIF” button to switch to the GIFs section, then click the one you like to add it to your document.
How to add emojis or GIFs on Mac
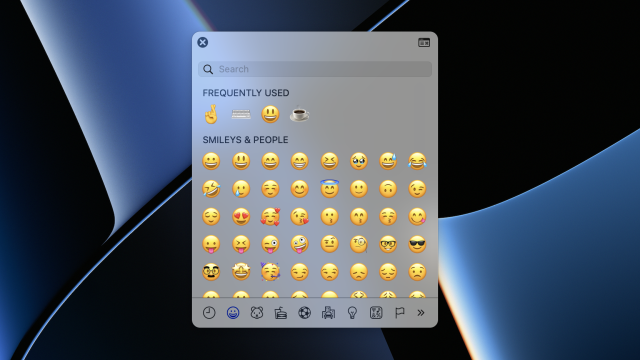
On the Mac, it’s a slightly different story. Mac has a powerful emoji tool built-in, but no support for GIFs. If you’re using a Mac that was released after 2020, you’ll find an Emoji key in the keyboard itself (doubling as the Function (Fn) key). Just press the key and the emoji-picker will show up; the keyboard shortcut Command + Control + Space will also do the same thing.
While there’s no official GIF support on the Mac, that’s nothing a free utility can’t fix — the GIF Keyboard by Tenor has a great menu bar utility app, so you can search, drag, and drop GIFs right from the menu bar.
Leave a Reply
You must be logged in to post a comment.