Your garden and potted plants can really benefit from a drip irrigation system. These systems reduce the time you have to spend watering your plants, can help keep fragile plants properly watered on hot days, and keep house plants watered while you go out of town for a long weekend. Many drip irrigation systems can be created with just a few simple tools and materials and can be filled with rainwater, making them simple and affordable. Here’s how you can make one.
Figure out which method you want to use
There are three main kinds of drip irrigation system:
- The wick method. This involves filling a container or multiple containers with water and then installing a wick, rope, or string that will use gravity to slowly move water from the container to the soil, keeping your plants hydrated over a period of time. This method can be used in raised beds, for potted plants, or even for individual plants that are right in the ground. You can use any kind of container that will hold water and which allows you to run a string from above the height of the soil into the soil to allow gravity to carry the water. Some people use empty plastic bottles, buckets, or pots.
- Buried container method. This simple drip system uses a buried container like a milk jug, a five-gallon bucket, or a barrel with small holes poked in the sides. After poking small holes in your container, bury it next to the roots of the plant or plants you want to water, leaving the opening a little bit above the surface of the soil so you can refill it.
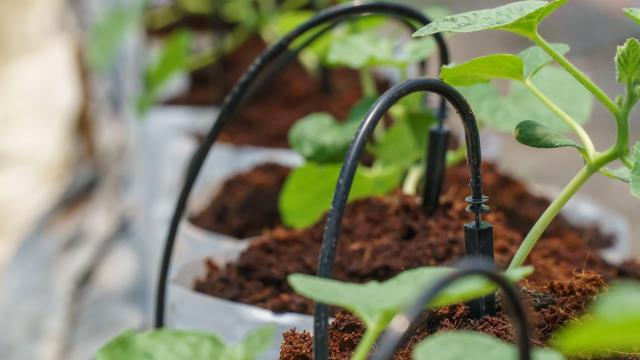
- Drip hose systems. The most common drip irrigation system is a gravity-fed drip hose. These can be constructed using a barrel or a five-gallon bucket, some PVC pipe, flexible hose material, a nozzle with a shutoff valve and gaskets, and a nut. To make the transition between the hose and the PVC you will also need an adaptor that screws onto your hose and some PVC glue. You’ll also need a drill for this project so you can drill holes in your PVC drip line, and to install your valve if your container doesn’t come with one.
There are also companies that specialise in making drip irrigation systems if you’d like to buy ready-made supplies or get a little inspiration.
Build and instal your drip line
Start building your drip line by sizing it for the area you need to water. If you’re watering a small area with potted plants, you can run a hose as your drip line. If you’re aiming for a wider area, you’ll need to cut your PVC pipe to the right length for your plants. Drill small, ⅛-inch to ¼-inch holes every eight inches or so, depending on how far apart your plants are, then connect your drip line to your container. If your container already has a nozzle, you can just screw your hose end into the nozzle on one end. If not, you’ll need to install your nozzle by drilling a hole the same size as the opening opposite the nozzle, then applying your gaskets, and screwing on the nut on the inside of the container, making sure there are no leaks.
To attach a PVC pipe for your drip line, glue your adaptor on the end of your PVC closest to the container, and then screw it into the hose. It’s important to follow the directions on the PVC glue to get a good seal. Finally, just fill your container and open your valve to get the water flowing.
Leave a Reply
You must be logged in to post a comment.