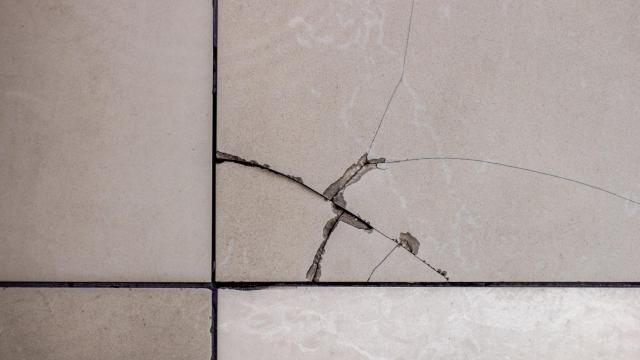
Tile is a wonderful and versatile floor and wall covering. Water-resistant, cool to the touch, relatively easy to clean and maintain, and, if properly installed, long-lasting. That doesn’t mean it can’t be damaged, though, and there is nothing — nothing! — more infuriating than a single cracked tile in a field of perfect tile work.
The rage is even stronger if the crack is the result of a dumb accident, like a dropped tool or ill-advised indoor golf practice. Even if you are willing to overlook the crack, you really shouldn’t — cracked tile can have sharp edges that can injure bare feet and hands, and a damaged tile in a damp area can allow water intrude into your walls or subfloor.
But unless you strongly suspect your cracked tile is due to a structural issue or improper installation, you don’t have to rip out an entire wall or floor of tile to fix one treacherous culprit. With only a slight affinity for tools, you should be able to replace that one goddamned cracked tile ruining your aesthetic.
Take it slow
Resist the urge to grab a hammer and smash the tile out of the wall. Yes, that would be very satisfying! Until you cracked more tiles and grout lines in your exuberance, then realised you’d also undermined the wall under the tiles or the thinset adhesion. To create you must destroy, yes, but not like that.
Second, make sure you have replacement tile to work with. You did save a few tiles from the reno, didn’t you? If not, or if the tile work predates you, you’ll have to hunt down a replacement tile. Be warned: Even if you find the same brand and colour of tile, colour and finish can vary wildly across different lots. And if your existing tile has been there a while, it may have uniform wear that will make the new one very noticeable, which can be as distracting as a damaged tile.
Compare your replacement tile with the existing installation before doing anything. If necessary, you might be able to have your tiles replicated from the broken shards, but that ain’t cheap, and can take a little time. But this might be the only way to get a perfect match, especially if your tile has been discontinued.
Once you have a tile in hand, grab some supplies: a grout saw, painter’s tape, a drill, a hammer and chisel, and some adhesive.
- Remove the grout. Use the grout saw to saw away the grout around the edges of the broken tile. (You can also use a multi-tool with a grout saw attachment.) Be careful not to scratch any of the good tile — take it slow and steady.
- Tape the tile. Use painter’s tape to cover the undamaged tiles around the broken one. This will protect them from damage.
- Drill the tile. Using an appropriate 1/4-inch drill bit (e.g., a ceramic bit for ceramic tile, a stone bit for stone tile), make some holes in the pieces of the broken tile, being careful not to penetrate the substrate. This makes it easier to pop the broken pieces out.
- Chisel. Using a hammer and a cold chisel, tile chisel, or honestly any flat-edge tool (like a screwdriver), chisel out the broken tile. Again, take it slow — you don’t want to damage any of the surrounding tiles. Once the tile itself is gone, go back and chisel out the thinset or mastic that’s left behind until you have a nice clean substrate exposed.
- Set the tile. Clean out the hole, apply thinset or other adhesive, butter the back of your replacement tile, and set it. Once it is ready, apply grout, and you’re done.
If you worked carefully and had extra tiles, your work should be invisible. Now all you have to do is find a new place to practice your hammer juggling.
Leave a Reply
You must be logged in to post a comment.