Like the Trash folder on a Mac, the Recycle Bin seems like a pretty important part of Windows. If you accidentally delete something, you can always get it back (unless you’re a Shift + Delete person). But it’s time to question the need for a Recycle Bin on your Windows machine, because far too often, it becomes yet another folder where clutter accumulates for no good reason. We’ve previously shown you how to automatically clean up your Recycle Bin, but if you want to go further, there is a way to remove it, too.
Why you should get rid of the Recycle Bin
Getting rid of the Recycle Bin isn’t for everyone, but if you aren’t storing much data locally, you may not actually need it anymore. These days, most people stream music and movies, have online backups for photos, and use services like Google Docs or Microsoft 365 (the latter of which saves Office documents to OneDrive by default). Cloud storage services have a trash folder of their own, which you can use to recover anything you accidentally deleted. When you realise that most of the data on your computer is already being backed up online, the need for the Recycle Bin begins to fade into obscurity.
What to do before deleting your Recycle Bin
Of course, it’s important to make a couple of changes to make sure that you’re ready for the transition to a Recycle Bin-free world. You probably want to change your browser’s download file location to your Google Drive/OneDrive folder, and you can make the same change for other apps that you use to download or save files, like WhatsApp, Telegram, Slack, Photoshop, and so on to ensure that you have a copy of your data on the cloud in case you accidentally delete something.
You should also invest in a computer backup solution. For most people, an online backup tool such as Backblaze is the easiest way to get started. Alternatively, you could purchase an internet-connected external drive such as WD My Cloud Home and set up automatic backups to minimise the chances of losing data.
How to remove the Recycle Bin from Windows
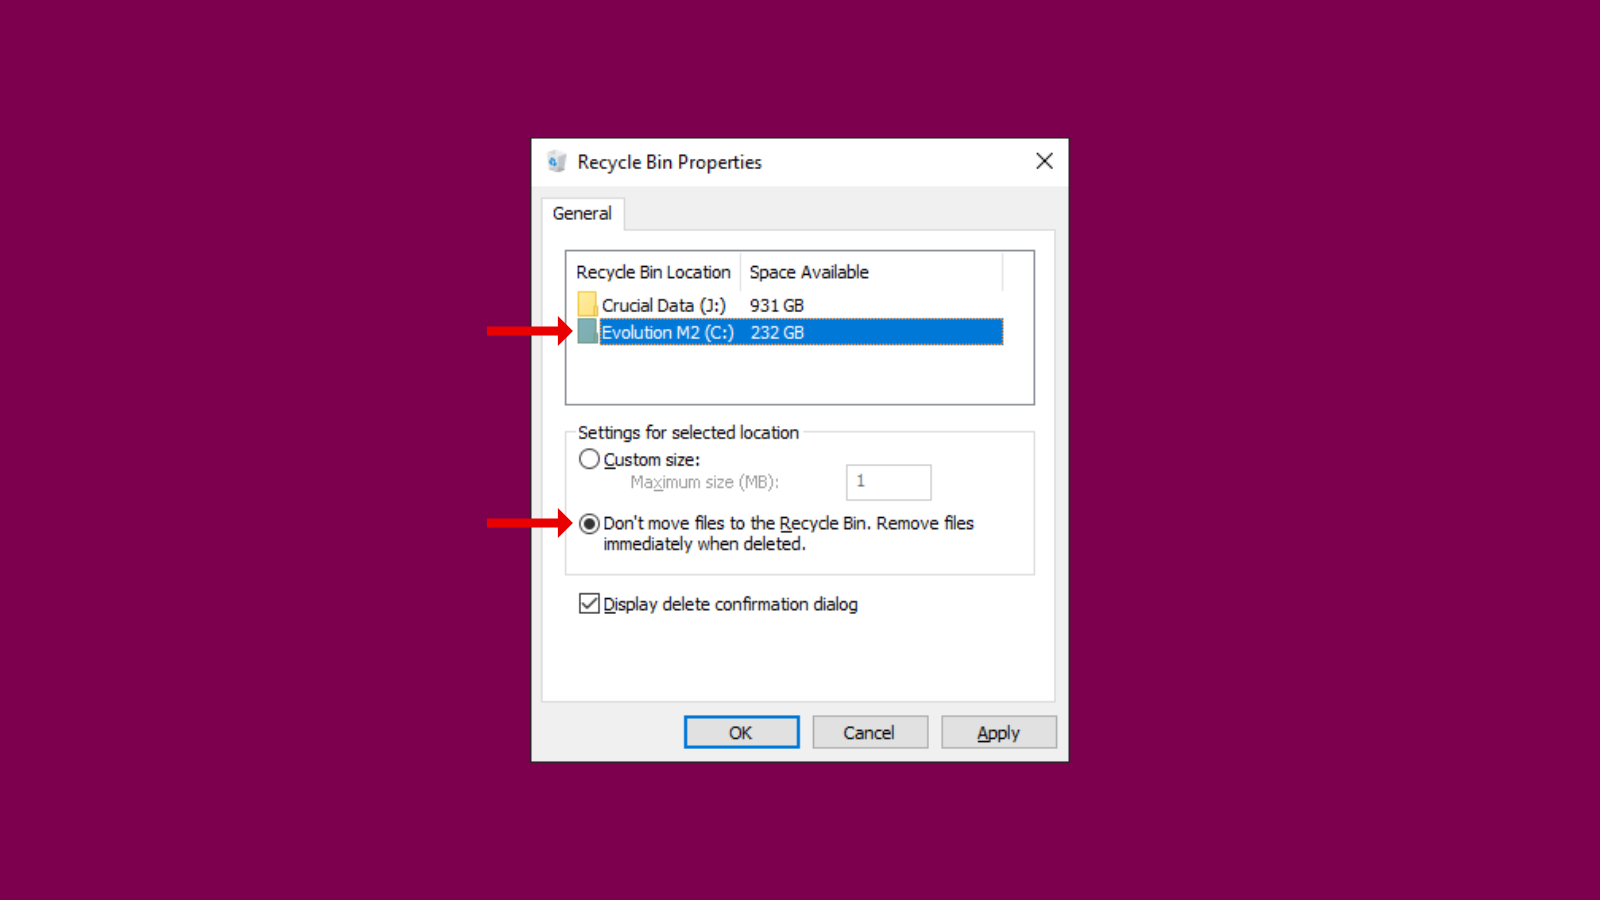
Now that you’re ready for the post-Recycle Bin world, you can go to the desktop on your Windows machine and right-click the Recycle Bin. Select Properties, which will list each drive on your computer. If you want to bypass the Recycle Bin on C Drive, select it.
Under Settings for selected location, you should choose Don’t move files to the Recycle Bin. Remove files immediately when deleted. Click OK.
You can repeat this process by selecting all other drives on your computer. Alternatively, you can bypass the Recycle Bin for some drives and let the others be.
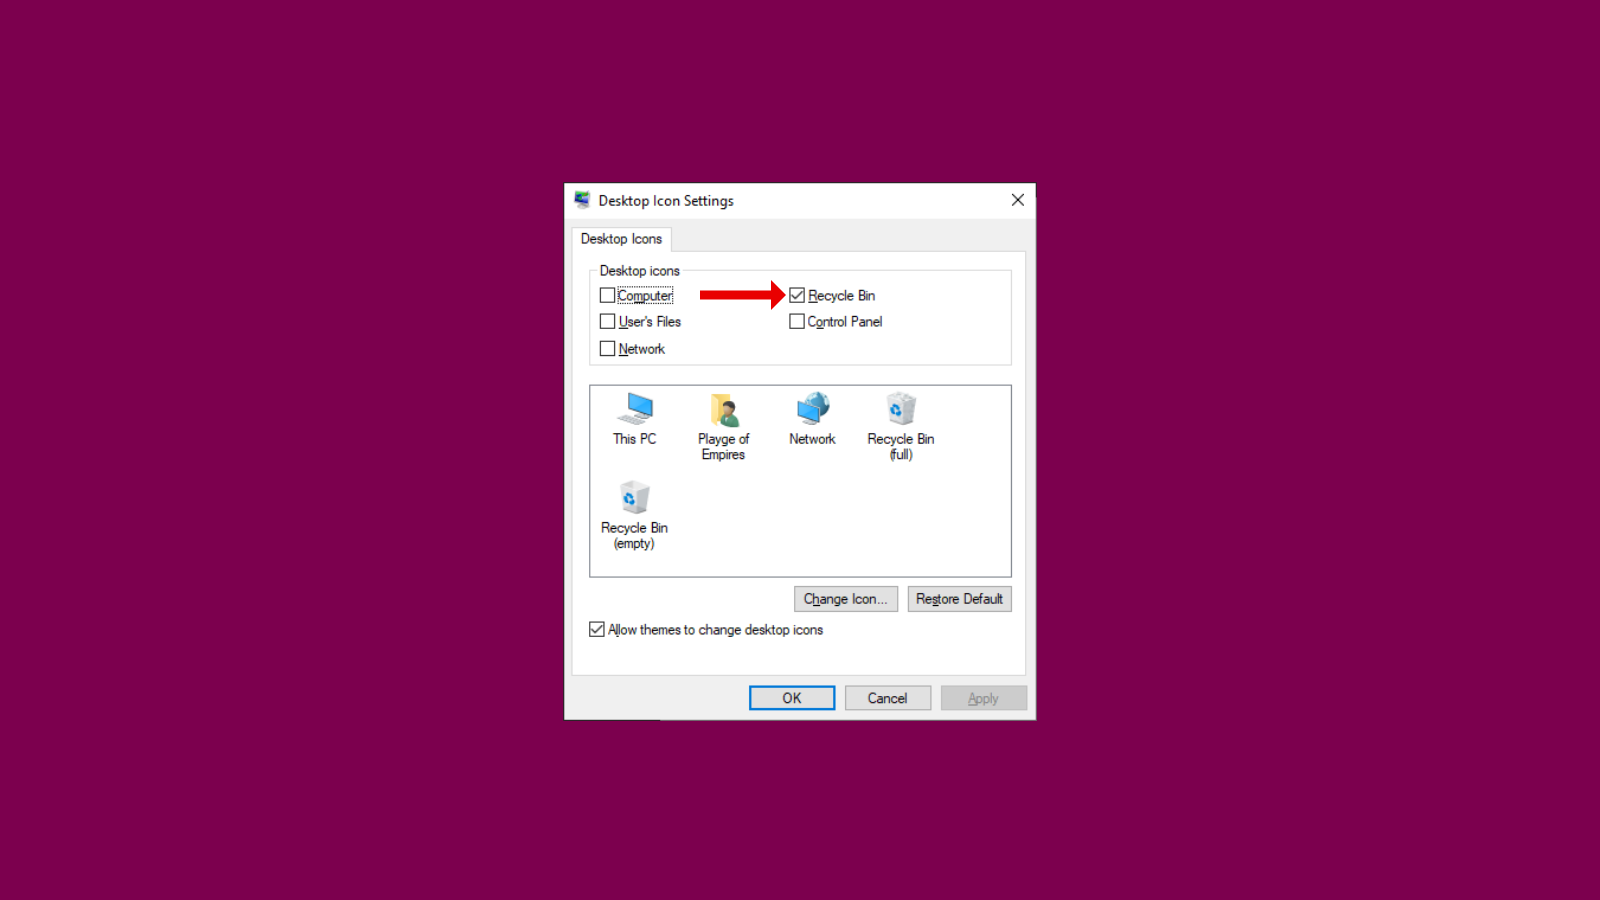
The final step is to hide the Recycle Bin from your desktop by right-clicking an empty space on your desktop and selecting Personalise. This will open a settings page on Windows. In this window, select Themes in the left pane, and then click Desktop icon settings. This option is located on the right-hand side of the page, under Related Settings. In the Desktop Icon Settings window, uncheck Recycle Bin and click OK. This will remove the Recycle Bin from your computer. Live free and prosper.
Leave a Reply
You must be logged in to post a comment.