Adding walkways to your garden can make it more inviting and cut down on your weeding and mowing. Paying someone to install pavers isn’t cheap, but there are ways to DIY beautiful, low maintenance garden paths that won’t require you to rent heavy equipment or break your budget. Here are some ideas to get you started.
Gather your tools and materials
All you will need to get started are a shovel, a rake, the material you’ll use to make the path, some edging material, and landscaping cloth and stakes. A 2×4 or a similar piece of scrap lumber and a light sledge or heavy hammer will also help. Once you have decided on where you want your paths to go, you can use these tools to accomplish most of the job in a single day.
How to figure out how much material you’ll need
To plan out the shape of your walkway, use string, a hose, or rope to map out on the ground. This will help you visualise the length, width, and placement of your path before you start doing and digging. Once you’ve accomplished this step, you can use this free calculator to determine how much mulch or gravel you’ll need to complete the job.
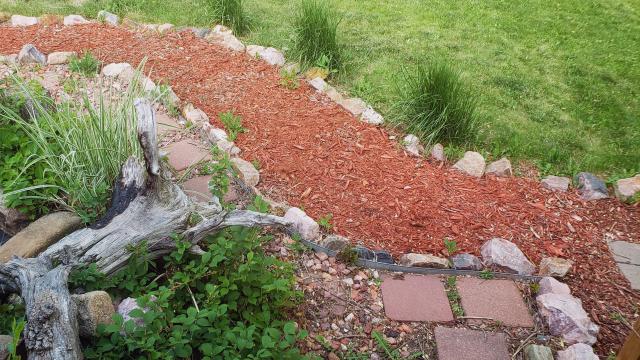
3 straightforward DIY garden paths
Mulch and cedar pathway: A mulch pathway is a good option because it’s cost effective and won’t impact the surrounding soil too much. To create a mulch path edged with 12-inch cedar shingles, you’ll need enough mulch to cover the area of your path and a length of landscaping fabric long enough to cover the area, and some cedar shingles. Cedar is a great choice to edge a path because it is naturally pest resistant and will hold up well against moisture. To define your path, use that scrap of wood and your small sledge to drive the shingles vertically into the edges. Next, lay down your landscaping fabric and stake it down. Finally, cover the pathway with mulch.
Salvaged brick and gravel pathway: Another simple, cheap walkway — especially for high-moisture area that would benefit from additional drainage — is to use salvaged brick and gravel. For this project, you’ll need some landscaping cloth, enough bricks to define your path’s edges, and enough gravel to fill the space between. Lay your landscaping fabric down, then set the bricks along the edge to create a simple border. (The cloth will help to contain the gravel and discourage weed growth.) Next, spread your gravel evenly between your two rows of bricks.
Stepping stones with a natural border: To create a path with a more whimsical look, use stepping stones or rounds cut from tree branches in place of edging and fill in the space between with gravel or mulch. You can allow the edge of your path to be organically defined by the shape of the ground. Lay down your landscaping fabric first and stake it down. Set out your stepping stones along the predefined edges of your path, then add the gravel or mulch around the stones.
Use upcycled materials for edging
Another way to create a defined edge for your path while keeping your budget in check is to use upcycled materials. Upturned glass bottles, broken china, or terra cotta pots are all viable options, but whatever border material you choose will work best if you place landscaping fabric beneath the pathway to keep weeds from peeking through.
Leave a Reply
You must be logged in to post a comment.