
If you frequently keep running out of storage space on your computer, it’s past time to take just a few steps to sort your problem out. Many of us tend to accumulate tons of junk on our computers, and while you might think to buy more storage, you should also consider just taking a few steps to teach your computer how to clean up your mess for free.
Use a built-in Windows feature to delete junk

Windows ships with a feature called Storage Sense, which can take care of clearing out unwanted files. It can easily be configured to run on a schedule, and it can also run itself whenever your computer is running out of storage space. Storage Sense will automatically delete old files in the Recycle Bin, get rid of temporary files, and help you identify which types of files are occupying a lot of space on each of your drives. To set it up on your Windows machine, go to Settings > System > Storage. You’ll see more information about large files or folders on the right pane of the window.
How to configure Storage Sense in Windows
You can configure Storage Sense by clicking the option labelled Configure Storage Sense or run it now. You can click the “Off” button below Storage Sense to enable it (the button changes to “On” when enabled). Under Run Storage Sense, select when you want to automatically clean up your computer. You can also select During low free disk space to run Storage Sense when your computer is running out of storage.
This page has a few other nifty options such as Delete temporary files that my apps aren’t using, which removes unwanted files. You can also click the drop-down menu below Delete files in my recycle bin if they have been there for over. This lets you choose an option between one and 60 days, and it’ll automatically clear the recycle bin in that interval.
Another useful option is Delete files in my Downloads folder if they haven’t been opened for more than. This lets you choose if you want to delete unused files from your downloads folder automatically, and you can choose a time interval between one and 60 days.
How to automate your disk cleanup

You can also use Windows’ Disk Cleanup utility to free up storage space automatically. This method requires you to type one simple line of code in the Command Prompt, but don’t let that deter you because it’s just as easy as the previous method. You’ll just need administrator privileges on your account for it to work.
Press Windows Key + X and select Windows Powershell (Admin) from the menu. This will open the command prompt, where you can type this command: cleanmgr /sageset:9000. You can change the number to a different value if you like, as long as it’s any integer from zero to 9999.
This will open a dialog box, where you can select which files you’d like to automatically clean up. When you’ve selected the files you need, click OK and close the Powershell window. Use the search box in Windows to open Task Scheduler on your computer and go to Action > Create Basic Task. Give this task a name and description, and follow the on-screen prompts to set up a schedule for this (daily, weekly, monthly, when the computer starts, etc.).
When the schedule is decided, you’ll reach the Action tab. Here you can select Start a program and on the next page, type C:Windowssystem32cleanmgr.exe, click Next, check if the schedule looks good, and click Finish. Now Disk Cleanup will automatically remove the specified files according to the schedule you set up.
How to remove files from specific Windows folders
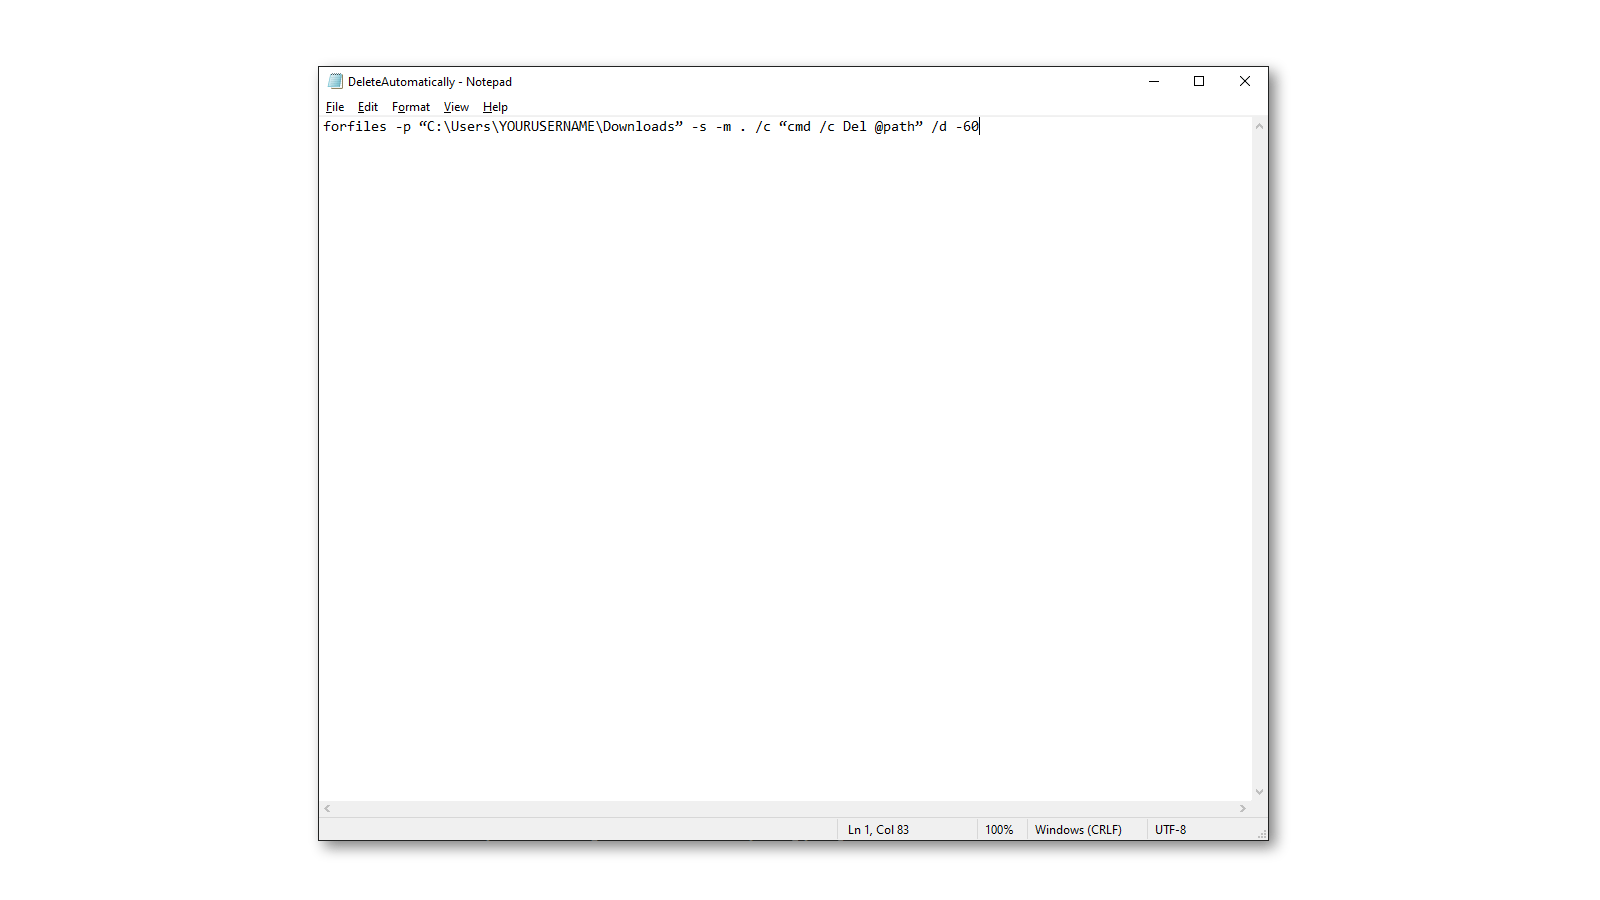
If your storage space issues stem from specific folders like Downloads or Documents, then you can use an alternative method to get rid of them. Open Notepad on your PC and paste this command in a new note: forfiles -p “C:UsersYOURUSERNAMEDownloads” -s -m . /c “cmd /c Del @path” /d -60.
This has been pre-configured to remove all files older than 60 days from the Downloads folder on your computer. You can replace YOURUSERNAME with your account’s username, and you’re good to go.
How to customise your command prompt
To change which folder is automatically cleaned up, you can change the path. That’s the part that reads C:UsersYOURUSERNAMEDownloads. You can open any folder in Windows Explorer and copy its path from the address bar. The -s bit in the command asks your automation to also consider sub-folders within the Downloads folder when it’s deleting files. You can remove this if you don’t want to delete anything in sub-folders.
The most interesting part is the -m *.* parameter, which lets you select specific file types from the folder. You can change this to -m *.jpg* to only delete JPG files, or change it to .pdf, .png, or any other file type you want to target. Note that leaving *.* in the command asks it to remove all files from the folder.
Finally, the term /D lets you decide how old a file should be for it to be considered for deletion. /D -30 means it’ll delete files older than 30 days, and you can change the number to anything you prefer.
This should allow you to customise the command to your needs; when you’re done, go to File > Save As and save the file as DeleteAutomatically.bat. The filename itself doesn’t matter much, but the .bat extension does, so be sure to avoid saving this as a regular txt file.
You can now use Task Scheduler once again to run a program at a fixed interval, as described in the previous section. When selecting the program, you can use the Browse option to locate the file called DeleteAutomatically.bat or whatever you named it.
Leave a Reply
You must be logged in to post a comment.