
Ideally, you wouldn’t store any sensitive personal information in the cloud. There’s always a risk your online accounts will get hacked, so in theory you’re better off storing all your documents and data offline. But that’s not really how the world works anymore, and the convenience (or necessity) of maintaining easy access to financial records, IDs, and medical documents often means taking a calculated risk.
But lots of people risk more than they need to, and end up storing quite a lot of personal information on a cloud storage service like Google Drive, iCloud, or OneDrive. If you do too, consider better protecting the data by encrypting it with a password. We’ll show you a few ways to encrypt sensitive files before you upload them online.
Password-protect your files before uploading
For most people, adding a password to their files offers sufficient protection. There are various easy ways to password-protect your files, but the most convenient is to use apps such as 7Zip or Keka, which let you compress multiple files into a single archive you can easily protect with a password. Your password-protected file can be accessed on any device; you just need the password to view its contents. This method works best if you have lots of files you want to encrypt quickly.
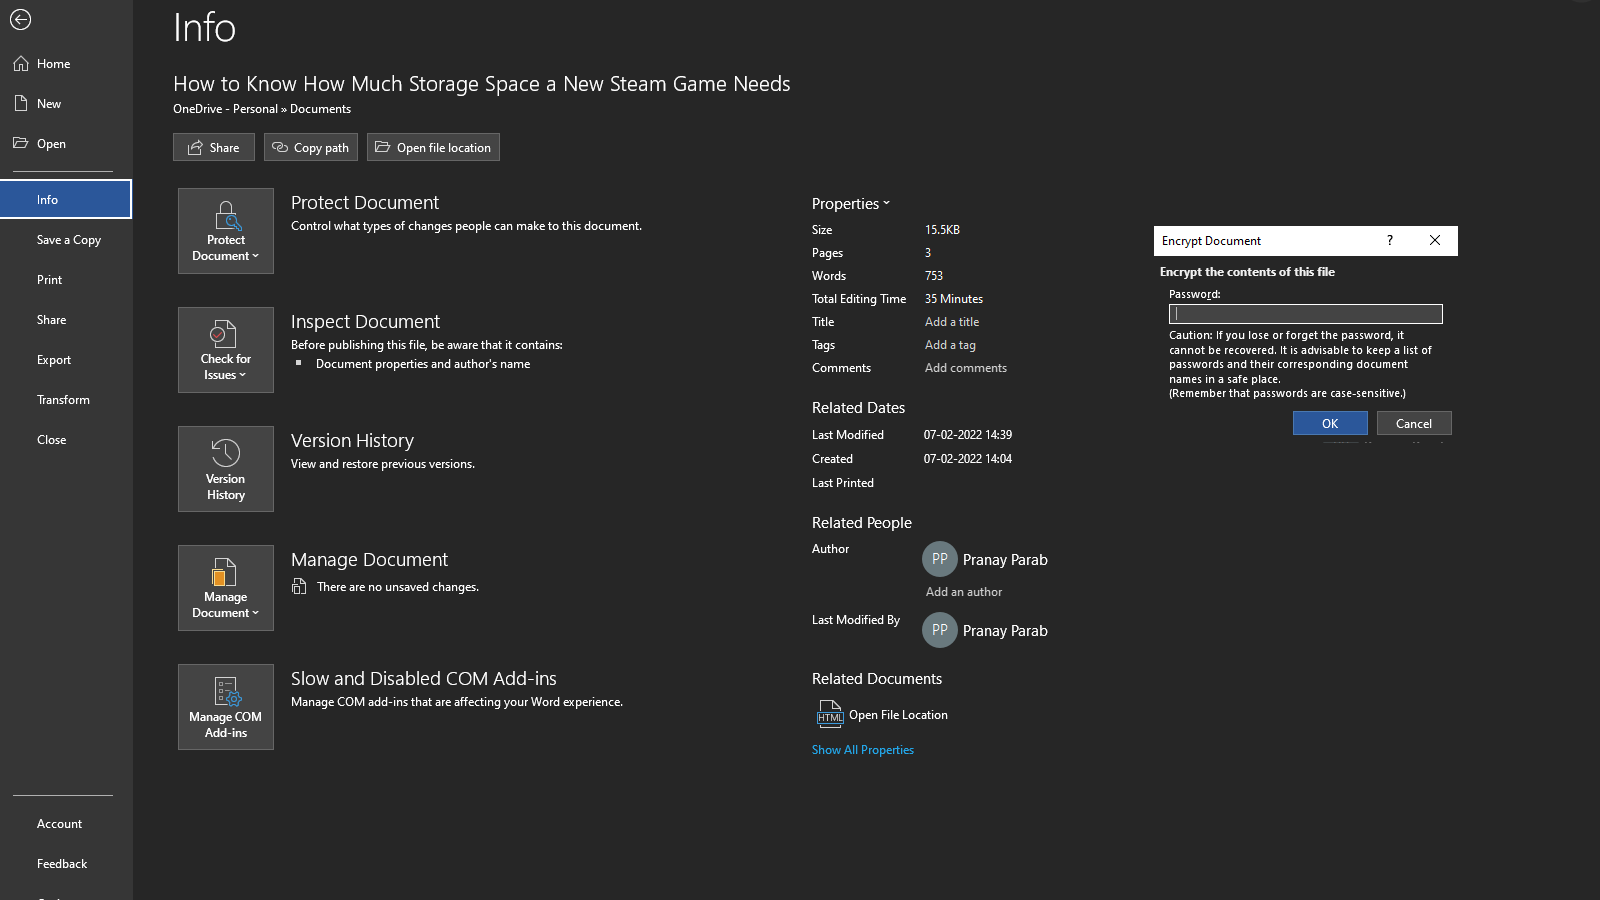
If you’re exclusively dealing with documents of only one file type, you may not need to use a different app to encrypt them. For example, if you’re creating sensitive doc files using Microsoft Word, go to File > Info > Protect document > Encrypt with a password. You can use a similar method with your preferred PDF app to encrypt those types of files. Be careful not to lose these passwords though — and consider this another good reason to consider using a password manager.
Store files directly in a password manager
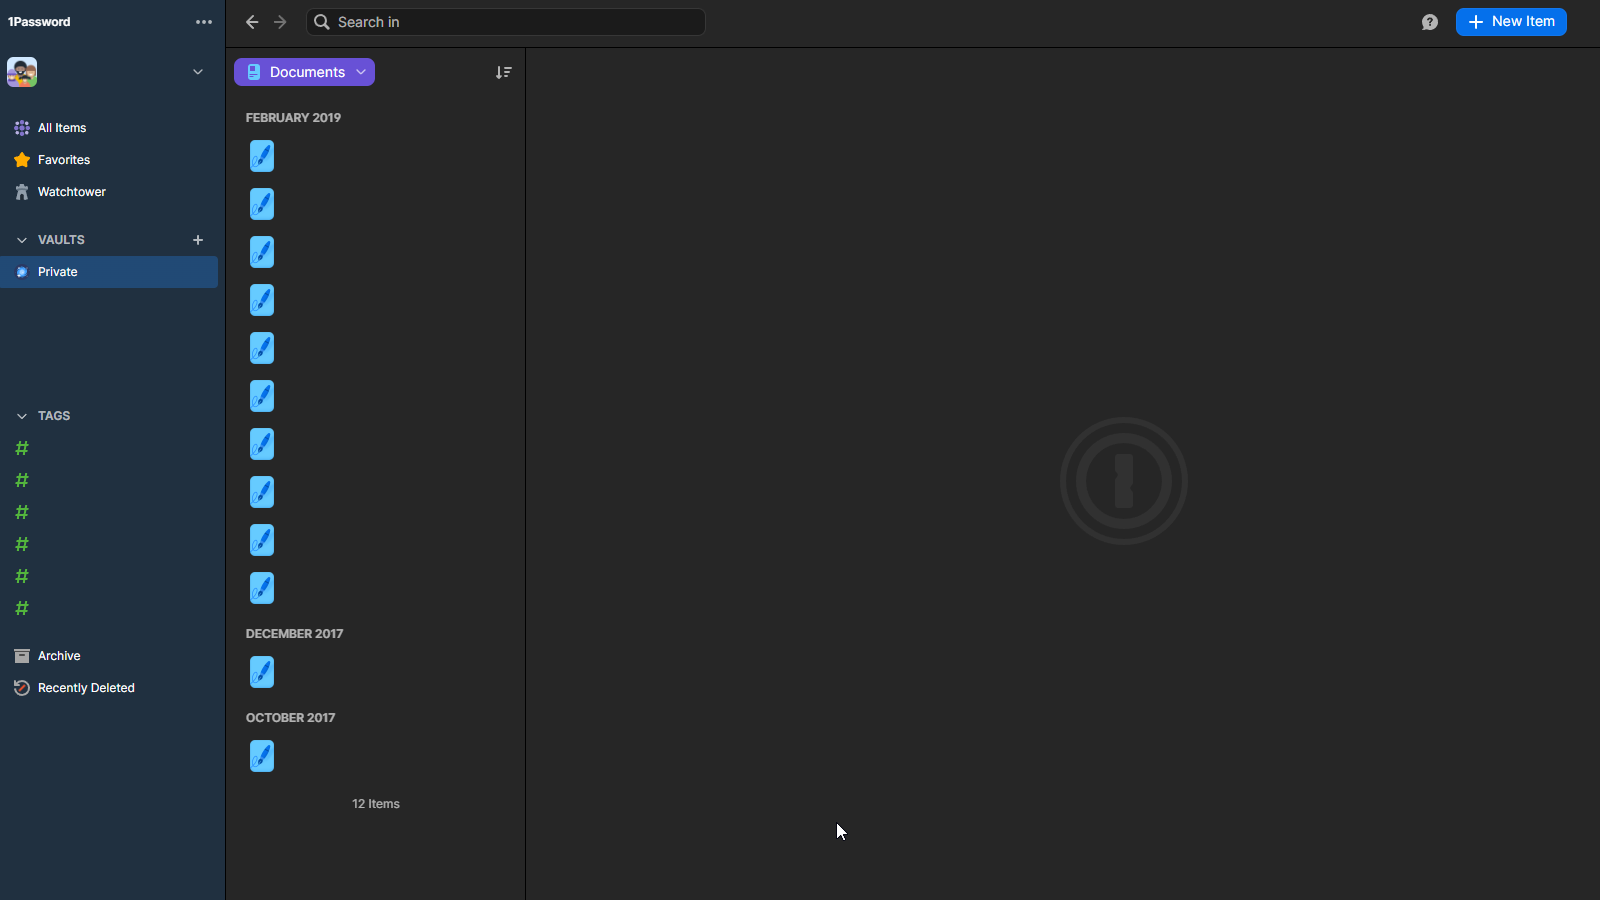
Password managers such as BitWarden or 1Password offer up to 1GB of encrypted file storage on their premium plans. If you’re already paying a subscription fee for a password manager, it’s worth exploring this option as a way to store sensitive documents. This way, you don’t have to remember or store additional passwords to access them; the master password for your password manager app is all you need. Bitwarden lets you access this feature on plans starting at $US10 ($14) per year, while using it on 1Password will require a plan that costs $US30 ($42) per year.
Create encrypted vaults in your cloud storage service
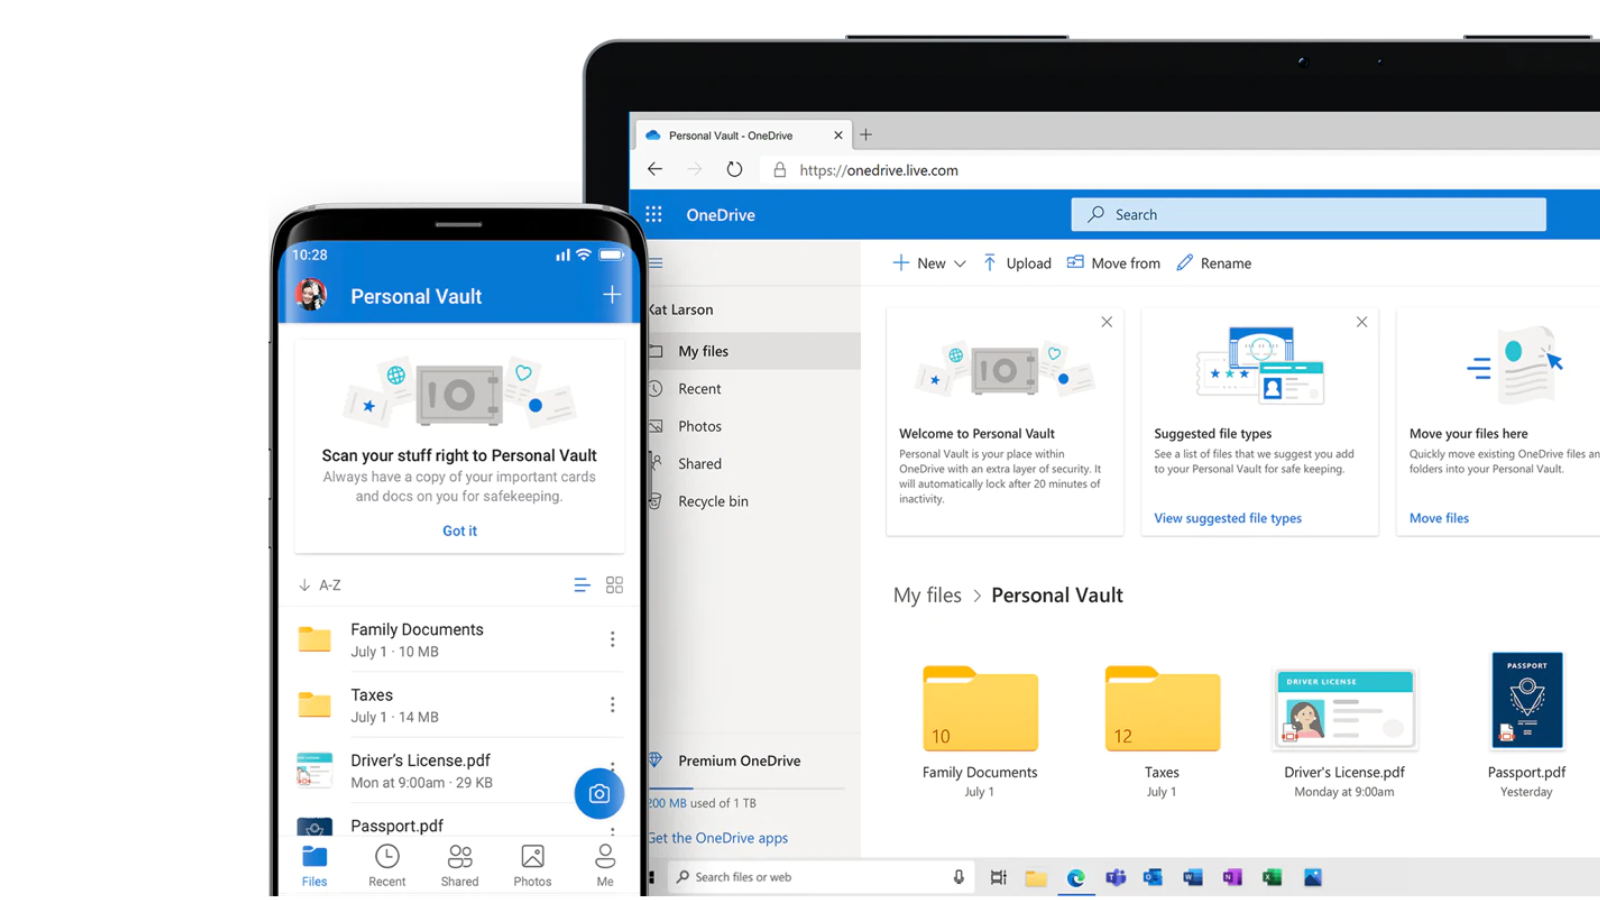
Dropbox Vault and OneDrive Personal Vault allow you to create you an encrypted space for your most important files. You’ll have to use an additional password or a numeric PIN to access the information stored in these folders. A OneDrive Personal Vault is available for free, but you can only upload three files into it. To get around this restriction, create a .zip archive containing as many files as you need to store (and go ahead and protect the .zip file with a password too). This limitation is removed on the paid tier for OneDrive. Dropbox Vault is only available on the paid tiers for that service.
Create encrypted folders on your computer
If you’re using a cloud storage service that lacks encryption, you can create an encrypted folder yourself for free. On Windows, use 7Zip to get the job done fast. Right-click any file or folder and select 7-Zip > Add to archive. Under the Encryption section, you can type and confirm the password before clicking OK to create the archive.
On your Mac, the built-in Disk Utility app also lets you do this for free. Use Spotlight Search (Command + Spacebar) to search for and launch Disk Utility. Then navigate to File > New Image > Image From Folder. You can then select any folder on your computer, and then pick 256-bit AES encryption from the drop-down menu next to Encryption. Disk Utility will ask you to type and confirm the password. Once you’ve done that, you should also select where you’d like to store the folder from the drop-down menu next to Where. After this, under Image Format, choose Read/Write, and click Create.
This will create a disk image (.dmg) file, which can be opened easily on any Mac (as long as you have the password). The dmg file is a password-protected copy of the original folder, so remember to delete the original folder, which will be accessible without a password.
Use third-party encryption apps
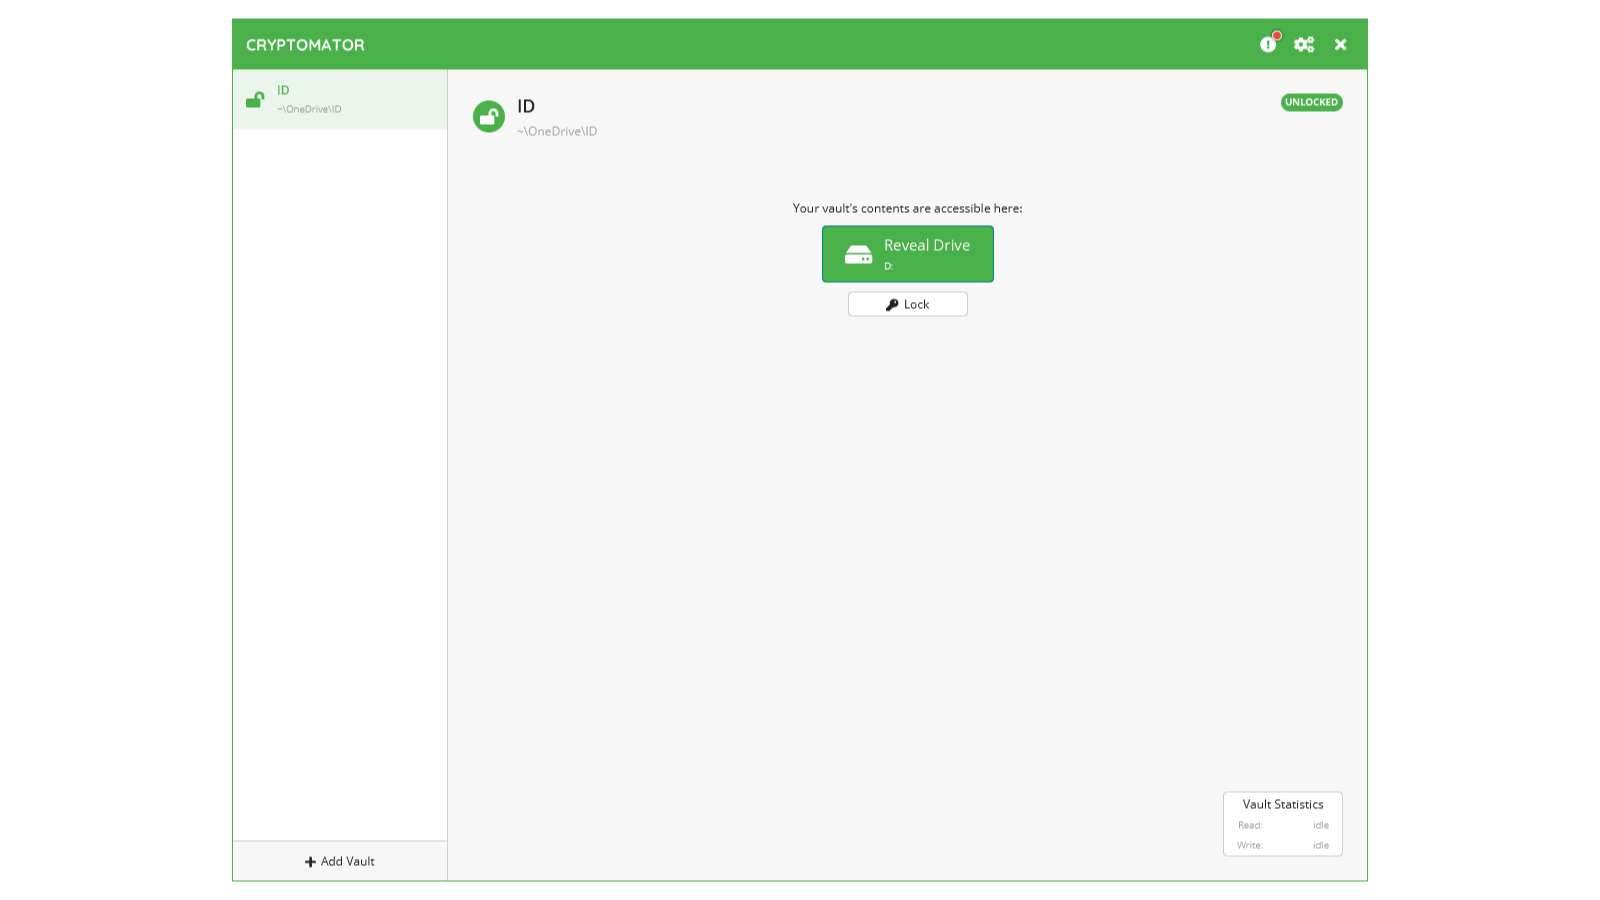
This method is probably the least convenient and most secure. Third-party apps such as Cryptomator and Boxcryptor allow you to create a secure storage space on your computer, and allow you to access these files on any device. Both services are compatible with popular cloud storage services such as Google Drive, OneDrive, Dropbox, and iCloud Drive.
Install the app for Cryptomator or Boxcryptor on your computer and use it to quickly encrypt any folder in your cloud storage services. For example, if you have a folder containing scanned copies of all your ID cards on Google Drive, you can add it to the app, and it’ll password-protect the folder.
If you want to access this folder on any other device, you’ll have to install the app on that device (including on smartphones), and enter the password to access it.
Even though this is the best solution from a security standpoint, you should only use this if you’re ready to troubleshoot minor issues. We encountered problems when using Apple’s Files app, which would sometimes not allow us to access an encrypted folder on an iPhone, while Windows worked more smoothly.
Leave a Reply
You must be logged in to post a comment.