If you’ve been over to your local markets or browsed a couple of shops on Etsy, you may have noticed a rise in what’s called “epoxy resin art” in the form of beachy chopping boards, marble trays and coasters.
Unfortunately, many of these pieces — while stunning — can cost you a good arm and leg, especially if they’re handmade by a resident artist. Some artists may charge $200 or more, when a single bottle of resin can cost as low as $30.
Resin art is surprisingly easy to DIY and it’s a fun crafting activity to spend with friends or share with little ones. You can even hand them out as gifts for a special one-of-a-kind birthday or Christmas present.
Recently, Logan Paul sparked controversy online thanks to a certain resin art home project he completed with a collection of rare Game Boys. While the coffee table he created looked cool, many were appalled that he ruined 15 still operable handheld gaming devices. On a positive note, Paul’s gaming-inspired resin project is a great example of one of the many great things you can achieve with epoxy resin.
What is epoxy resin?
Epoxy resin is a two-part adhesive that usually consists of mixing liquid resin with a matching hardener. When combined, the two start a chemical reaction that generates heat and takes several hours to harden and cool down. You usually need to mix the resin and its hardener in either a 2:1 or 4:1 ratio.
For the purpose of arts and crafts, it’s best to go with a high viscosity (also known as laminating) resin that features a consistency similar to honey.
This resin kit for $89.62 is a great way to get a quick start. It includes one clear bottle of resin, transparent hardener, 12 colour pigments, three packets of gold leaf, moulding trays and an array of tools. You can also get this starter kit for $35.99 if you want to begin with more resin (but less tools).
Make sure you wear protective equipment, including protective gloves, eyewear and an apron before starting any resin project. For your safety, please ensure you work from a well-ventilated area and avoid contact with your skin and eyes.
If you’re convinced this is your next big hobby, read on to discover some easy 10 minute crafts you can do at home.
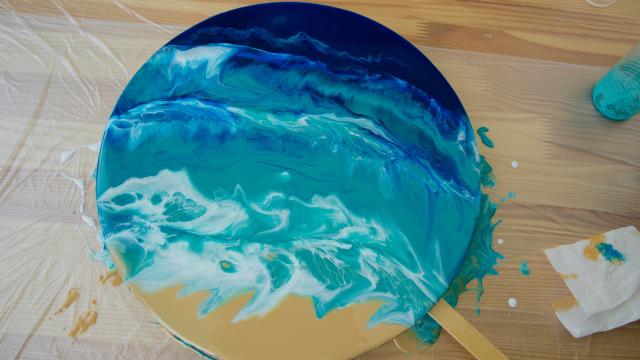
A sea foam-inspired cheese or chopping board
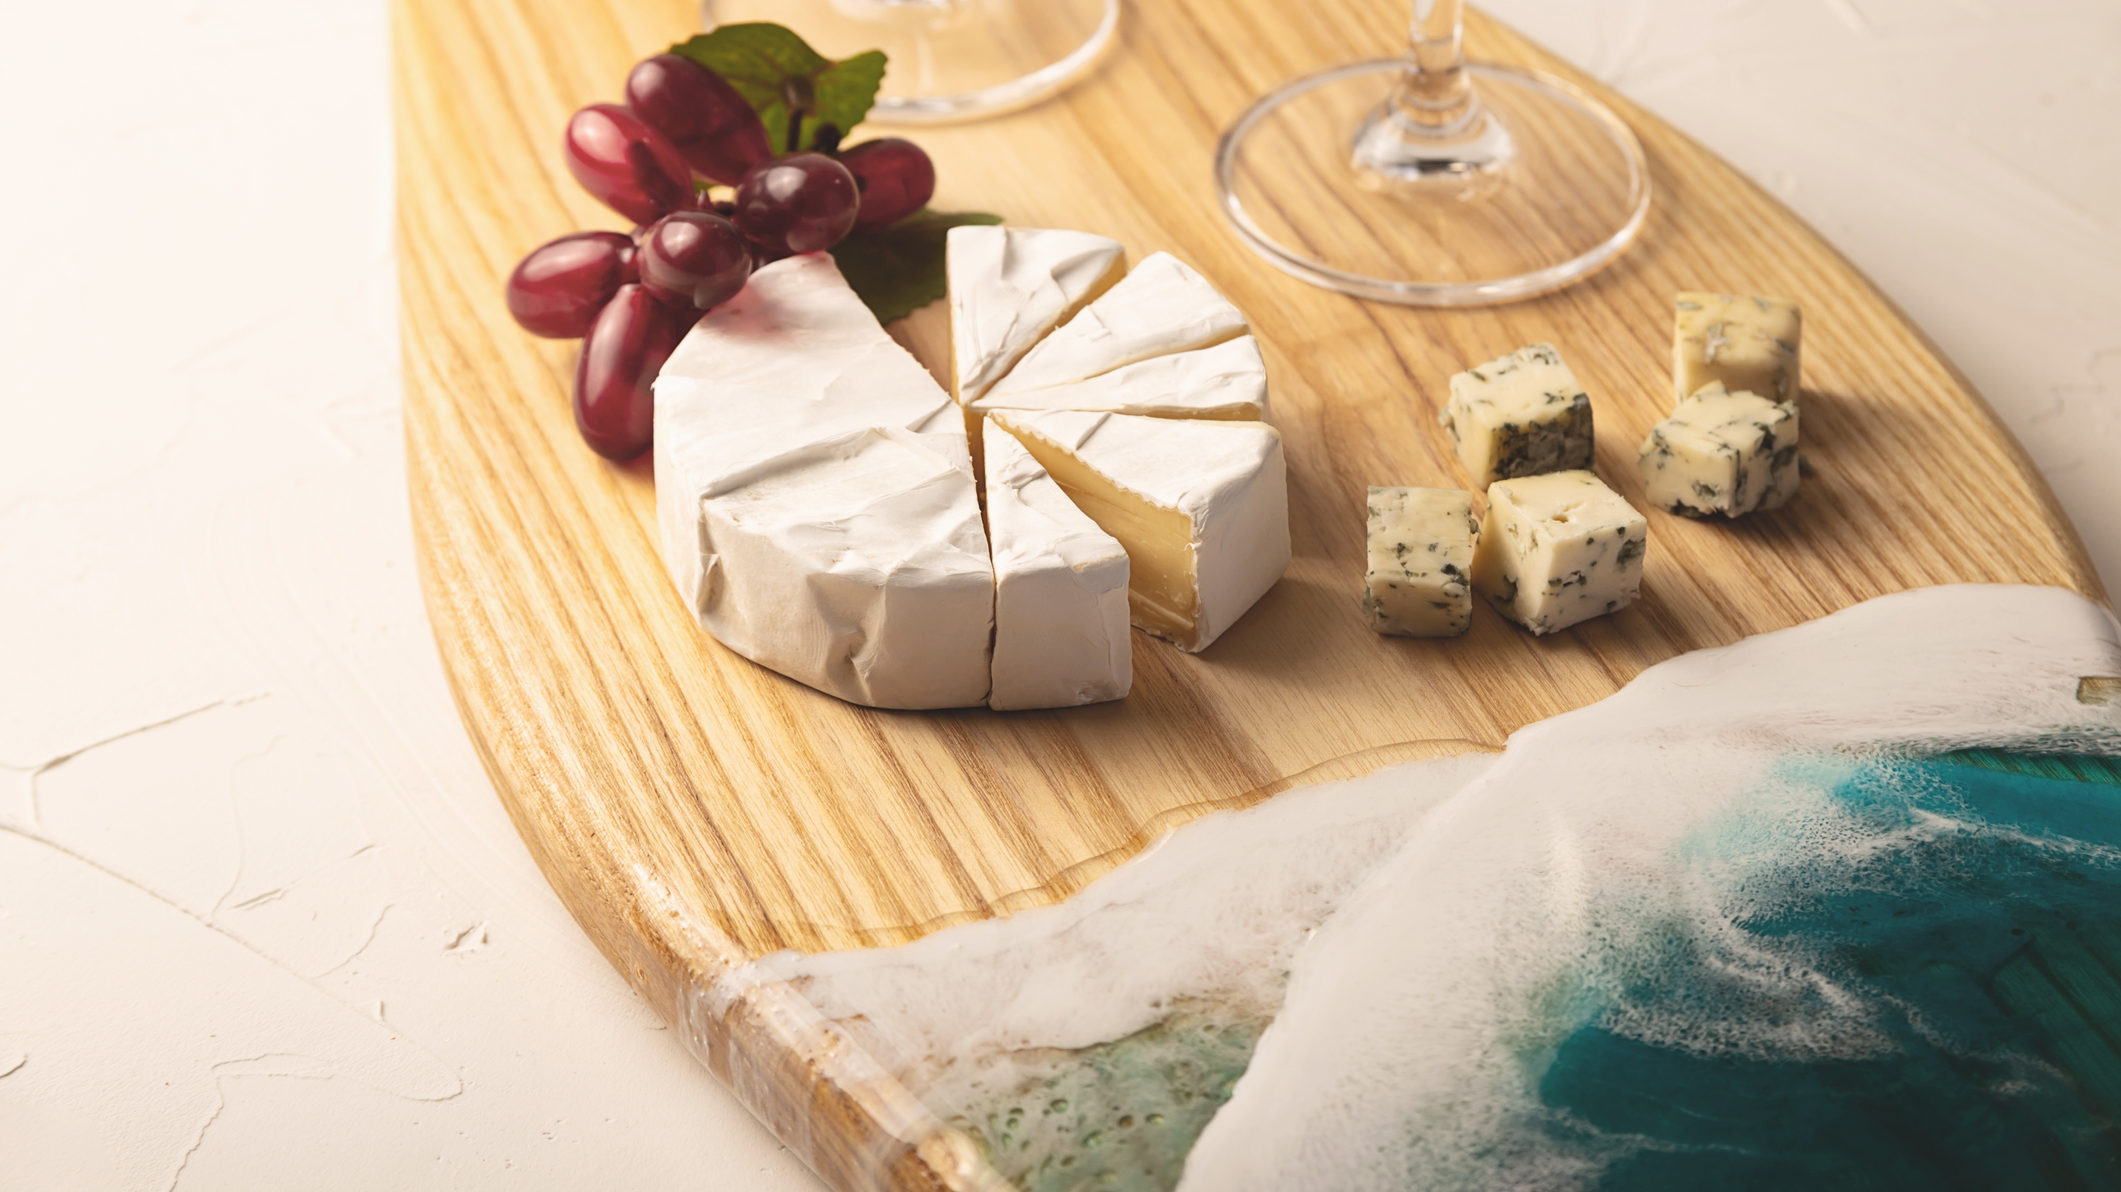
Every time we go to the local farmer’s market, there’s always that one stall that stocks beautiful, sea foam-inspired resin chopping or cheese boards. Here’s what you need to do if you want to recreate one at home.
What you need:
- A cheese or chopping board of your choice
- A heat gun
- Stirring sticks
- Measuring cups
- A sheet of parchment paper to protect your workspace
- Liquid resin and hardener
- Different coloured pigments
Directions:
- In a jug or measuring cup, use your stirring sticks to mix the liquid resin and hardener until fully combined using your stirring sticks. Follow the instructions on your bottle to ensure you have the correct ratio.
- In two to three separate cups, equally divide the epoxy resin.
- Add your chosen coloured pigment to each cup and stir to combine. If you want to create a sea foam-inspired board, you’ll need to mix separate cups of dark blue, light blue and white cups of pigment. Make sure you keep one cup of clear resin. If you’re feeling creative, try out a pastel pink and white combo to recreate Lake Hillier from Western Australia.
- Taking your dark blue pigment, start at the base of your board. Slowly pour the resin in a curvy line, resembling a wave.
- Repeat with the lighter blue pigment just a notch higher up on your board.
- Take out your heat gun and blur the lines where the dark blue and light blue pigment meet. You can also use a gloved finger to blur the lines if that’s easier for you.
- Take the white pigment and carefully pour lines of white where you think it looks best. This is to create your waves. Add some clear resin after the light blue part and mix in a line of white pigment, which will be your sea foam.
- Once you’re happy with your placement, pick up your heat gun again and use it to push the white and transparent pigment in one direction.
- When you’re all done shaping your waves, leave your resin cheese or chopping board to sit untouched for about 2-3 days until it’s cured (or set).
Check out this YouTube tutorial here for guidance.
A resin flower vase

One can never have too many flower vases. Or, if you have a love of plants, why not combine two hobbies into one? It turns out propagation and resin art can go hand in hand, so here’s how you can get started.
What you need:
- This plant propagation station or flower vase mould
- Stirring sticks
- Measuring cups
- A sheet of parchment paper to protect your workspace
- Liquid resin and hardener
- Your choice of glitter, gold leaf, dried flowers, fake butterflies or sea shells
- (Optional) Different coloured pigments
Directions:
- In a jug or measuring cup, use your stirring sticks to mix the liquid resin and hardener until fully combined using your stirring sticks. Follow the instructions on your bottle to ensure you have the correct ratio.
- Separate the combined resin into measuring cups and mix your pigment in. You can skip this step if you’d prefer to do a translucent vase.
- Add a thin layer of resin to the bottom of the mould.
- Next, add your choice of decoration on top then pour another thin layer. This will help create depth in your piece.
- Repeat until the mould is full.
- Leave for 2-3 days until resin has hardened.
- Carefully remove vase from mould by pulling back silicon.
- If you went with the plant propagation station, take the test tube from your pack and insert it into your resin station.
Geode-inspired resin coasters
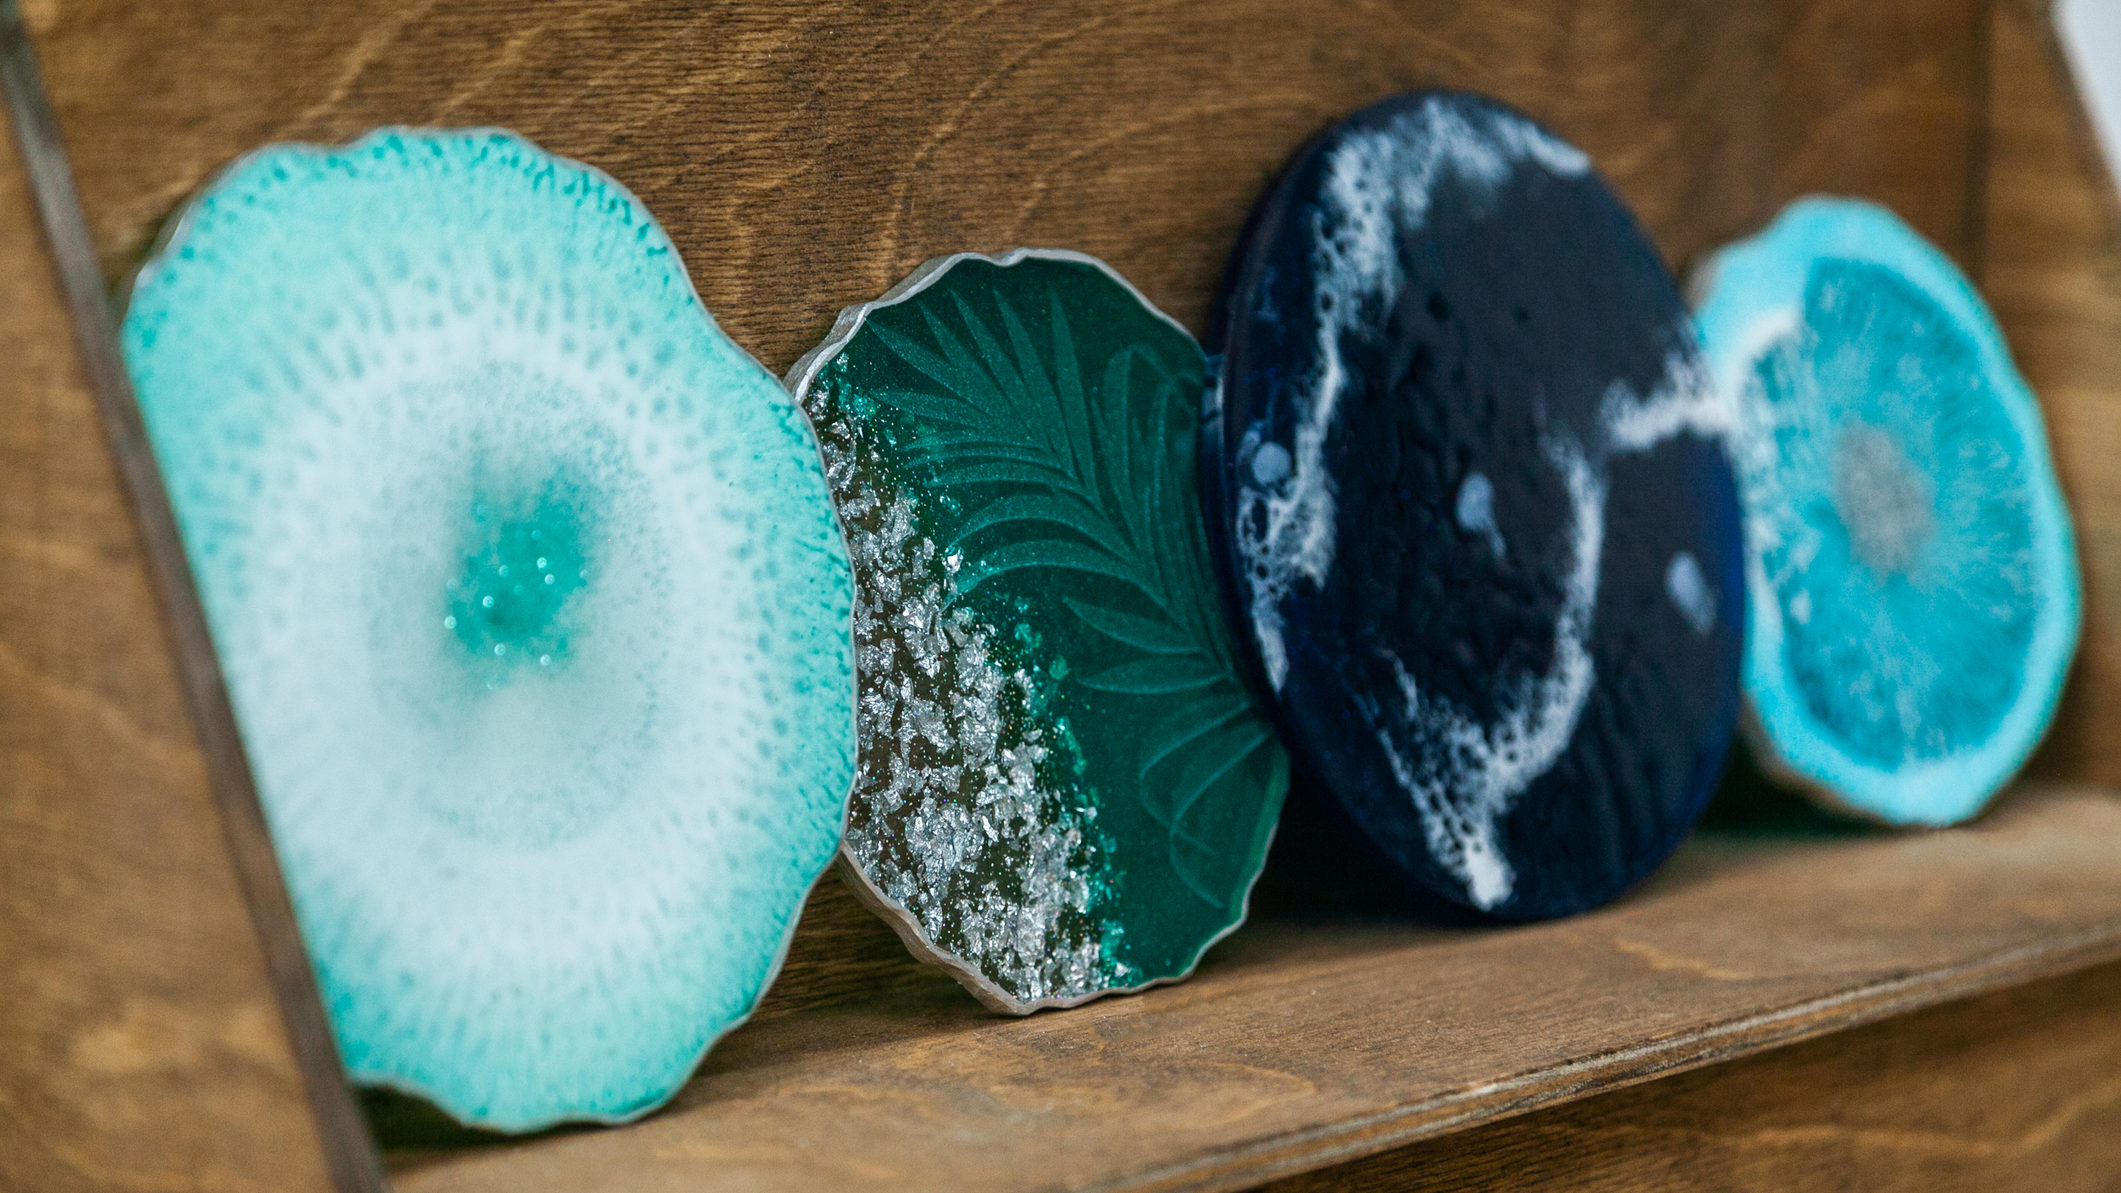
Have you ever eyed off those gorgeous geode coasters at your local farmers market? Same. However, the price tag is usually enough to make us choke (we’re talking $20 per resin coaster). Who would’ve thought it’s easier (and cheaper) to do it yourself at home?
What you need:
- Silicone coaster moulds for resin art
- Stirring sticks
- Measuring cups
- A sheet of parchment paper to protect your workspace
- Liquid resin and hardener
- Your choice of glitter, gold leaf, dried flowers or fake butterflies
- Your choice of pearl pigment powder
- (Optional) A heat gun
Directions:
- In a jug or measuring cup, use your stirring sticks to mix the liquid resin and hardener until fully combined using your stirring sticks. Follow the instructions on your bottle to ensure you have the correct ratio.
- Separate your combined resin into as many cups as you need for the number of colours you’ve chosen. Mix in some glitter to hone in on that crystal vibe. We recommend choosing about three colours in a tonal gradient.
- Lay out your silicone coaster moulds.
- Pick which colour you’d like to start with. We recommend starting from the middle with the lightest colour so it resembles a geode better.
- Using your stirring stick, carefully trail a ring of pigmented resin in the centre of your mould.
- Repeat with your next colour and the next.
- Use your stirring sticks to blend the lines of the pigments together.
- To add a bit of flourish, sprinkle some crushed gold leaf or turn on your heat gun and use it to gently blow out the colours in all directions starting from the centre, so it resembles a star.
- Leave for 2-3 days untouched.
- Once set, remove your resin coasters from the silicone moulds.
- Optional: Crush up some gold leaf and mix it with hot glue. Use a brush to paint the gold leaf glue around the edges of your coasters to give it a stunning golden border.
You can follow this YouTube tutorial here for inspiration.
Resin marble serving tray
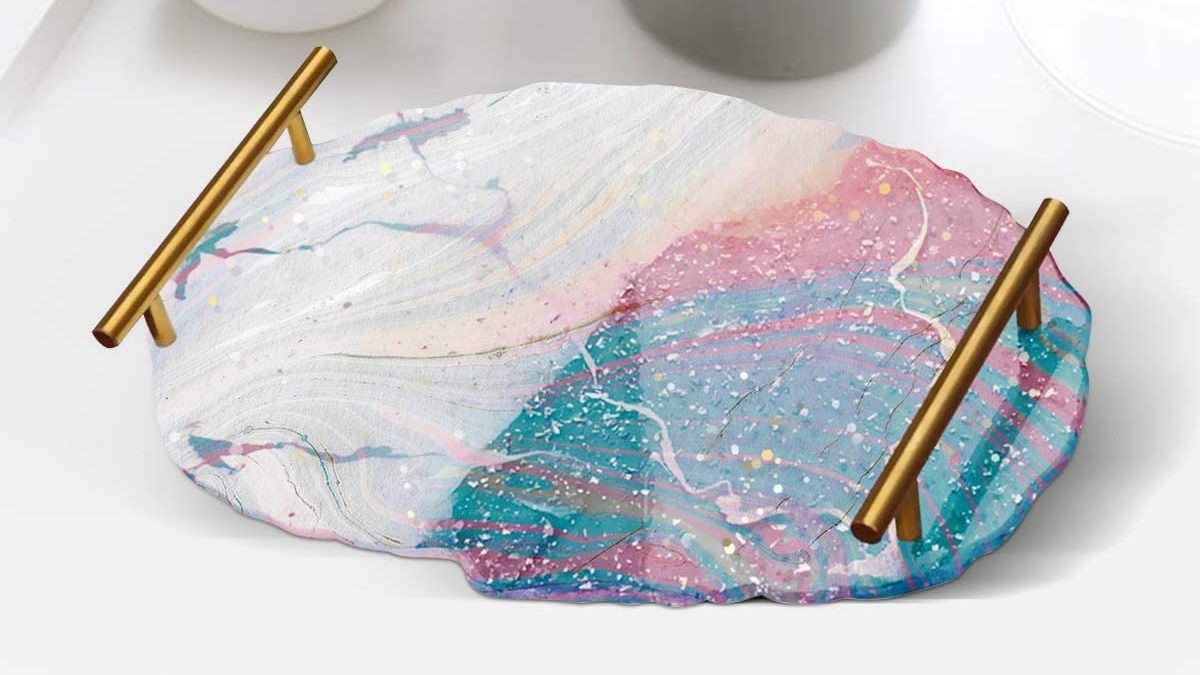
While recreating anything that resembles marble might feel out of your comfort zone, it’s surprisingly simple when you’re got a batch of resin and a heat gun. Marble is a texture that will never go out of trend, and looks great in almost any combination of colours. Here’s how you can make a colourful and bougie looking marble resin tray.
What you need:
- This silicone serving tray mould for resin art
- Stirring sticks
- Measuring cups
- A sheet of parchment paper to protect your workspace
- Liquid resin and hardener
- Your choice of glitter and/or gold leaf
- Your choice of pearl pigment powder
- A heat gun
Directions:
- In a jug or measuring cup, use your stirring sticks to mix the liquid resin and hardener until fully combined using your stirring sticks. Follow the instructions on your bottle to ensure you have the correct ratio.
- Separate your combined resin into as many cups as you need for the number of colours you’ve chosen. We recommend choosing two colours like pink and gold or blue and silver. Combine your choices of pearl pigment powder with your resin mixture as directed by the packaging.
- Save some clear resin mixture and mix with glitter.
- Now that you’ve got your pigments sorted, pull out your silicon tray mould. To get the marble look, take one colour and carefully pour it in a swirling motion inside the resin tray.
- Then, repeat with your second colour until you can’t see the bottom of your tray.
- Get out your heat gun and gently blow the swirls of colours around the tray for about five minutes until they’ve mixed. You can also use a stirring stick to help push the pigment around.
- Next, go in with the clear resin you mixed with glitter over the top. You can use your heat gun again to help it merge with your two base colours.
- Once you’re happy with how it looks, pull out the two metal handles that came with the tray mould. Place one handle on each end of the tray.
- Leave your resin serving tray to harden for 2-3 days.
- Once set, you can peel back the silicone tray from the resin.
- Optional: You can paint the sides of the tray to give it a different look if you wish. You can also sand the sides if you think it feels too rough.
Watch this YouTube video to follow the tutorial.
Glittery dominoes
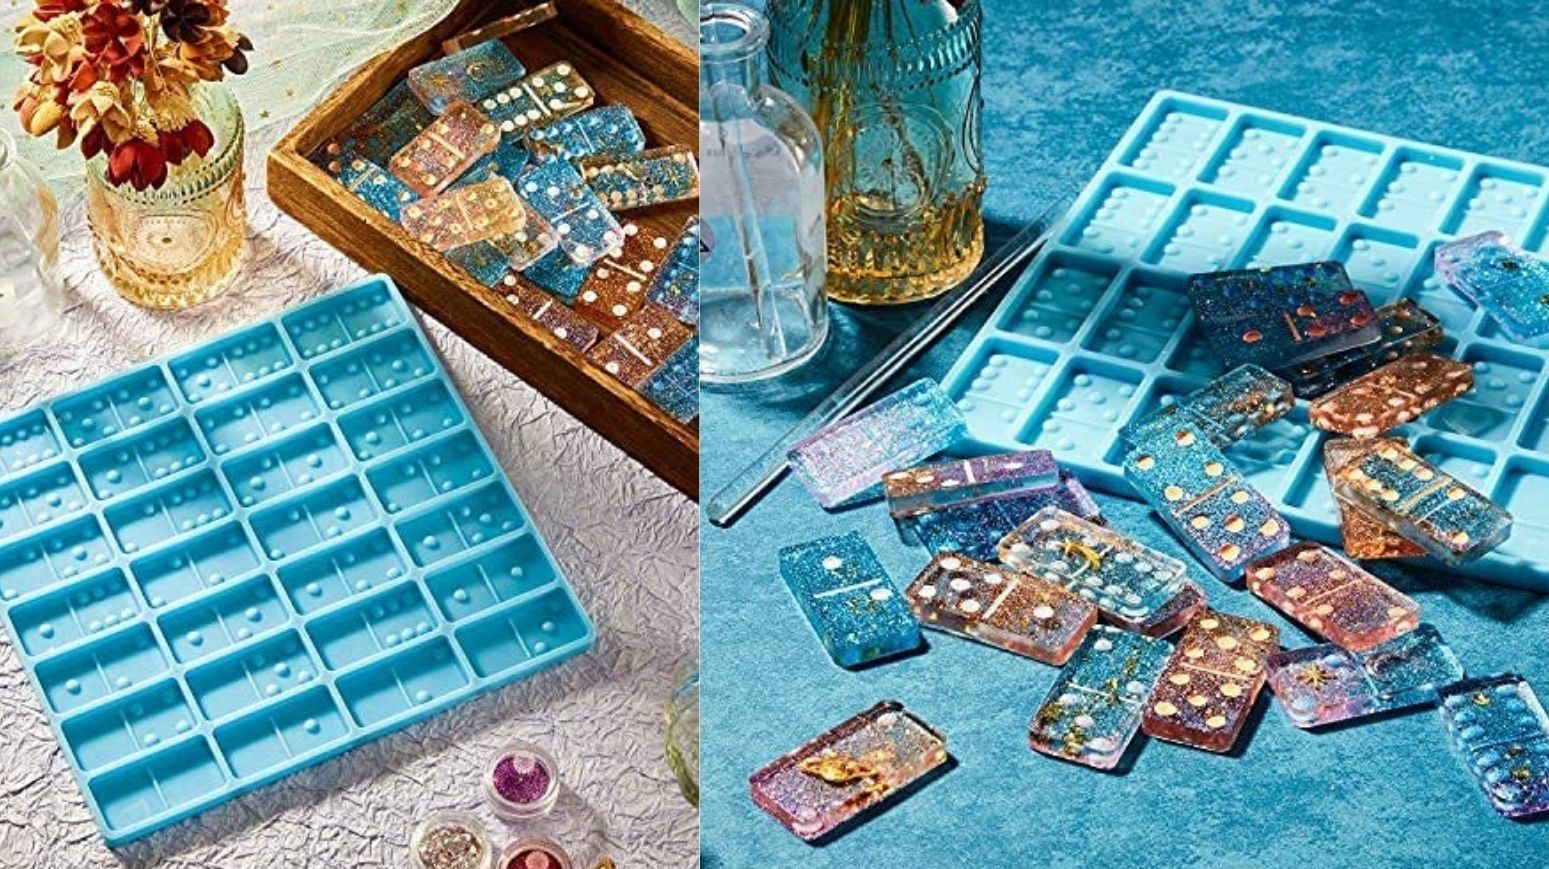
If you thought dominoes were a thing of the past — they’re about to make a stylish comeback. Making glittery, flower-filled dominoes is a welcome spin on the classic game. Not only will this make for some stunning coffee table decor, but the perfect gift for all of your friends.
What you need:
- This domino silicon mould
- Stirring sticks
- Measuring cups
- A sheet of parchment paper to protect your workspace
- Liquid resin and hardener
- Your choice of glitter, dried flowers and/or gold leaf
- Your choice of pearl pigment powder
- Some acrylic paint and a small brush.
Directions:
- In a jug or measuring cup, use your stirring sticks to mix the liquid resin and hardener until fully combined using your stirring sticks. Follow the instructions on your bottle to ensure you have the correct ratio.
- Separate your combined resin into as many cups as you need for the number of colours you’ve chosen. You can also mix in some glitter.
- With your domino mould, pour a very thin layer of resin mixture at the bottom.
- Then, if you wish to add any dried flowers, extra glitter or gold leaf, sprinkle that over each domino mould.
- Once you’re happy with your decorations, pour the remaining resin mixture over each domino piece.
- Allow it to set for 2-3 days.
- After the dominoes have dried, carefully remove them from the silicone mould.
- Using your acrylic paint, use your small brush to draw dots on your dominoes.
This article has been updated since its publication.
Leave a Reply
You must be logged in to post a comment.