The MacBook Pros are finally pro machines again. Now that the ports are back, and Apple has upgraded the power and the design, it’s your turn to upgrade the software experience. After unboxing your MacBook Pro, take some time to make some essential productivity tweaks. These little changes will go a long way to making your machine more efficient and functional.
Deal with the notch situation, if you want
Don’t judge the MacBook Pro by the notch. Give it some time, and, in a week, you’ll probably forget all about it. But if you can’t get used to it, there are two ways to hide the notch.
You can use a free third-party app called TopNotch that puts a black background in the menu bar, essentially hiding the notch. This way, you can still use the extra screen space, as the menu bar is still in the area around the notch.
Apple also has a feature that hides the notch. Enabling “Scale to Fit” brings the old fat bezels back. You can activate this on a per-app basis. Right-click on an app and choose “Get Info.” Here, enable the “Scale to fit below built-in camera” option. The next time you open the app, Apple will automatically scale down the entire UI to below the notch. Of course, in this situation, you end up losing the screen real estate, but you won’t be distracted by your hatred for the notch, either.
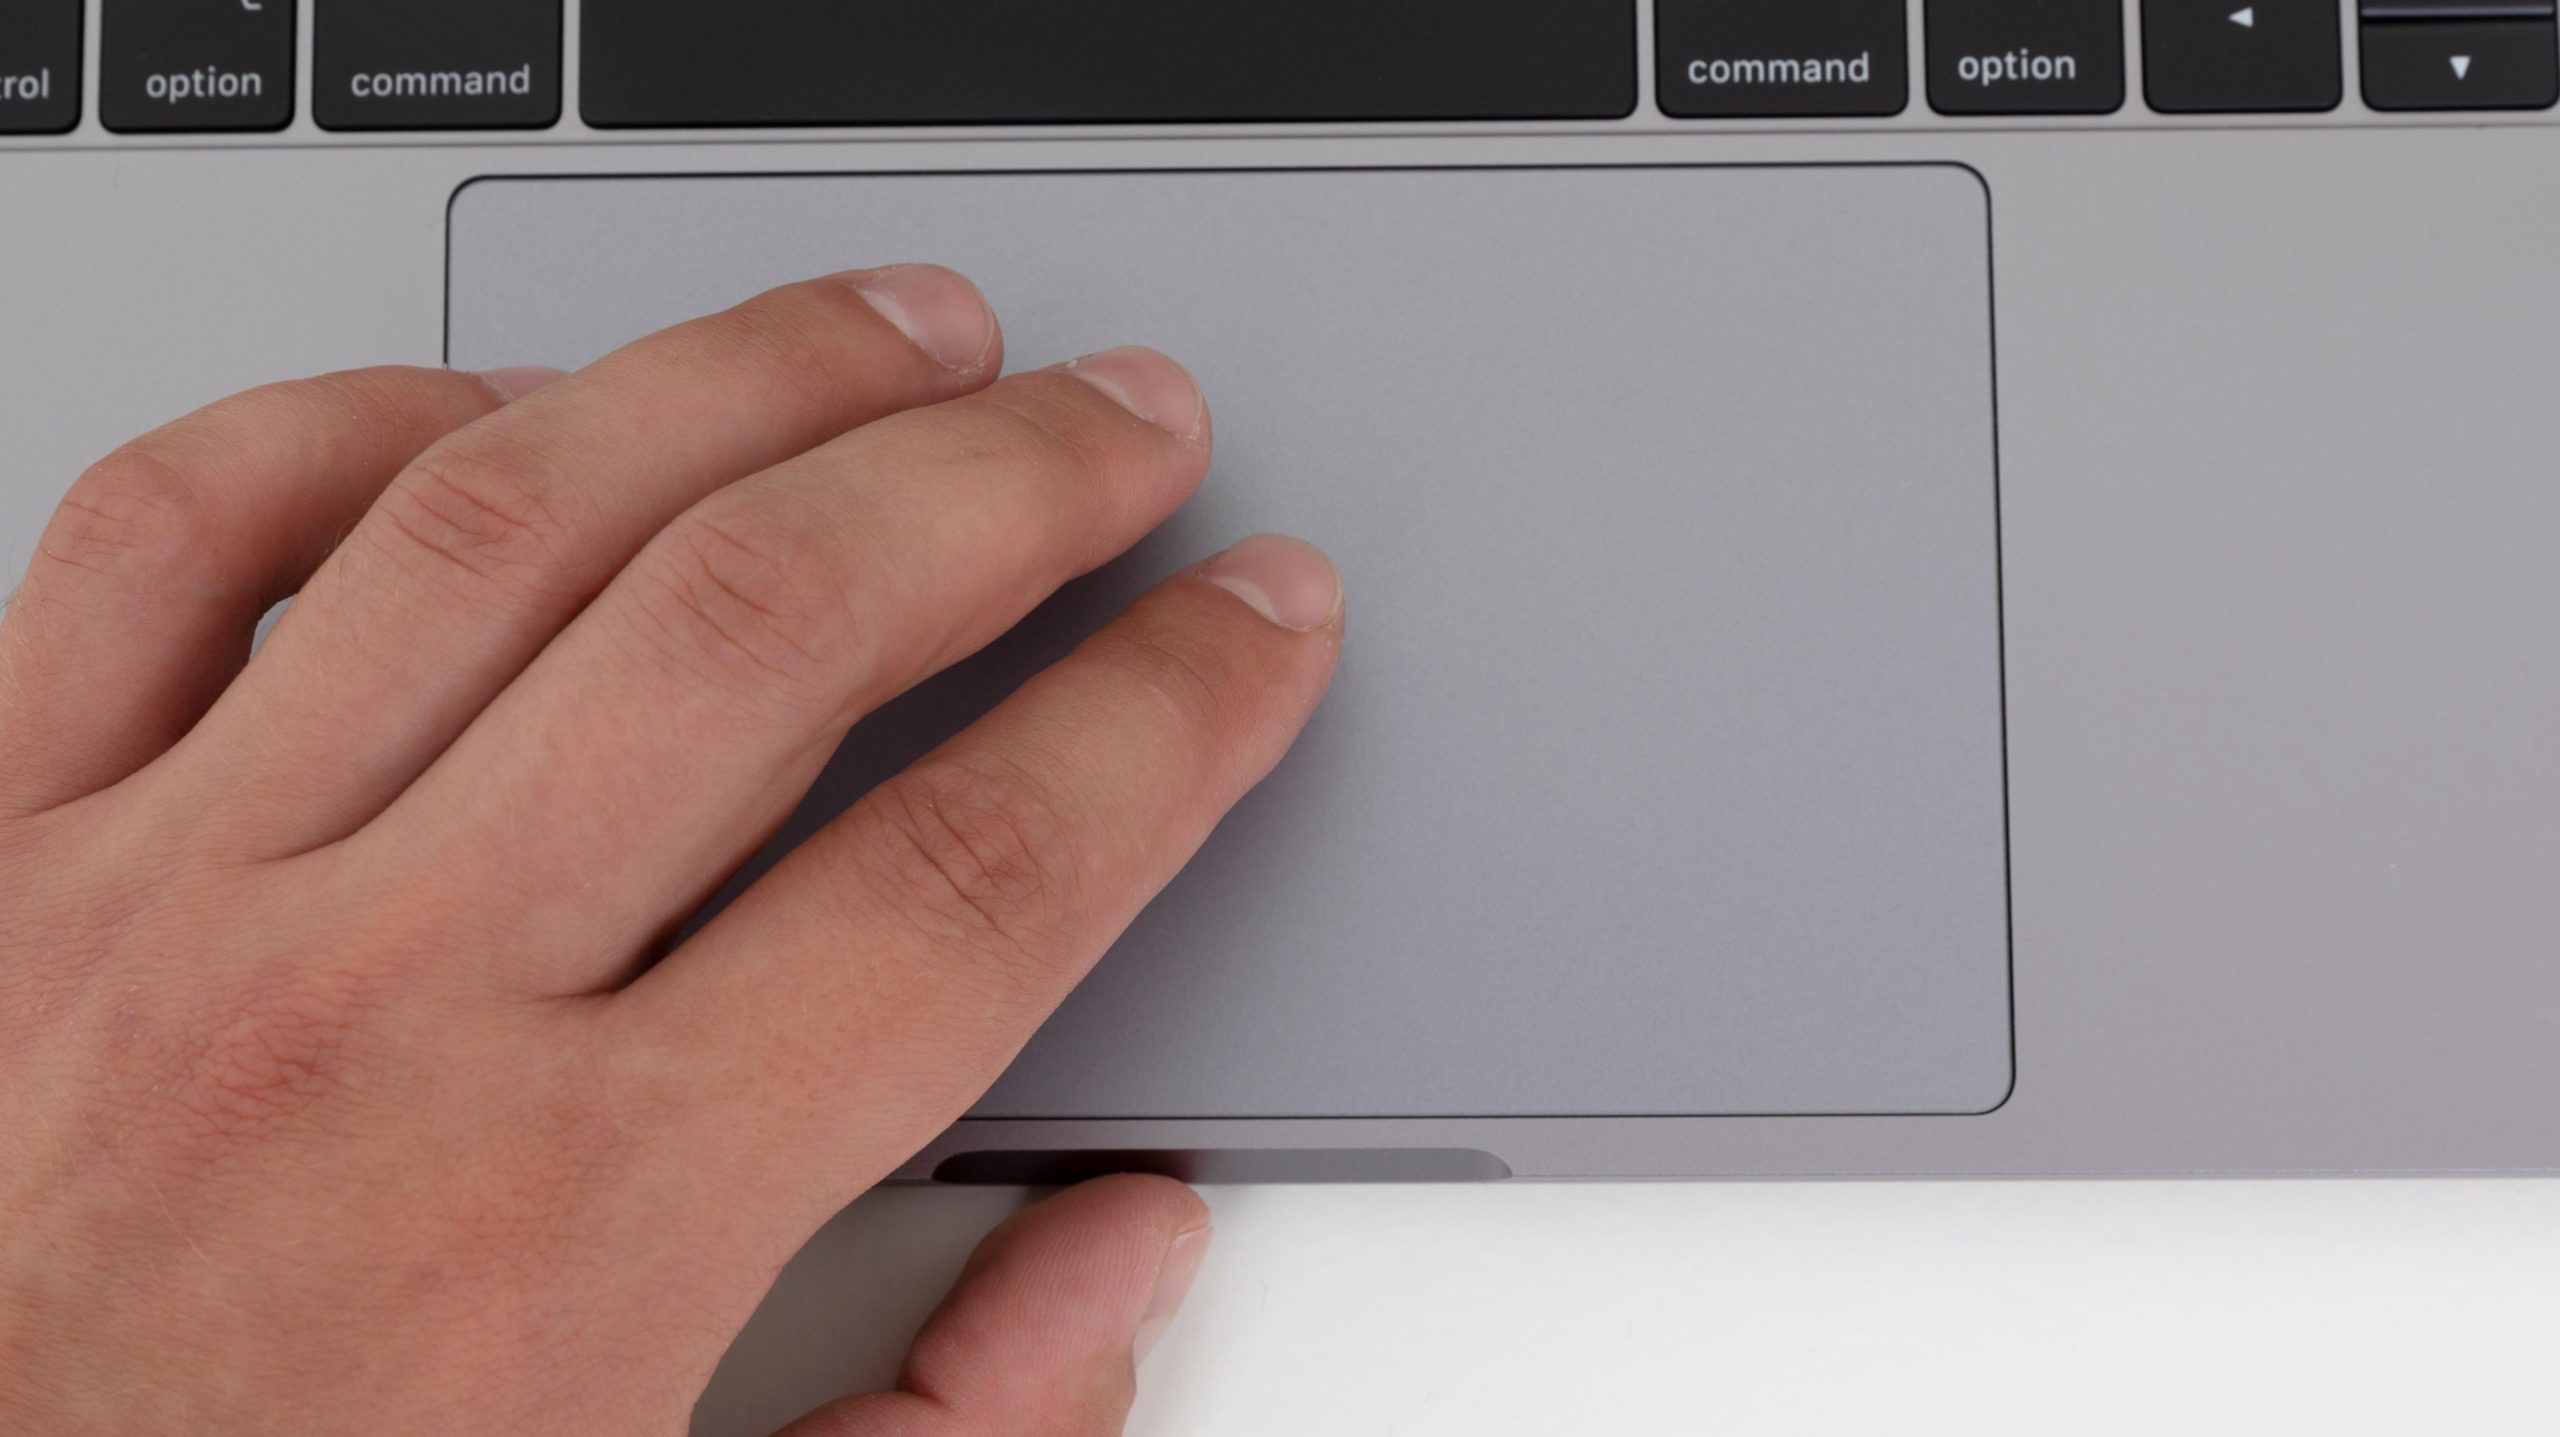
Enable Tap to Click
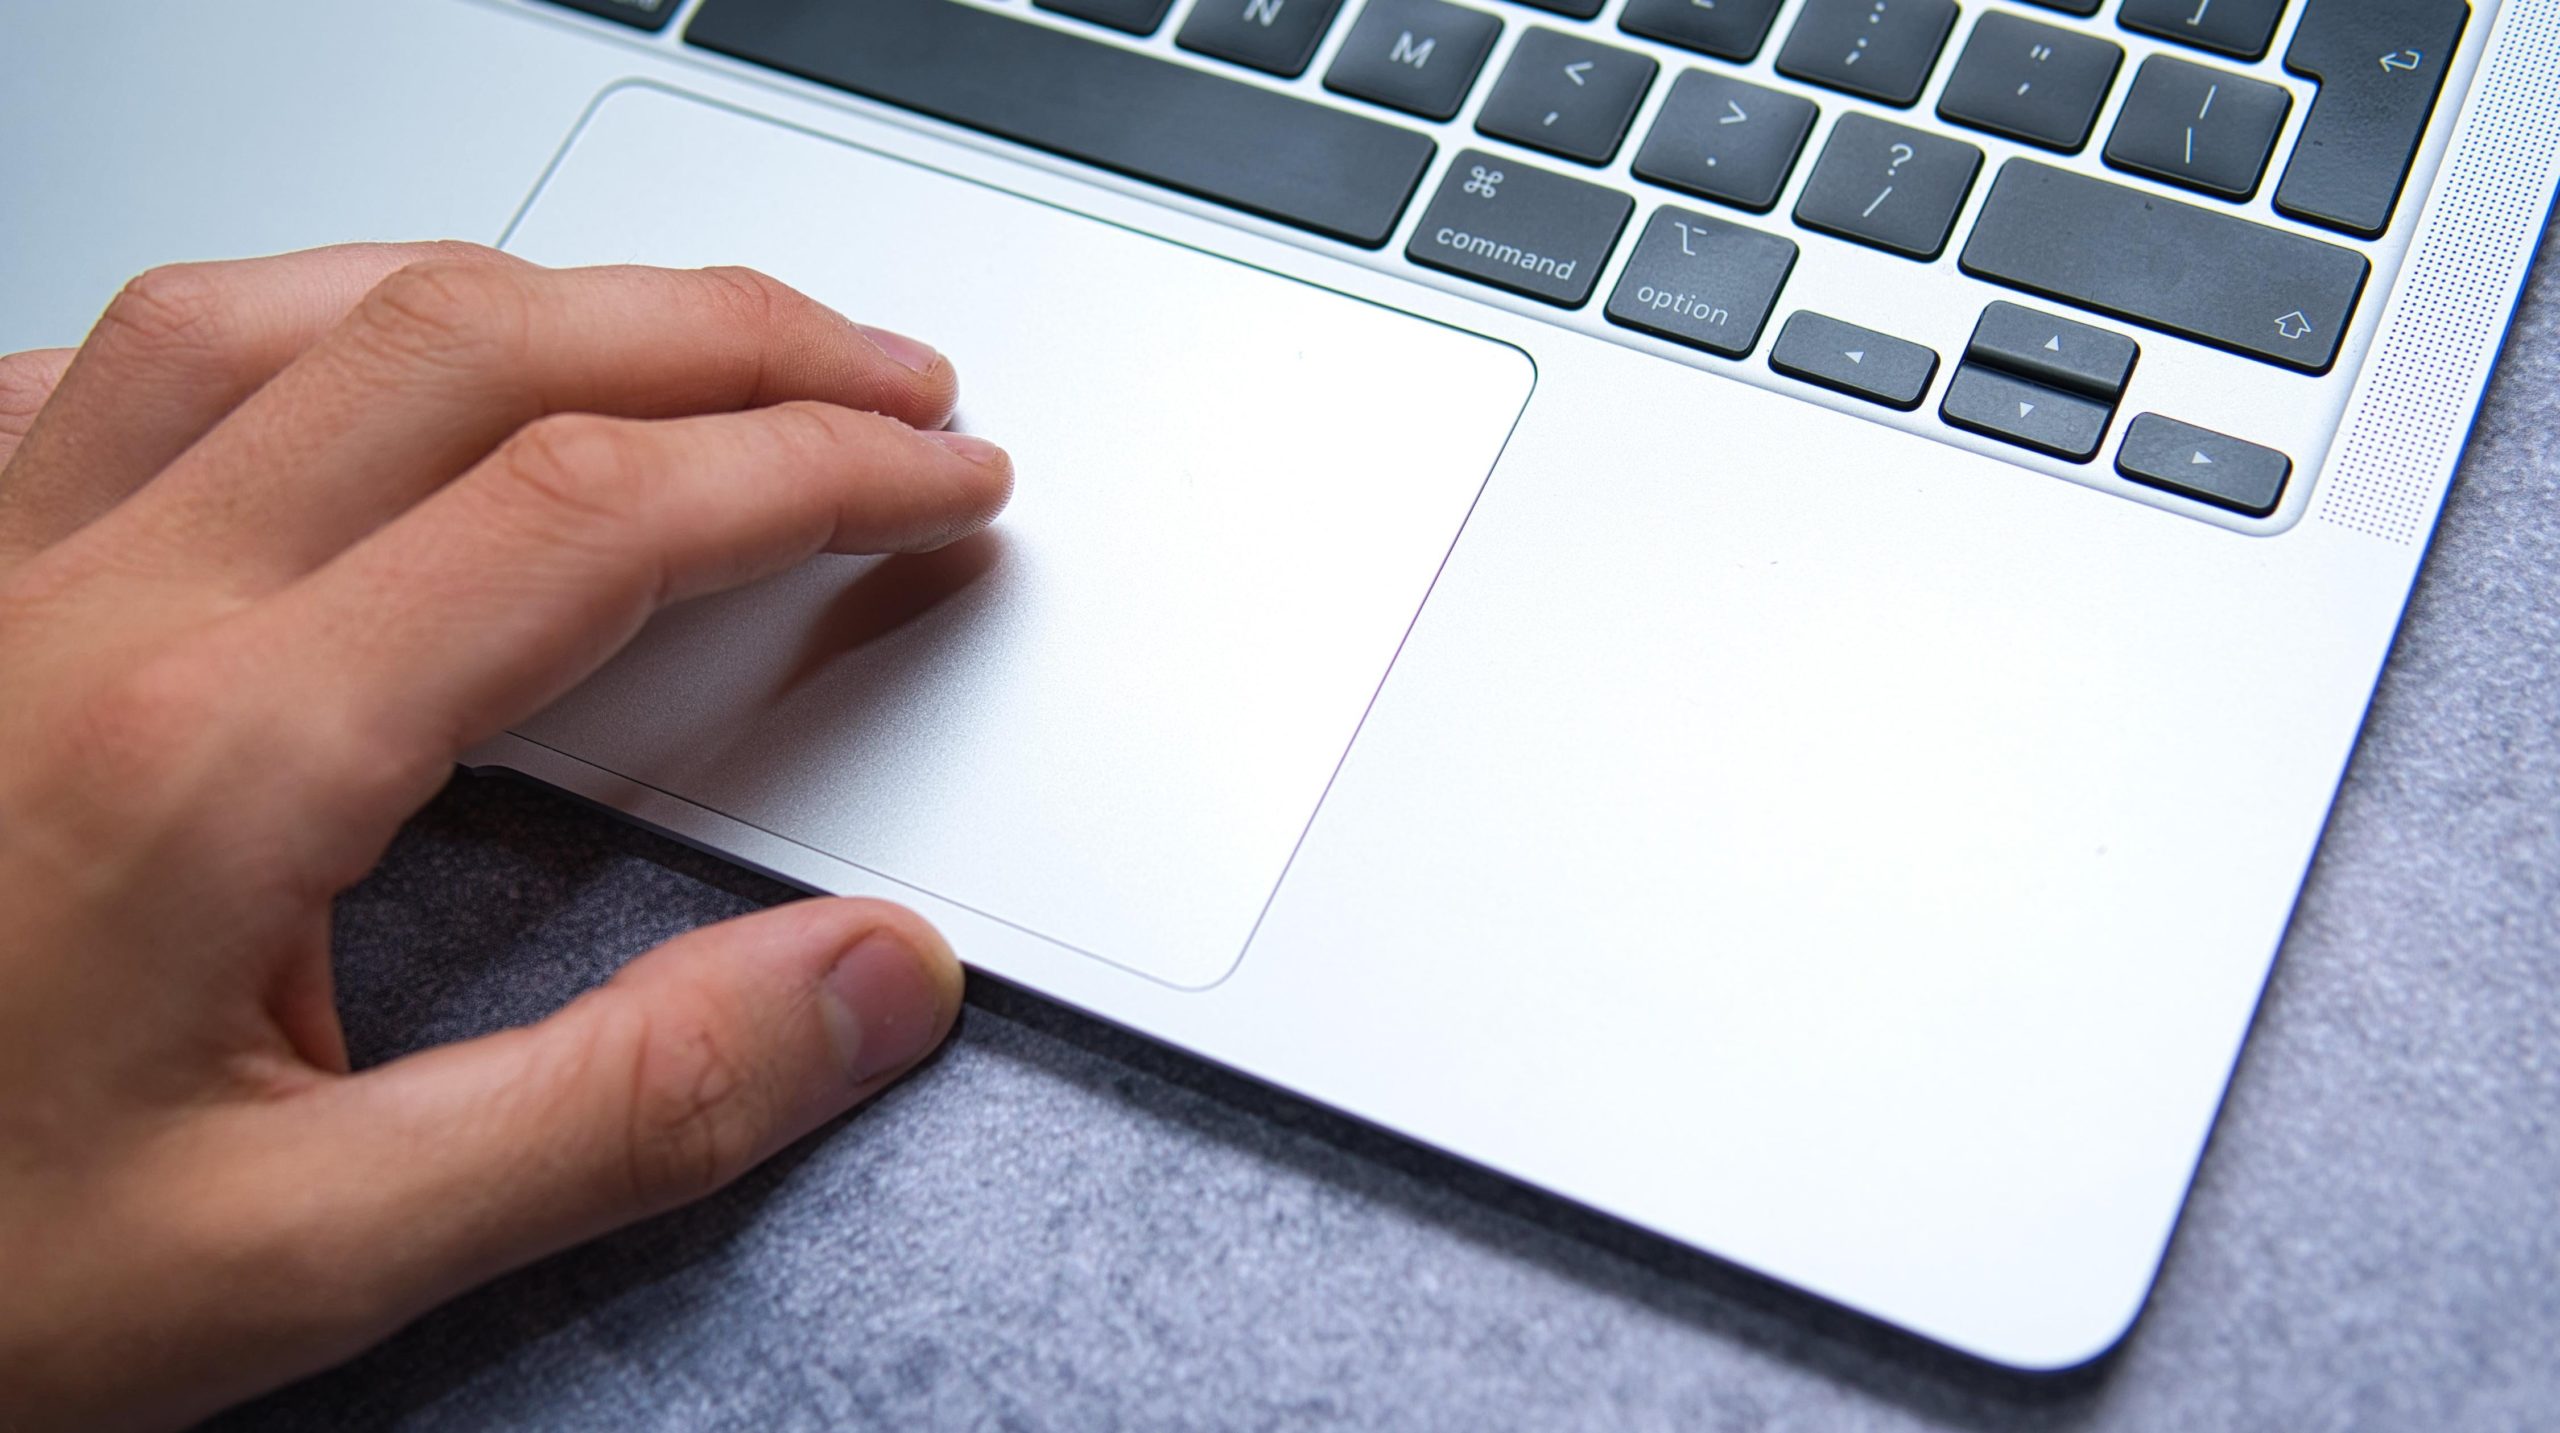
This is a feature that Apple should enable by default. Why click the trackpad when tapping will do the job? Not only is it faster, it’s also easier on your fingers. Go to System Preferences > Trackpad > Point & Click > Tap to Click to enable the feature.
Move the Dock to the side
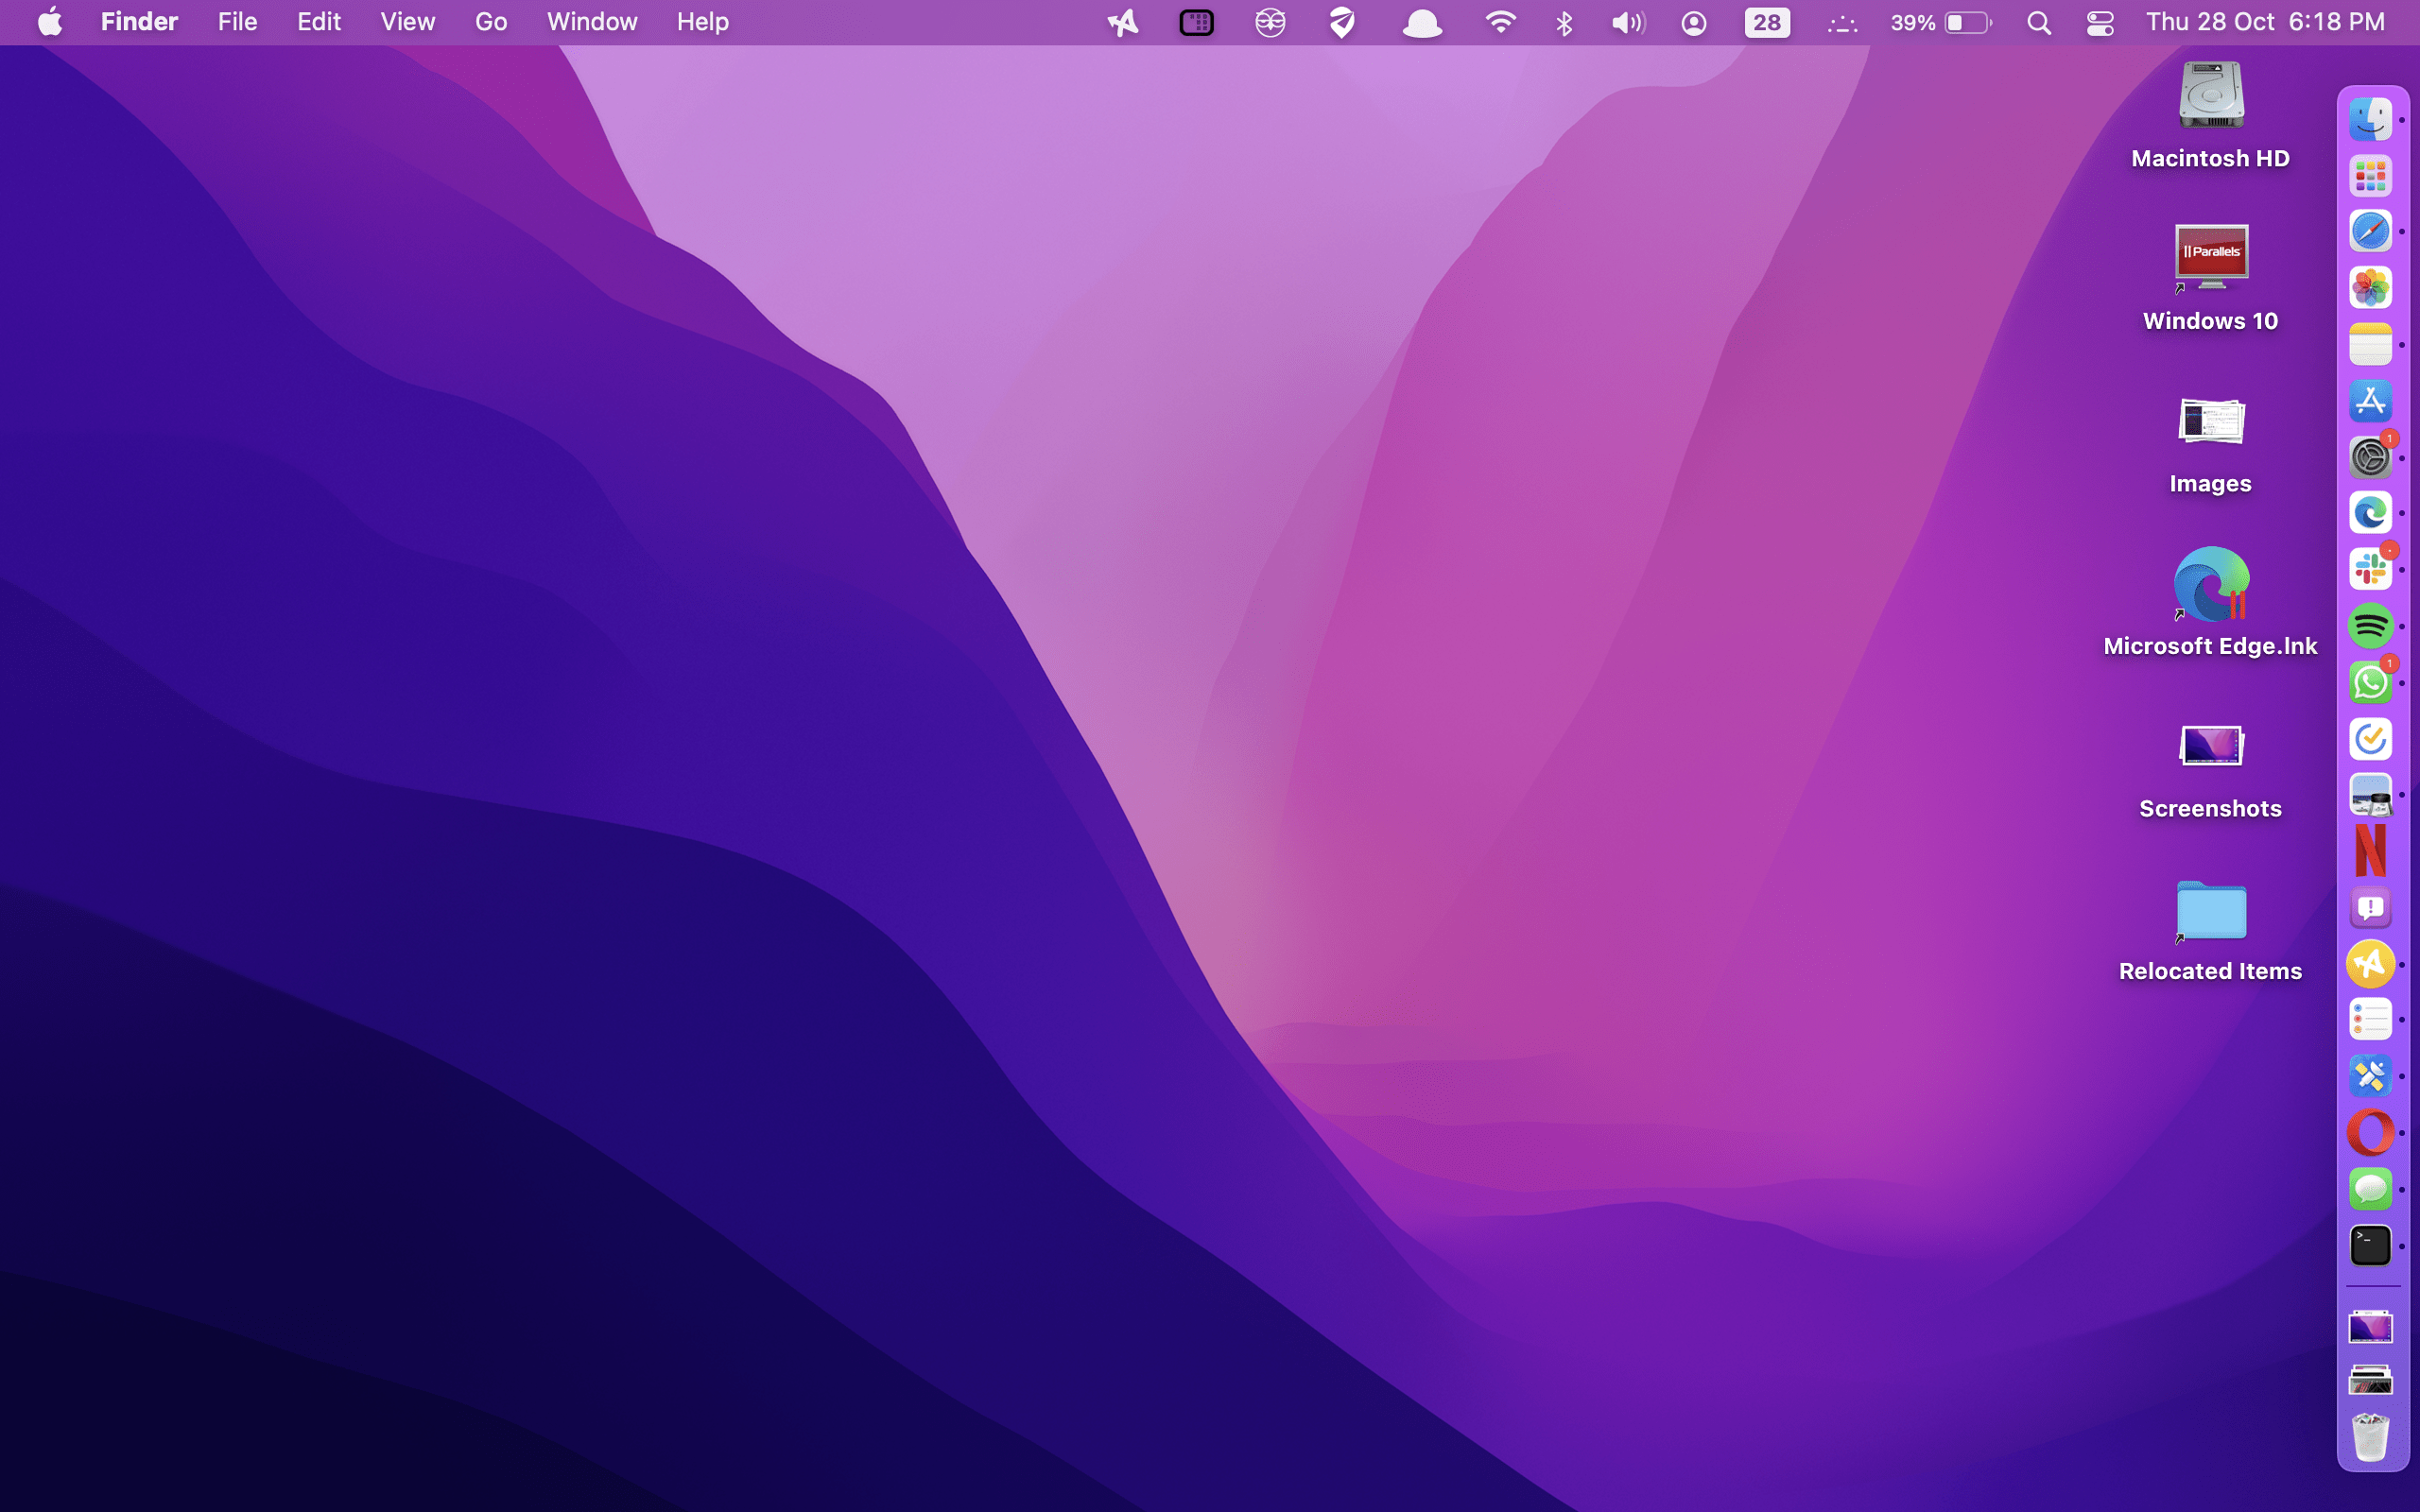
Vertical screen real-estate on the MacBook is scarce. When you’re using a web browser, or productivity apps, the extra vertical screen space can come in really handy. This is why you should move the Dock to either the left or the right side. To do this, right-click in the free area on the Dock, Choose “Position on Screen,” and switch to the “Left” or “Right” option. It will take a little getting used to, but it’s worth it in the long run.
Customise the Dock

Now that the Dock is on the side, it’s time to customise it. First of all, remove the built-in apps you’re never going to use. You can do this simply by dragging them to the middle of the screen and letting go of the cursor.
Once you’ve done that, pin your most-used apps to the Dock. Right-click an open app, and choose Options > Keep in Dock. Next, spend some time customising the Dock. Right-click the divider in the Dock and choose the “Dock Preferences” option. From here, you can tweak the Dock size, the magnification, minimization effect, and a lot more.
Enable Stacks for the desktop

With Stacks, You don’t need to worry about making a mess out of your Mac desktop, which will no longer be littered with hundreds of screenshots and folders. This feature will manage everything automatically for you, giving you a clean desktop — or the appearance of one at least. Right-click the empty part of the screen and choose the View > Use Stacks option to get started.
Unlock your Mac with your Apple Watch
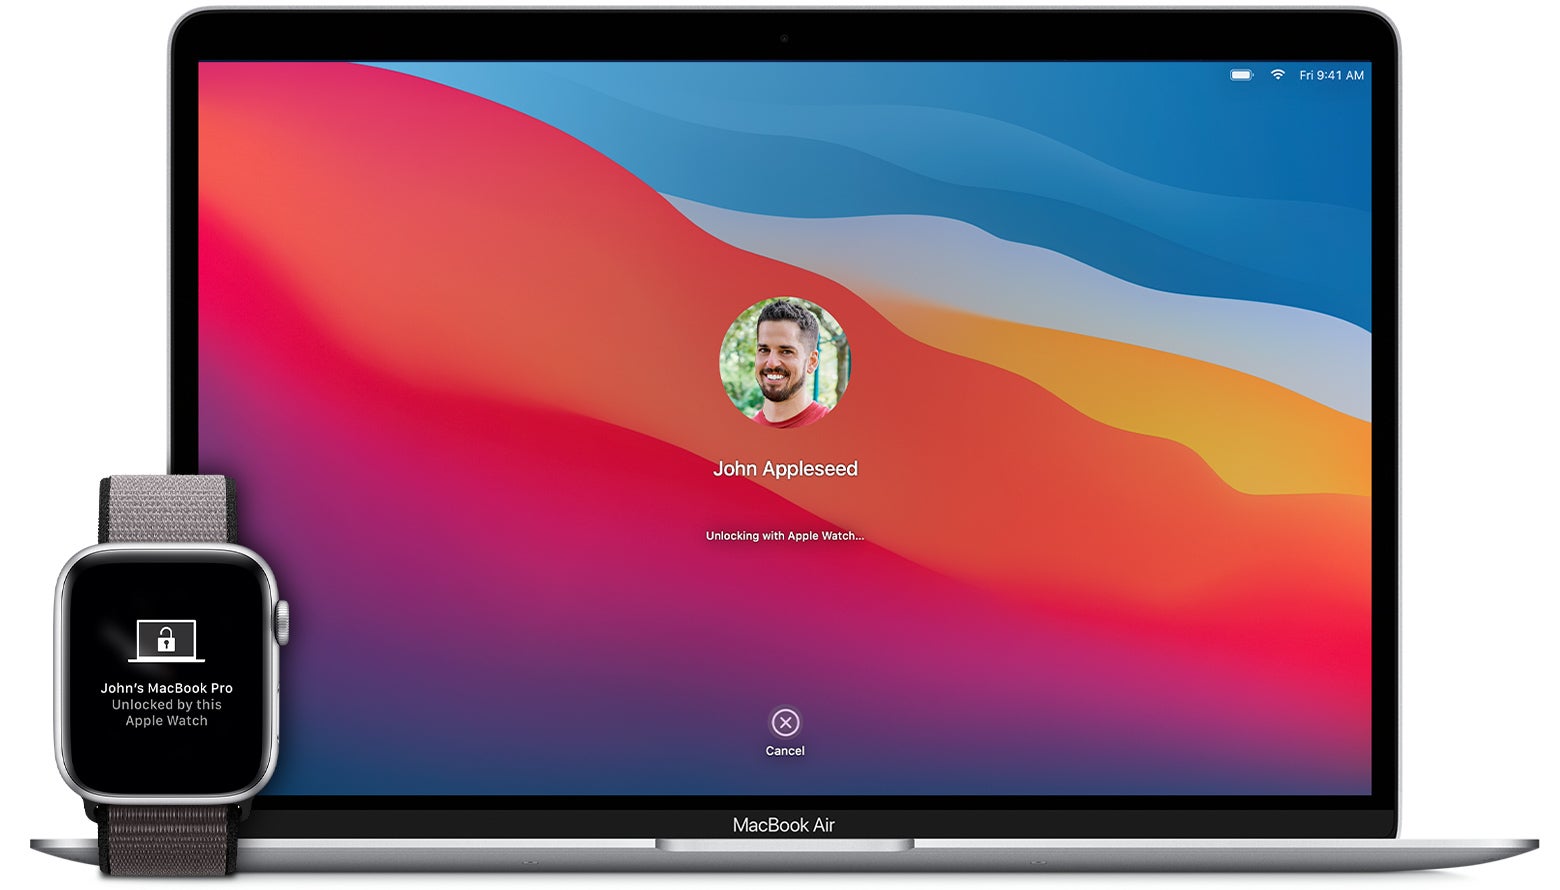
The MacBook Pro comes with Touch ID, but there’s an even faster way to securely unlock your Mac: Use your Apple Watch. With this setting enabled, as long as you’re wearing your Apple Watch, your Mac will instantly unlock when you lift the lid. To set this up, go to System Preferences > Security & Privacy > General > Use your Apple Watch to unlock apps and your Mac.
Tweak the Finder experience

The Finder app is the gateway to all your files and documents, so take some time to improve the Finder experience.
First of all, open the Finder app, and adjust the sidebar. Drag your most-used folders to the Favourites section so you have quick access. Remove the lesser-used folders or locations using the “Remove from Sidebar” option in the right-click menu.
By default, Finder always opens the Recents folder, which isn’t very useful. You can change this by going to Preferences > General > New Finder windows show. Switch to display Downloads, Desktop, or any folder you’d like. You should also enable the “Show Path Bar” and “Show Status Bar” options from the “View” menu in the menu bar — the path bar will quickly tell you the directory path, and the status bar will tell you how much space you have left on your Mac.
Enable Messages in iCloud

If you’re a frequent user of iMessage on your iPhone and your Mac, enabling the Messages in iCloud feature is a must. Once enabled, all your Messages will be synced and updated using iCloud. This option brings device-parity to iMessage, which will stop your Mac’s annoying habit of being 30 minutes behind the Messages app on the iPhone.
To enable this feature, open the “Messages” app, go to “Preferences,” and from the “iMessage” tab, check the “Enable Messages in iCloud” option.
Disable iPhone calls on Mac
It’s a weird feeling when your MacBook starts ringing before you’ve even gotten a call on your iPhone. Perhaps this is a useful feature for some, but for most, it’s an annoyance that shouldn’t be enabled by default. To turn it off, open the “FaceTime” app and go to “Preferences.” Disable the “Calls from iPhone” feature.
Enable Three Finger Drag
Find yourself constantly dragging windows around? Enable three-finger drag. It will let you drag and reposition windows using a three-finger gesture by positioning your pointer arrow over the window’s toolbar, no clicking required. Enable this feature from System Preferences > Accessibility > Pointer Control > Mouse & Trackpad > Trackpad Options > Enable Dragging > Three Finger Drag.
Show battery percentage in the menu bar
For some reason, macOS hides the battery percentage in the menu bar by default. It’s obviously useful to know how much juice you have left, so to enable its display, go to System Preferences > Dock & Menu Bar > Battery > Show Percentage.
Clean up the menu bar using third-party apps
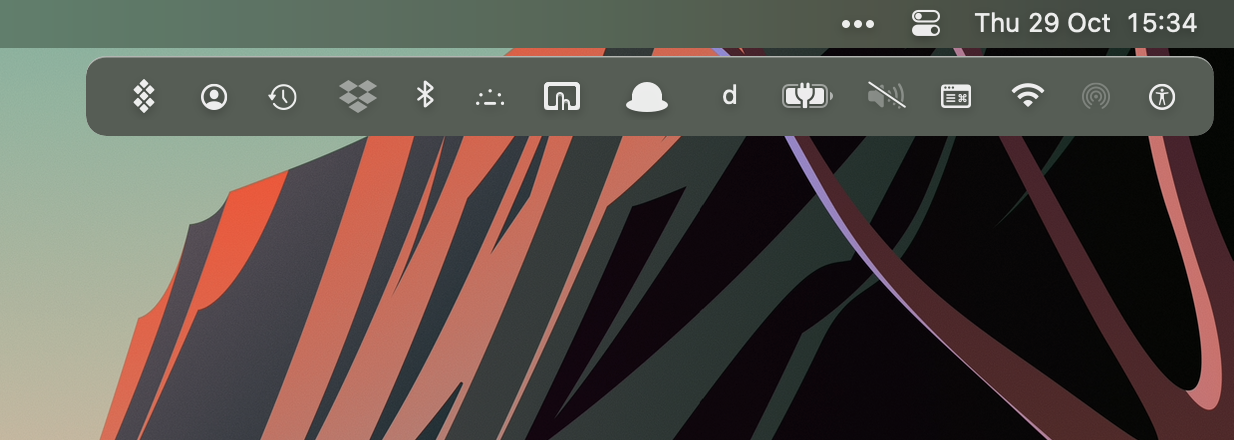
You’re already losing out on some screen space in the menu bar thanks to the notch, so take some measures to clean up the menu bar before it gets too crowded.
You can use two third-party utilities to achieve this result. Vanilla is a free utility that will hide menu bar icons behind an expandable menu. Even better, you can install Bartender, which is paid app ($US15 ($20)), to hide these icons in a drop-down menu.
Change default apps to whatever you use most

It’s always weird when you click on an audio file and your Mac tries to open it in the Music app, where it is subsequently added to your library. Better to open it in QuickTime or a media player like VLC to listen to it once.
You can easily change the default app for a given file type, but the option is a bit hidden in macOS. To get there, right-click a file, and choose the “Get Info” button. Expand the “Open With” section, and choose a new app from the drop-down. Click the “Change All” button, and then click the “Continue” button from the confirmation box. Now, all files of that type will open in the new default app.
Leave a Reply
You must be logged in to post a comment.