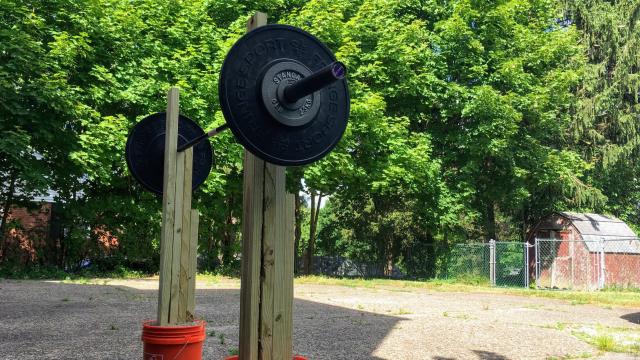
At the early stages of Covid-life, I was using my barbell at home. It worked fine for deadlifts, and Olympic lifts and when I needed to pick it up and curl or press it, but I had no place to keep this thing other than on the ground. But you, sadly, cannot squat without a rack.
A few months into my home-workout routine, however, I started noticing something interesting popping up on Instagram. People were setting their barbells on stacks of lumber propped up in buckets filled with concrete, and I kept hearing that these DIY stands were surprisingly stable. In the end, I decided I had to give it a go.
So, I built myself a DIY squat stand, and now, my only regret is not doing it earlier. The stands are sturdy, and they were quick and cheap to make. I learned a few things as I was doing it, so here’s what you need to know to make a good set of squat stands.
Read the DIY instructions
There are several sets of plans out there, but they’re all fairly similar. (I’ll link a few: one, two, three.) It’s good to read through more than one and note the slight variations in materials and design choices. Some of the plans include a second, lower rack so you can also use them for bench presses.
In all of them, you cut several pieces of wood to varying lengths, stack them together and secure them into a single, sturdy post. Then, you set that post into a bucket, and fill that bucket with concrete. The result can easily support a heavy weight set on top of it, and the concrete makes the stands difficult to tip over.
The required tools are fairly common ones that you probably already have on hand if you’ve done any DIY home repairs. If not, the materials themselves will probably cost under $70 in total.
Know how to use your DIY squat stands safely
This is not a power rack. These do not have safeties. These are squat stands, meaning they hold the weight up while you’re loading it, and they give you a place to put the bar back when you’re done. That’s all.
This means that if you’re squatting and you can’t complete the rep, you have to drop it. If you’re lifting near your limit, know how to safely bail. As a weightlifter (Olympic style lifting, that is), I use bumper plates that bounce and I am used to dropping bars on the ground — it’s half the fun of this sport. If I fail a back squat, I drop the bar (letting it roll down my back) and I hop forward a little and stand up like it’s no big deal — like in the second video here:
If you can’t bail from an unassisted squat, whether due to a lack of confidence, a lack of experience or you’re living in an apartment with fragile furnishings or downstairs neighbours, heavy squats are not for you. Do you still want a pair of DIY squat stands for lighter lifts? Maybe you do. Proceed with caution.
Make them shorter than you think you need
There’s a rookie mistake that a lot of people make, even at the gym: squatting from too high a setting on the rack. If you have to shrug or tiptoe to get the bar off its hooks, you’ve set them too high.
This DIY stand is not adjustable, so you can’t just realise your mistake and move the hooks down a notch. Make it shorter than you think you need. There’s nothing wrong with a squat rack being too low — you just have to bend your knees a little more as you’re getting set up. If two people of different heights will be using these squat stands, do not attempt to split the difference. Make the stand to fit the shorter person.
To find the right height, hold your barbell in the position you normally do for squats, and bend your knees slightly, like you’re re-racking it at the gym. Have a friend make a pencil mark on the wall, and measure that height. Then I would say: subtract at least two inches. That’s the measurement you should use for the board the bar will rest on. A board two inches taller will be in front — that’s the lip that holds the bar in place — and the board on the other side should be tall enough that you can use it as a guide when re-racking. (Don’t slam it down; you might knock the things over.)
If it helps: I’m 5’6″, and my squat rack holds the bar 1.22 m off the ground.
Cut, stack and stabilise the wood
Before you go to the store, figure out how many pieces of wood you’ll need and what size each should be. You’ll probably want to buy ones that are eight feet long, although your options may vary. Plan out how you’d like them cut. Maybe check with Bunnings staff or a local handyman to get some additional insight into how to properly tackle this DIY task.
Once you’re home, double-check the measurements, because you don’t want your squat stands to be uneven. Secure the pieces of wood together according to the instructions you’re following. I used deck screws.
Don’t screw up the concrete
Concrete is tricky stuff, so make sure to read the instructions and think everything through before you begin. Look for an option you can just mix with water, if possible. (If you buy plain old cement instead, you’d have to mix it with sand and gravel.)
Do not buy the fast-setting stuff unless you know you’ll be able to mix it quickly. I already had a concrete mixing power tool — kind of like a giant eggbeater — and my husband pitched in so we could work quickly. Even then, we only just barely poured each bucket within the 20-minute time limit.
Mixing concrete is a dusty business, so wear a mask. It can irritate your skin too, so wear gloves. And for the love of God: follow the directions. The ones on the bag, not whatever you read online. Too much water can make concrete weak, for example, so measure it. The post-setting instructions sound great, but if you’re not setting your post in a hole in the ground, they don’t apply. If you’ve never mixed concrete before, watch a few videos so you know what kinds of tools to use and what consistency to expect. This one on mixing by hand is a good place to start.
That said, mixing concrete isn’t hard, and you can do it. Buy three buckets when you go to the store: two for the squat stands and one for the mixing. When it’s time to dump the concrete mix out of the bag and into the mixing bucket, set a spare bucket upside down to make a platform to hold that heavy-arse bag of concrete while you pour it in.
I found that one 27 kg bag almost perfectly filled each of my buckets. If you plan to keep your squat stands outside (in which case I hope you chose treated lumber), fill any empty space at the top with sand or dirt so they won’t collect water and breed mosquitoes.
Level your DIY posts
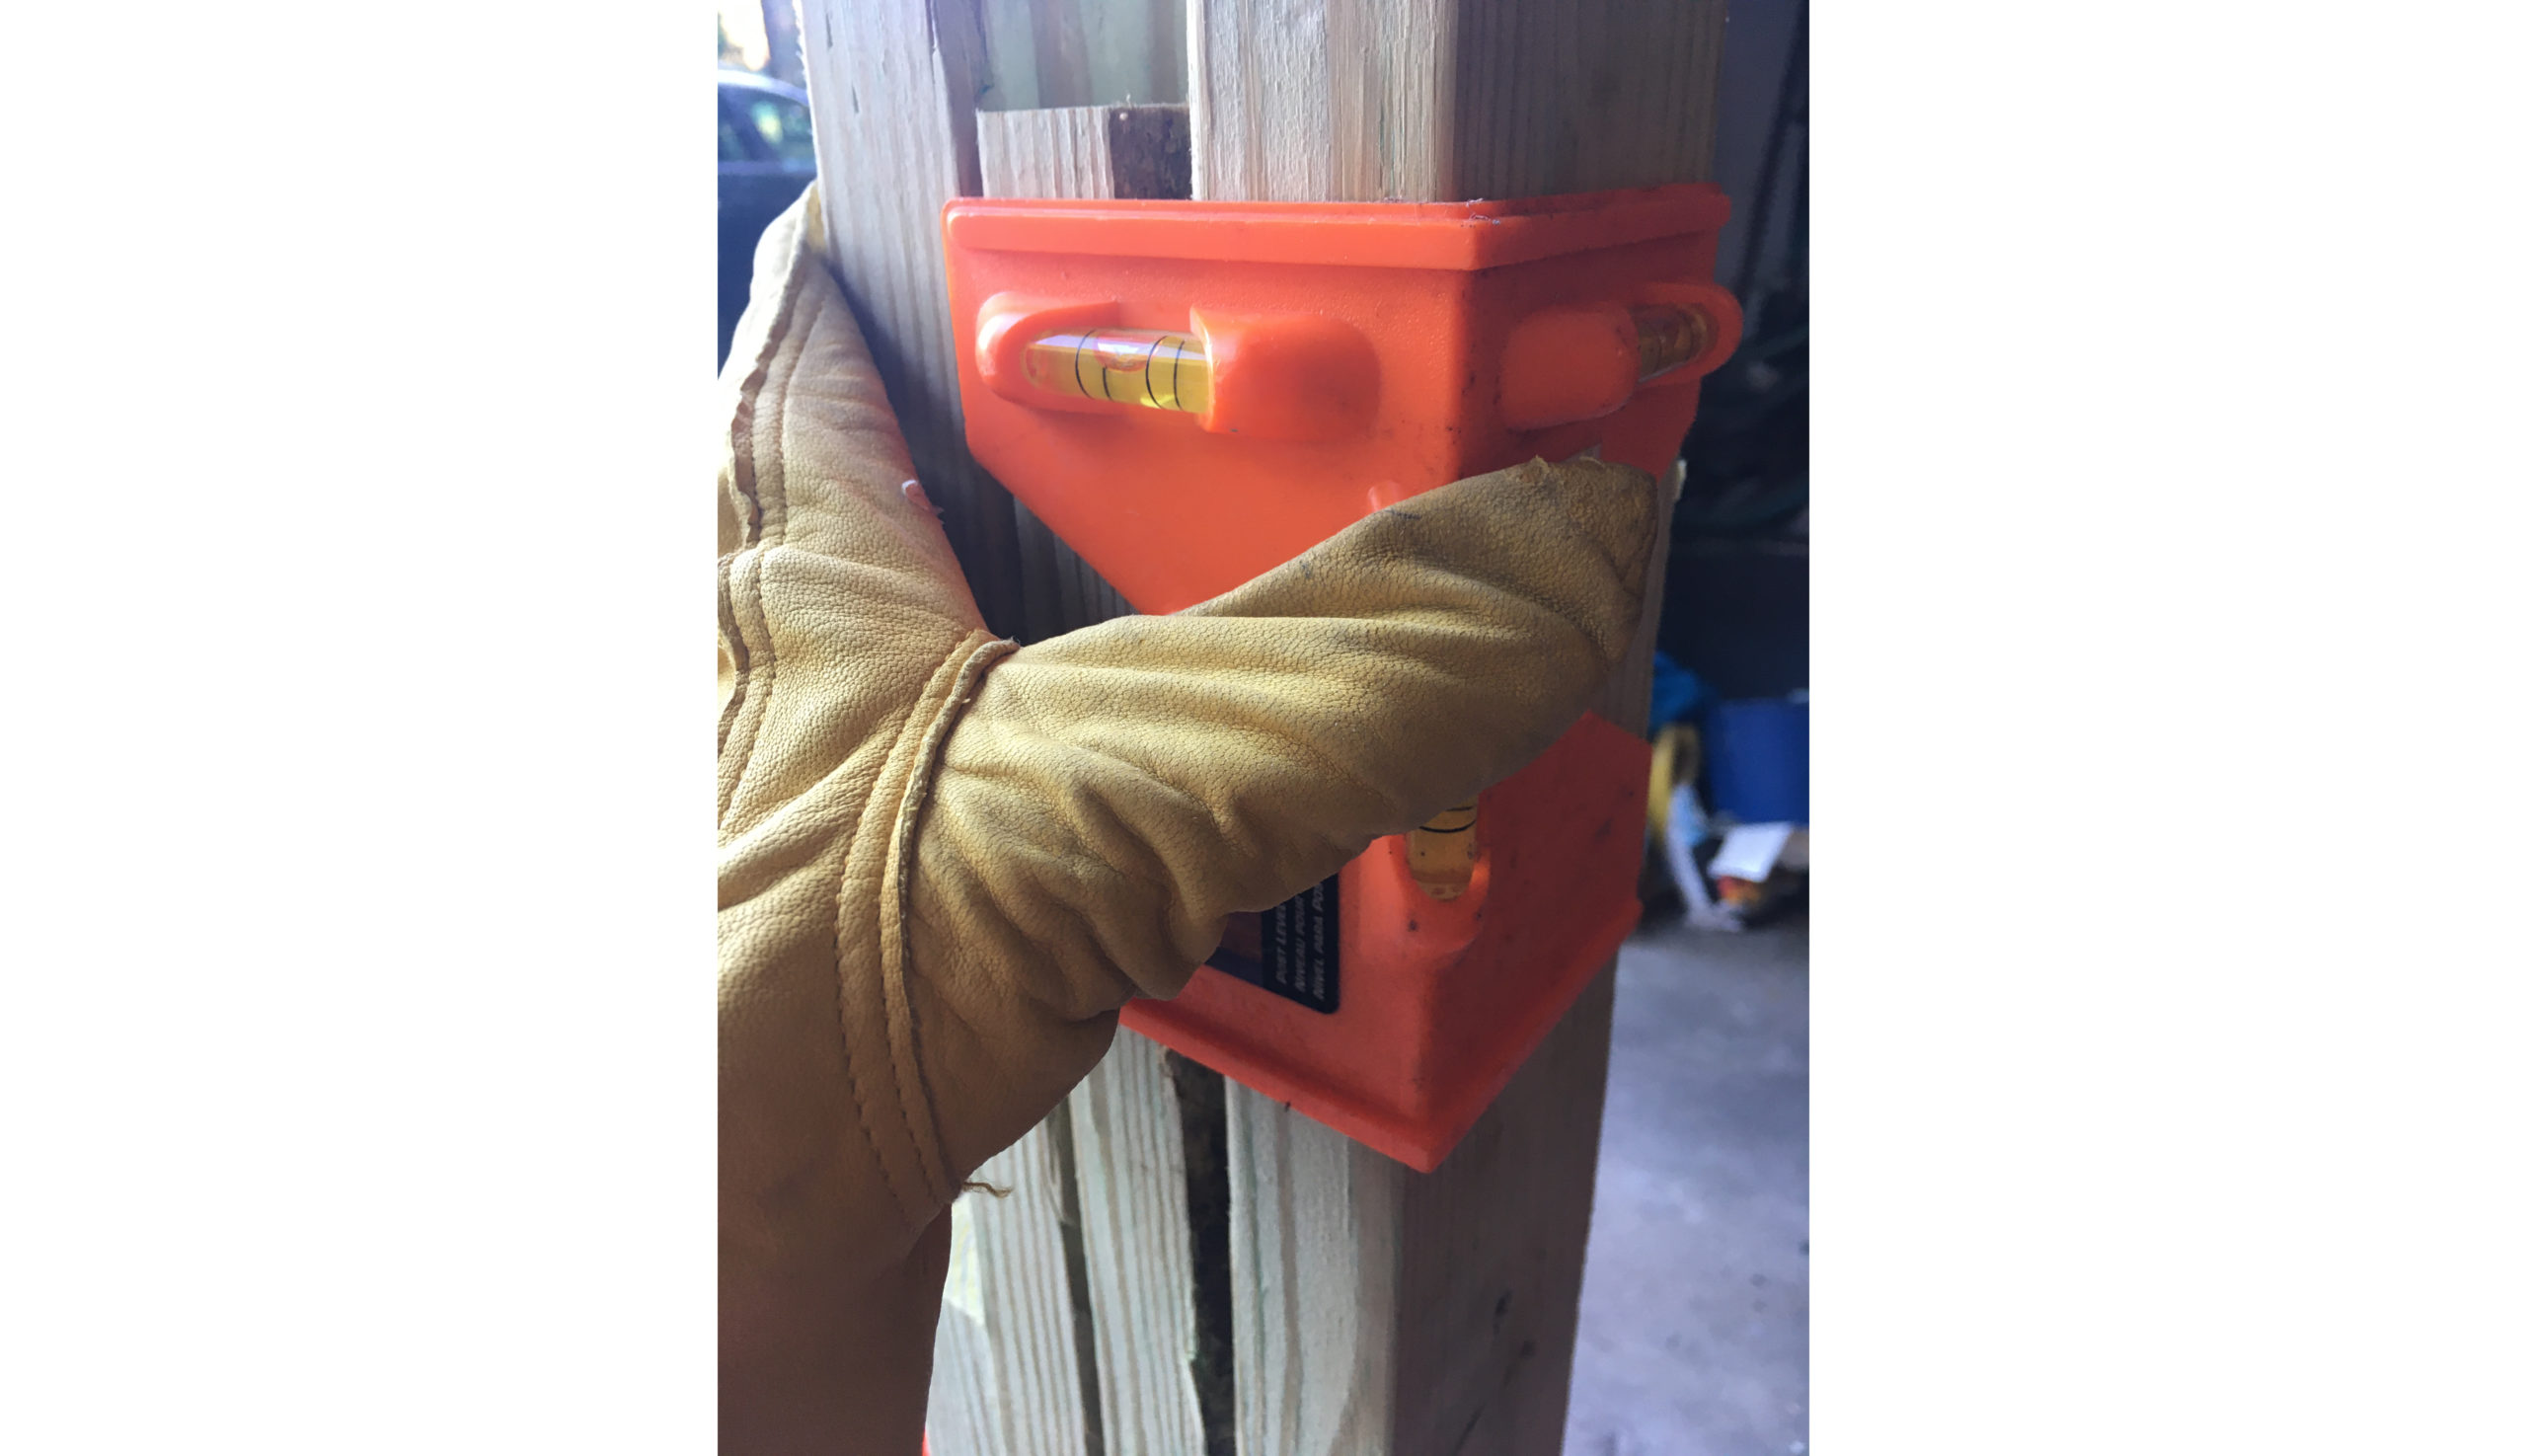
I cannot emphasise this too much: before you add concrete to your buckets, make sure the posts are absolutely straight. This means:
- Before you pour the concrete, make sure the floor or ground is perfectly level (use a level)
- When you set the posts in the buckets, make sure they are perfectly level (use a level!)
- Use the buddy system: one person should add the concrete while the other holds the post perfectly level (Use. A. Level.)
Fortunately, there exists a handy tool you can buy at any hardware store called a post level. We already had one, and it still had the price tag on it from whenever we bought it, and that price tag said $6. It is absolutely worth six dollars to make sure that your squat stands are straight.
Find them a permanent spot on level ground, and enjoy
Has the concrete cured for however long the instructions said? Congratulations, you’re now ready to squat! And it’s time for you to learn that these things are real dang heavy. They are not easy to move. Do not plan on moving them in and out of your workout space every day.
So you’ll need to find them a home. Make sure that wherever you put them is level. If it’s not, use a shim (a thin piece of wood, or even folded paper) to prop up the part that’s shorter. You can use your post level again for this – if you like.
Make sure to set the stands up at the same width as a typical squat rack. You know how you can put a plate on one side of the barbell at the gym, and the bar doesn’t fling itself at you like a catapult? That’s a good thing. If you put the stands too close together, all bets are off.
Now, finally, you can enjoy your DIY creation! Load up the weight and have fun finally doing some nice heavy squats. A word of warning, though: even though the stands are sturdy, they will have their limit. I cannot tell you mathematically what that limit is. Stay safe out there.
This article has been updated since its original publish date.
Leave a Reply
You must be logged in to post a comment.