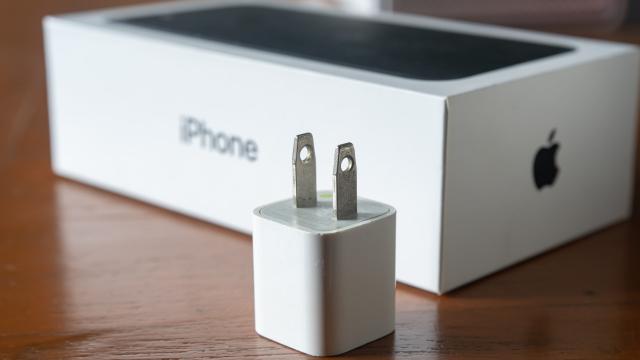
For the first time in my life, I’ve finally decided to take advantage of Apple’s trade-in program. Yes, I know you can get a better deal if you use one of the many different services out there to sell your iPhone to a third party. The problem is that my iPhone X’s battery is complete trash, and any sites I’d think to sell it to won’t accept an iPhone in that condition. Apple doesn’t care, so off to the trade-in program it goes.
While Apple’s setup is pretty simple, there’s a bit more you have to do beyond just dumping your phone in the box Apple sends you and calling it a day. However, you shouldn’t need to spend more than ten minutes (or so) getting your trade-in phone prepped for its big goodbye — with one caveat.
Unpair your Apple Watch from your phone
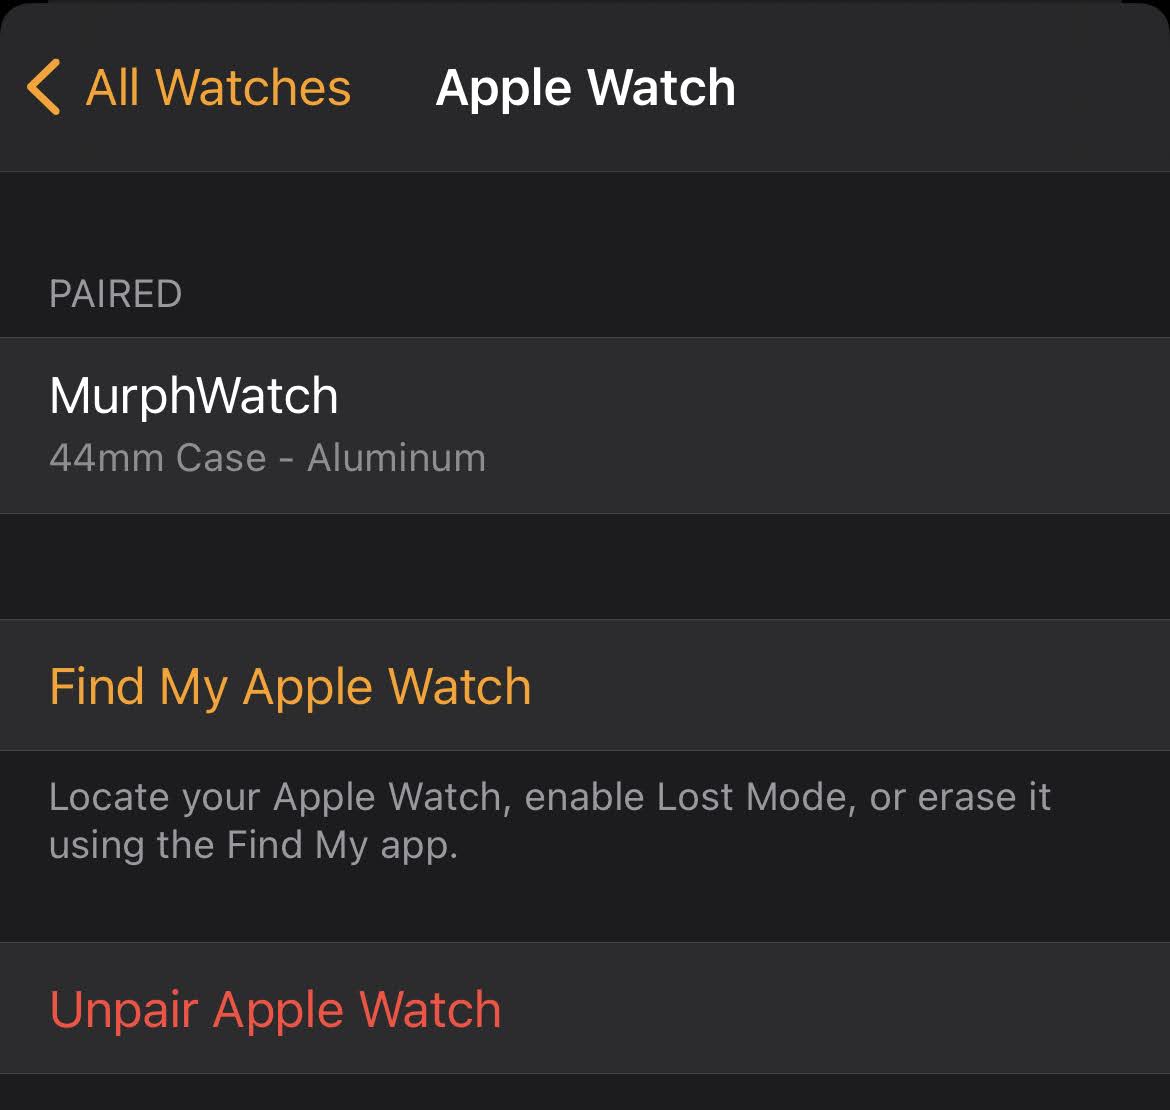
If you have an Apple Watch and you’re trading in your iPhone, I’m going to assume that you have another iPhone that you’ll then use for pairing. An Apple Watch needs an iPhone, after all.
While you can probably do the next step without issue — copying your old iPhone to your new iPhone via the latter’s setup menu — I did encounter a quirk where my new iPhone didn’t recognise the Apple Watch I had paired to my old iPhone. About an hour or so after the process completed, though, my Apple Watch restarted itself and, magically, was paired to my new iPhone.
I’m not quite sure if that’s how the process was supposed to work, but if you need to use your Apple Watch with your new iPhone immediately, make sure you first unpair it from your old iPhone via the Watch app > the All Watches link in the upper-left corner > the “i” icon > Unpair Apple Watch.
Copy your old iPhone to your new iPhone
If you’re trading in an older iPhone because you purchased a newer one, and you don’t want to start from scratch on the latter, you’re given the option to copy all of your settings, apps, and other information from your previous iPhone to your new one. This process takes all of a minute or so to launch via the setup screens on a new iPhone.
Depending on how much data you’ve moving over, however, it could take a bit of time — anywhere from one to two hours, potentially — to get all your stuff transferred. Set up the transfer process before before bed and let it run overnight. With luck, your new iPhone will have everything your old iPhone had.
Oh, and don’t forget to pop out your SIM card from your old iPhone and transfer it to your new iPhone (or whatever new device you purchased).
Sign out of iCloud
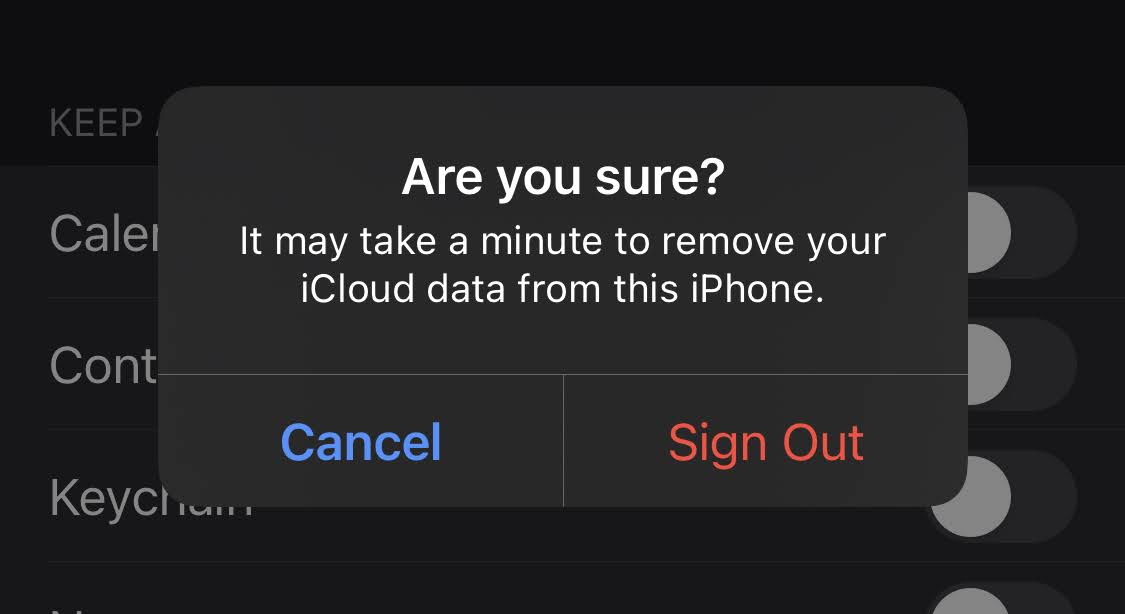
This one’s a biggie. Tap on Settings, tap on your Apple ID, scroll to the bottom, and tap on Sign Out. This how you’ll remove this device from being associated with your Apple ID. If you’ve been using “Find My” to keep tabs on your device in case of loss, you’ll be asked to input your Apple ID password to turn it off.
Finally, you’ll be asked whether you want to keep a copy of your data on this phone. It doesn’t matter, as you’ll soon be resetting it anyway, so just tap on “Sign Out” to continue. It should only take a few minutes to remove your iCloud data from your old iPhone.
Reset and erase your iPhone
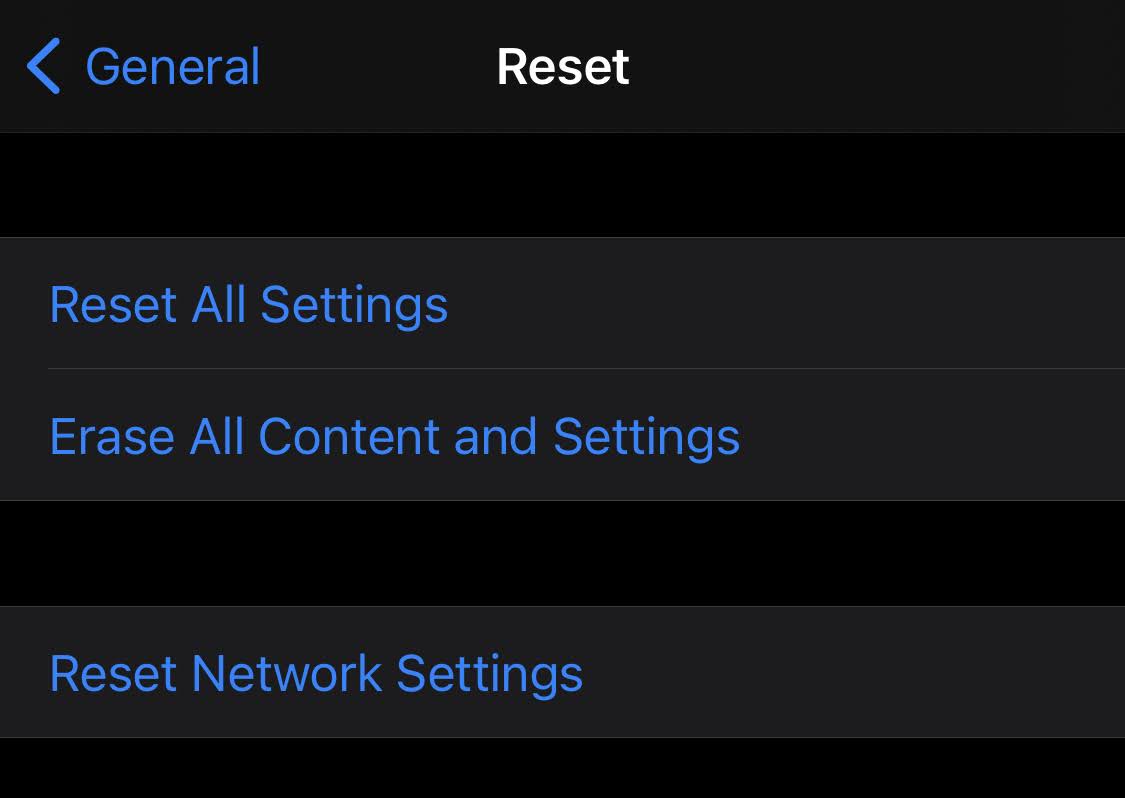
Tap on Settings, tap on General, scroll to the bottom, and tap on Reset. Select the second-place option: Erase All Content and Settings. Enter your passcode or password one final time. Tap on the red “Erase iPhone” option. Say a final goodbye. Tap “Erase iPhone” one more time.
Double-check your iPhone is gone for good
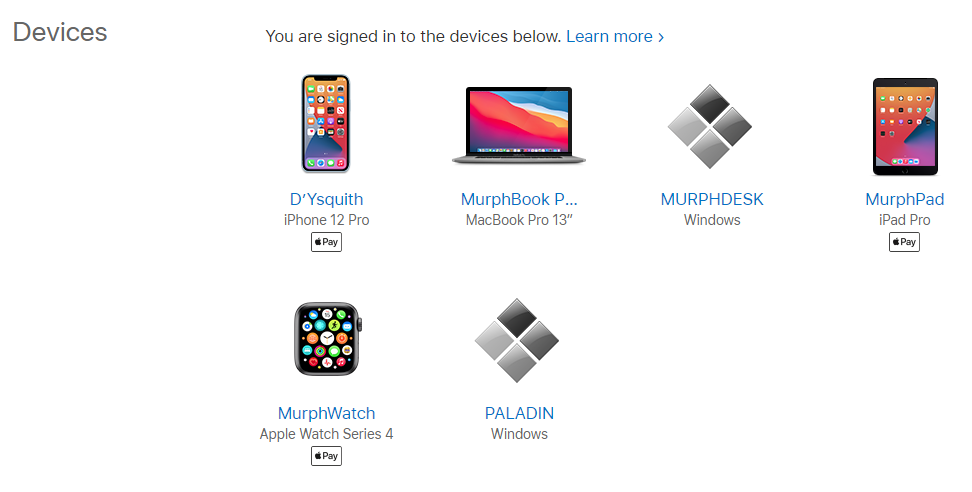
Go visit your Apple ID’s account management page and scroll down a bit until you see “Devices.” Your iPhone shouldn’t be on that list. If it is, click on it and select “Remove from Account.”
Turn off your old iPhone and send it back to Apple
This one’s self-explanatory, but make sure you power down your old iPhone. Then, open up the return box Apple sent you and follow its instructions to mail your iPhone back. Try not to think too much about the huge sacks of cash — in the form of a refund or an Apple balance — headed your way.
Leave a Reply
You must be logged in to post a comment.