If you accidentally delete a file, all hope isn’t lost. However, assuming you can’t just drag it back out of the Windows Recycle Bin ” especially true if you, like me, tend to default to the more permanent Shift + Delete instead of just “delete” ” you’re going to have to roll up your sleeves and try a slightly more complicated technique.
File-restoration apps have download from the Microsoft Store right now.
Before you pull it up and get recovering, let’s take about the basics. The very best thing you can do to ensure a more successful file recovery is to use an app like this one the moment you accidentally delete something. Don’t power down or restart your computer. Don’t say, “eh, I’ll do it tomorrow.” The more time that elapses after the accidental deletion ” days, weeks, months ” the less likely you’ll be able to recover the data, assuming you’ve been using said system (and its HDD or SSD) in the meantime. File-recovery tools can save the day, but their powers aren’t infinite.
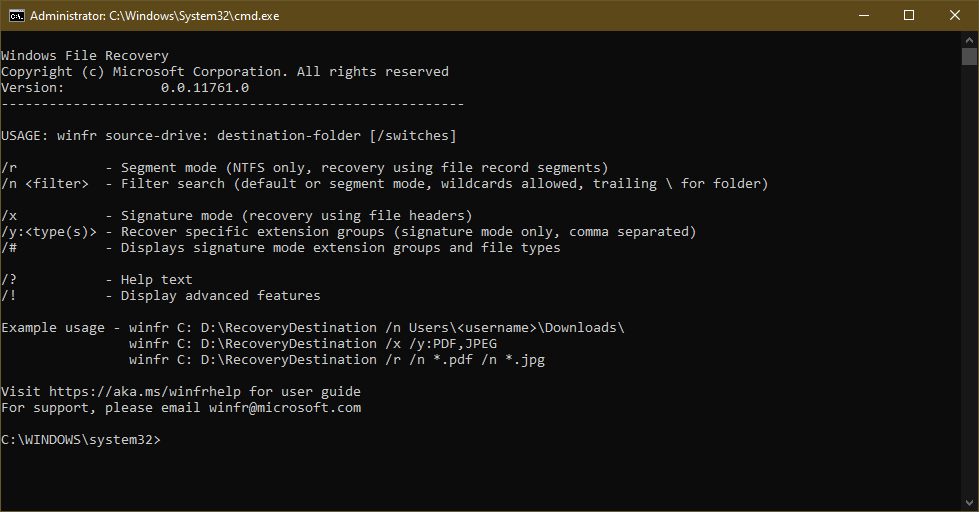
With that out of the way: Launching Windows File Recovery doesn’t pull up the pretty-GUI app you might be expecting. Instead, you get a Command Prompt:

There are a lot of options you can type in for the various switches. But, if you just care about the basics, then something like this:
winfr C: E: /n UsersDocumentsQuarterlyStatement.docx
would restore a specific file from your C: drive (the QuarterlyStatement.docx) to your E: drive. Yes, the source and destination drives have to be different for the file recovery to work, so you’ll want to plug in a USB drive to perform the recovery if your system doesn’t already have two separate drives.
Similarly, you can also attempt to recover the entire contents of a folder:
winfr C: E: /n UsersDocuments
Using that command would allow you to recover your entire Documents folder on the C: drive to your E: drive.
Now, you’ve probably noticed that there are actually three different file-recovery modes built into Microsoft’s tool: Default, Segment and Signature. There are a few reasons why you might want to use one over the other, depending on your file-recovery scenario. For example, if you’re using a non-NTFS file system (such as FAT or exFAT), you’ll only be able to use Signature mode.
As Microsoft spells out:

I haven’t tried Microsoft’s tool to recover anything yet ” and I haven’t suffered any horrific accidental deletions recently ” but I’d recommend going with Microsoft’s recommended order on this one. Signature mode, as I understand it, could take a considerable amount of time to run, depending on the size of your disk. Start with an easier mode so you aren’t wasting time, then turn to the more thorough scans if the “undeletion” doesn’t turn up what you hoped it would.

Comments