You, like me, probably miss the days of taking in the scenery on vacation and figuring out how to best capture it with your camera. But now you’re stuck at home, and your DSLR is gathering dust; your phone’s photo archive is filled with pictures of your cat. We know how it is. But hey, this is the perfect time to brush up on your photography skills. Maybe photos of your backyard azaleas won’t be as exciting as that time you captured the Taj Mahal at sunset, but what you learn now can help you once travel is back in full swing. (And if you just up the contrast on that latest cat portrait? High drama.)
Yesterday, I asked Lifehacker readers to tell me their favourite travel photography hacks. Here’s what they had to say.
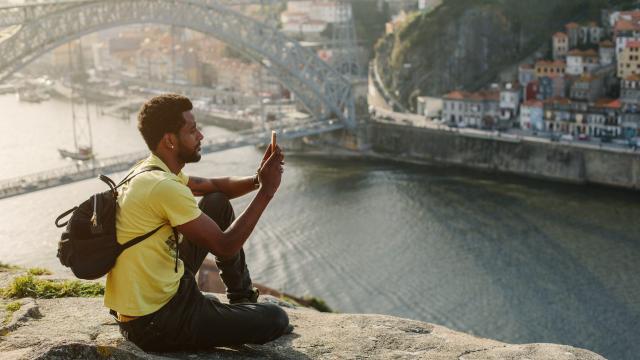
Create your own tripod
GregR offers some great tips on how you can use yourself and your surroundings:
1) Use your environment as a tripod. Find something to steady your hands on, like a railing or table or tree or something.
2) Use your body as a tripod. If none of those are available, or in addition to that, hug your elbows to your sides and bring the phone close as close to your face as practical so that your arms are under the camera. If you’re sitting, rest your elbows on your knees. The further your hands are from your body, the shakier they’ll be.
Such great advice, but I will also caution readers that if you’re using your environment, be sure that it’s extremely steady. On a trip to Bangkok, I used a table and napkin holder as a tripod, and my phone fell and shattered my entire screen. And yes, I had a screen protector but the impact was so bad that the main screen of my iPhone was busted.
Another reader, Tarquin Shrapnel-Carruthers has a fantastic hack in the form of creating your own tripod beanbag.
Just ask someone
There’s no place that I have gone in the world where I didn’t find someone taking a picture of themselves or their friends. These are typically people I enlist to take photos of me because I know they’re going to understand getting the right angles — you know, “for the gram.”
Wittyname has an awesome hack for asking strangers:
Whenever I need to ask a stranger to take a photo of me, I try to find someone pushing a stroller. I find I worry less about them taking the camera and running off.
People with families are usually a safer bet, but if someone looks like a tourist then they probably are and will be more than happy to take your picture. Photo taking and selfies are a universal language, so don’t be shy.
Day to night
A lot of times our worst pictures come from not knowing the type of lighting we may need. Do I need a flash or not? Should I face the sun or away from the sun?
Here’s what our reader GregR offers about when is the right time to shoot:
The perfect time is when you’re there. Don’t over think it or stress about being there at just the right time. There isn’t one perfect time.
Generally the ‘golden hour’ around sunrise and sunset results in pleasing light for many types of photos. I would start there. But that doesn’t matter so much if it’s overcast, or you’re in a city surrounded by tall buildings, or inside, or it’s not convenient to go out at 7AM. Also, night photos can be really nice, especially in a city.
But what about using the flash?
GregR continues:
If you’re indoors, a flashlight can help. I always have one in my little backpack anyway. If appropriate for the situation, shine the flashlight at a nearby wall or the ceiling — never directly at your subject. The light will reflect and diffuse into something resembling useful. Not perfect, but may be enough to get the shot.
You can sometimes make on-camera flash work indoors with an index card or other white piece of paper. Put the card directly in front of the flash at an angle so that the light is directed away from the subject, preferably to a nearby wall or ceiling. This can be super tricky on a phone camera because the flash and lens are right next to each other. It can be difficult or impossible to cover one without covering the other.
Think like a pro
The “1969 Dodge Charger Guy” advises that you use the “Rule of Thirds.” This means that you break the photo into thirds, both vertically and horizontally, creating nine squares. The grid this creates allows you to focus on exactly where is the most important part of the shot.
If you put your subject at any one of the four intersections instead of plopping it in the very centre, you’ll do yourself a big favour. And if you’re really rad, stick the subject matter way off to one corner.
For DSLR users, Ash78 adds:
If you want to use it as your main camera, go with a 35mm-50mm prime lens and the “auto” setting (ideally with the flash suppressed unless needed). This cuts down on size and weight, and requires a lot less fiddling to get good shots. Otherwise, please stay out of the way of the crowds as you fiddle around with changing lenses and setting up the tripod. You don’t need photo advice, you know what you’re doing.
Black and white
I don’t think black and white photos get enough credit for how much they can capture a moment. It turns out they can also help when light is at a premium.
GregR also advises:
Black and white can be your friend on dark photos. Even if there’s no motion blur, photos of dark scenes can be noisy/grainy. I find black and white is more forgiving in low light because the grain is less distracting. Something to try.
There are so many cool hacks to test out. But be sure to check out the comments in our previous post for more ideas.
Leave a Reply
You must be logged in to post a comment.