Gone are the days when you had to manually scan through hundreds of photos to find that one shot of you and your best friend that eludes you. On the three platforms you’re most likely to use to store your smartphone pictures — Apple Photos, Amazon Photos, and Google Photos — machine learning can categorise your photos by the faces in them, rather than rudimentary details like when or where they were taken.
All three platforms treat this time-saving feature differently. It’s pretty easy to figure out on Amazon and Google, but a bit more buried on iOS. Here’s a quick look at how to get your iPhone or iPad to recognise faces in your photos.
Tagging people in your photos
To get started, pull up your Photos app in iOS 11 (or later). Tap on a photo with a person in it to pull it up on your device. Scroll down a smidge, which gives you a new “People” and “Places” listing to look at.
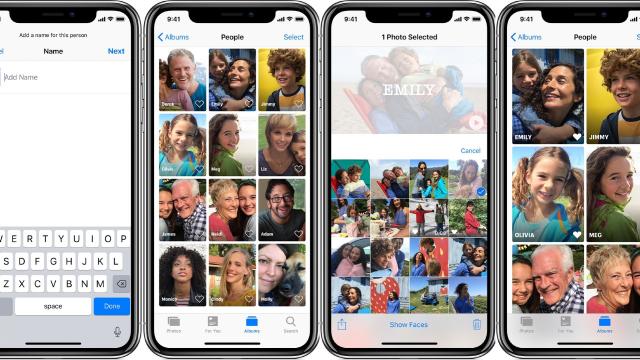
While your device is good at identifying that faces exist in a photo, it doesn’t do anything with this knowledge until you associate that face with a person. Tap on a person identified in the photo — the circular icon under ”People” — and then tap on “Add Name” at the very top of your screen to do just that. As you start typing, the person’s should autofill from your contacts (if applicable).
You’re not done yet. Now that you have your person set up, you’ll want to tap on the three-dot icon in the upper-right corner and select “Confirm Additional Photos,” which will (hopefully) give you suggestions of other potential photo matches that iOS might have missed.
Searching your photos for people
Once you’ve set up a few people like this, go back to the primary Photos app and tap on Albums. Scroll down a bit to uncover the “People & Places” section, and then tap anywhere on it to reveal this screen:
Tap on a person, and you’ll now be able to see all the photos they appear in (according to iOS). You’ll also be able to see this if you tap on the Search button at the bottom of the Photos app and look up the person by name or by tapping on their giant, circular photo. You can also search for multiple names to find shots featuring two (or more) people at once.
And since I mentioned it, if you find that you hate the thumbnail, or “Key Photo” that iOS picks for the people you’ve identified, you can change that, too. Tap on the person in the aforementioned “Peoples & Places” album, tap on select, tap the photo you want to use for the thumbnail, tap the Share button in the lower-left corner, and select the “Make Key Photo” option.
Comments