While Google is letting users test out the upcoming Android Q through a public beta program, it’s not going to be for everyone.
If you updated to the Android Q beta build and find your device has slowed down, that the battery isn’t as efficient, or that certain apps don’t run the way they’re supposed to (or at all), you’re not alone and chances are that you need to roll back to Android 9.
Performance issues and bugs like these are part of the tradeoff for getting early access to new software and features. Betas are meant to help developers find and solve problems, and to Google’s credit, the company is forthcoming about the potential shortcomings of opting into any of its beta programs.
The good news is that restoring your device to a stable version of Android 9 is actually quite easy. All it requires is a few button presses, then downloading and installing the update, and you’re done. The catch is that rolling back your device’s OS requires it to be reset to factory settings during the process, which wipes all your data and settings from the device.
This is the opposite of upgrading to a new version of an OS, which keeps your files, apps, and other data largely intact. Luckily, Google makes it easy to create a backup of your data, then port it back to your phone after the rollback is finished.
If you want to leave the Android Q beta and go back to Android 9, here’s how to safely and properly back up your data and rollback your Android OS.
Creating a backup of your device’s data
The key to a smooth rollback is having a proper backup of your data. Android devices feature a built-in, Google Drive-based backup process that saves the following files and data:
-
Google Contacts data
-
Google Calendar events and settings
-
Wi-Fi networks and passwords
-
Wallpapers
-
Gmail settings
-
Apps downloaded from Play Store
-
Display settings
-
Language and input settings
-
Date and time
-
Some settings and data for apps not made by Google (varies by app)
This backup can then be imported automatically when setting up your device to restore most of your saved files, apps, and more. Ideally, you would have created a backup prior to installing the Android Q beta, but don’t sweat if you didn’t—we can still backup your data in Android Q beta before rolling back to Android 9.
However, if you did make a backup prior to the beta, and are comfortable using that as your restore point, you can skip this section and jump to the rollback section below.
Before backing up, make sure the backup settings are enabled.
-
Open the settings app
-
Go to System & Advanced & Back up
-
Turn on the backup service
With the backup service turned on, it’s time to manually back up your device.
-
In the settings app, go to System & Advanced & Backup & Back up now
-
Tap “Continue”
-
Wait for the process to finish
You can find backups you’ve created by opening Google Drive on your device or PC and selecting the “Backups” tab from the menu on the left. Select the most recent backup from the list to see a general overview of what it contains.
It’s worth noting here that while the Backup setting saves most of your data, if you use apps downloaded from non-Google Play stores such as Amazon or have contacts on your device that aren’t connected to your Google account, you may need to manually back these files up as well before rolling back your phone.
To manually backup your Contacts:
-
Open the Contacts app.
-
Tap More & Settings & Export.
-
Choose which contacts to export.
-
Tap “Export to .VCF file.”
-
Upload this to your Google Drive or an external storage device (detailed below)
As for saving files from apps not associated with your Google account or that you downloaded from other app stores, the process can usually be done in the apps themselves but the steps will be app-specific. Consult the app’s store pages or official websites if you run into trouble. You can also manually upload files and folders to Google Drive.
-
Open Google Drive on your Android device.
-
In Google Drive, tap “Add” then “Upload”
-
Tap each of the files/folders you wish to backup
The other way is to connect the device to a PC via USB cable, opening the device’s storage location on your computer, then transferring the files to a storage location — whether that be an external storage device, cloud storage, or the PC itself.
Regardless of how you back up this data, you will also need to manually re-download these apps and import your contacts after you’ve completed the rollback update and restored your other device data.
How to opt out and rollback your device
-
Open the Android Q Beta page
-
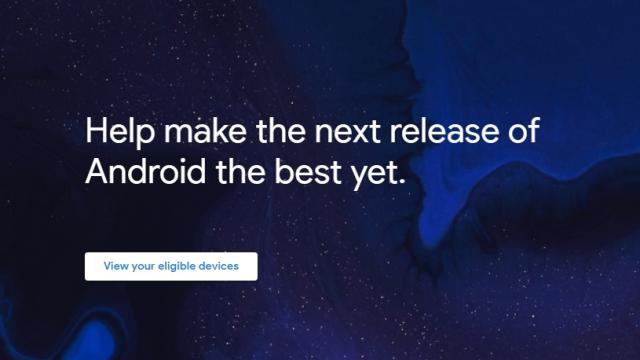
Click or tap “View your eligible devices” (if you don’t see your device, make sure you are signed into the Google account linked to device(s) you wish to rollback).
-
Tap “Opt-out” on the devices listed you wish to remove from the beta program (Note: If you sideloaded the Android Q beta rather than installed it via OTA, the button may say “Opt-in” rather than Opt Out. You can still restore your device using the OTA method by tapping or clicking “Opt-in.” Wait a few minutes, refresh the page, and the option should now say “Opt-Out.”)
-
Your device will receive a new update within about 24 hours, though ours was almost immediate. Go to System & Advanced & System Update & Check for Update to see if the update is available. Otherwise, you will get a notification once it’s arrived.
-
Run the update once it’s ready.
-
During the installation, your device will be reset to factory settings and you’ll have to go through the initial setup process as you would for a device you just purchased. At one point in the setup, you will be asked to import your data. Select the option to import the backup file from Google Drive, then follow the on-screen instructions.
-
After the setup is complete, your data will slowly be restored and your old apps reinstalled.
-
If you manually backed up any data that needs to be imported, or need to re-download apps from other app stores, you can do so now.
Comments