Drives fail. And no matter how many backups you have, losing a drive when you’re in the middle of working on something important — my namesake’s law — can be a real pain in the arse. Thankfully, replacing your old-and-busted drive with a brand-new drive is one of the easiest upgrades you can make.
Which drive should you get?
You have a lot of options depending on what kind of storage fits inside your desktop or laptop, how many gigabytes or terabytes you need, and what you’re willing to spend. Here’s a quick rundown of the basics:
Solid-State Drive
Generally, if you’re looking for performance above all else, you can’t go wrong with a great solid-state drive (SSD). SSDs are incredibly quiet, absurdly fast, and barely weigh anything.
You’ll pay for these conveniences: If you need a ton of space (say, 2TB), you’ll be spending anywhere from six to ten times the price of a regular hard disk drive (HDD). If you’re considering an even-faster M.2 solid-state drive (that connects via your system’s speedier PCI Express bus instead of your system’s slower SATA connections), be prepared to shell out even more — four digits, in some cases.
Hybrid Drive
A hybrid drive, or an SSHD, attempts to bridge the gap between slower HDDs and speedier SSDs. They’re basically HDDs with a little bit of memory. The drive attempts to shuffle your most-accessed data to the drive’s memory cache for quicker access. A majority of your data stays on the slower HDD portion.
Depending on how good the drive is at managing that process — which can take a little time to churn up, since the drive won’t have any information about frequently accessed data when you go to use it for the first time — you might see a speed increase in certain instances.
SSHDs can be a little more expensive than HDDs, but they tend to cost a lot less than comparably sized SSDs. You’re less likely to see huge-capacity SSHDs (4TB+) compared to their HDD counterparts, so if you need a ton of space, you’re going to have to make a choice (and we suspect you’ll go HDD).
Hard Drives
If SSDs are the fine dining of storage, and hybrid drives are the step-above fast food restaurant (Cantina Bell) or boutique hole-in-the-wall that you love and nobody else knows about, hard drives are the McDonald’s — the workhorse. They have been around forever, they work, they cost the least compared to everything else you can buy, and they will never go away. Never. (Or, at least, not until the price of memory gets so low that a huge-capacity SSD is finally a viable alternative. I won’t be holding my breath.)
All hard drives perform differently, and there’s one basic way to deduce a drive’s speeds when you’re staring at its box: Generally, when given two similarly sized hard drives, the one with the greater RPM (typically 7,200) will outperform the one with the lower RPM (typically 5,400).
Areal density also plays a role in drive performance, but if you’re obsessed enough with speeds to be considering that measurement, your best bet is to read up on benchmarks for drives you’re considering. Most people should be fine buying the biggest 7,200 RPM drive that fits your budget.
I bought a drive. How do I install it?
I think that buying a new drive for your system is the hardest part of the entire process. Once it’s out of the box and sitting on your desk, installing it is easy.
For this demonstration, I’m using my (dust-free) desktop PC. Installing a new drive on a laptop is even easier — if your laptop’s manufacturer allows it. Typically, you have to unscrew a single panel, pop out the old drive, and pop in a new drive, but you’ll want to check your laptop’s manual to make sure you’re doing everything correctly.
(If you go that route, you’ll have to reinstall your operating system and apps, set your software back up again, and copy over your data from wherever you previously saved it. My advice: Image your drive before you replace it, make a recovery CD/DVD/USB key, and restore that once you have your new drive in place.)
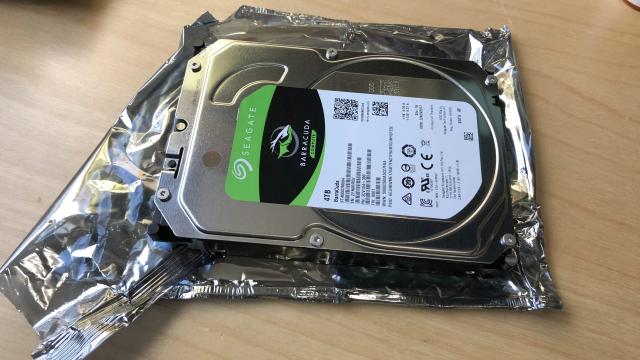
Step One: Take your new drive out of the packaging
Carefully remove your new drive from its packaging, typically an antistatic bag. Resist the urge to rip open the antistatic bag like a kid on [holiday of your choice]. I save them, because they’re great for holding older drives you don’t know what to do with, but don’t have the heart to recycle. Place the drive gently on the antistatic bag while you start preparing your desktop system for entry. (That sounded a lot worse than I intended.)
Step Two: Pop open your desktop PC’s case
You might have to break out the screwdriver; you might be able to use your case’s thumbscrews. Either way, remove both of its side panels — or, if you’re lucky, one side panel. (My NZXT H440 chassis has its easy-to-access drive bays all facing one direction.)
This is where our paths might diverge, because every desktop is different. Yours might come with pull-out drive trays or drive rails that you attach to each drive individually. You might even have to screw your drive directly into your case’s drive cage.
No matter how you get your new drive in your chassis, you’ll want to have your old and new drives connected to your system at the same time so you can more easily copy the contents of one to the other. In my case, since I use multiple drives, I disconnected one of my solid-state drives (not the one that my Window OS sits on) and used its power cable and SATA cable for my new drive — temporarily.
An aside: Generally, your current drive (or drives) should already be connected to your motherboard’s SATA ports. Your speediest drives should use your fastest SATA ports where possible, which is labelled in your motherboard manual and sometimes on the motherboard itself. If you have an SSD, let it use your 6 GB/s SATA port (if applicable). Since a regular hard disk drive (like the one I purchased) will never saturate the speeds of a 3 GB/s SATA port, the port you pick for it is less critical.
With the new drive and the old drive both connected and ready to go, I fired up my desktop, logged into Windows 10, and pulled up the Computer Management tool. I used this to initialize the new disk, create a new simple volume on its unallocated space (right-click on the big black chunk of space in Computer Management), and assign the new volume a letter.
If your old drive is storing a bunch of miscellaneous content — photos, documents, movies, et cetera — you can now copy its contents to your new drive via File Explorer. I find it easier to use a third-party app like Macrium Reflect, because it copies your files over then bugs you about any annoying issues that pop up. With File Explorer, you might have to keep walking back to your system to click “skip” whenever it can’t copy over some random .TMP file or some empty directory it can’t find (neither of which you need on your new drive).
Macrium Reflect is also great if you want to make a direct clone of your old drive to your new drive — a perfect way to copy the entire contents of your single, primary drive to a new one. When you do this, you’re making an exact replica of your old drive’s volumes, including their size.
That’s important to know, because if you clone a small drive to a larger drive, you’ll want to go back to Computer Management when you’re done to make sure that the cloned volume is taking up all of your drive’s space. If you’ve copied over multiple volumes, it’s up to you to decide how much more space each should have.
Once you have a perfect clone of your original drive on your new drive, power down your computer. You’ll now want to go back to your case, unplug and pop out the original drive, unplug the new drive, place the new drive where the original drive was, and reconnect your SATA and power cables to the new drive.
You can also disconnect and remove the original drive, assuming you are using a one-drive setup, and let your new drive sit right where you put it (if you installed it into your case rather than placing it crudely on top of something else, like I did).
Heck, you can even use both drives at once. Leave each drive’s SATA cable connected to to the drive, but swap their connections on your motherboard. When you boot your system back up, check Computer Management to make sure that Windows is using your new drive as your primary drive, take a deep breath, and then format your old drive.
(Here’s a quick tip to make it easier to figure out: Before you power down your system and swap your drives’ SATA cables on your motherboard, put a big text file on your old drive’s desktop that says “OLD AND BUSTED.” That way, if you swap cables, boot into Windows, and that file isn’t there, you’ll know that Windows is using your new drive as the primary.)
Adding, removing, and swapping storage isn’t the trickiest task, and there are a ton of different storage configurations you can create when you buy a new drive for your system. You’re only limited by your imagination (and available space for more drives). Even then, you can always get an external enclosure or dock if you run out of room in your system, but want to keep the drive for whatever reason. Like I said, you always have options, and it never hurts to have more storage. Right?
Comments