It’s 2018, you have reams of paper in your home office, a file cabinet with documents at work, and your kid just handed you a new excursion form you have to, for some reason, fax to their teacher. If this doesn’t sound like the paperless future you were promised, you’re right.
Luckily, you don’t need much to get a handle on all those PDFs you have (or are about to create). A scanner, a smartphone and some cloud storage services are all you need to convert the stack of papers on your desk into a paperless wonderland.
First, Get Your Signature on File
Stamping your name on documents is probably half the reason you get physical copies of them in the first place. Contracts, permission slips and invoices, all require a signature, and are all easier to sign and edit when you’re using a digital version. If you’ve already scanned your documents (or received them via email) and need to sign them, importing your real signature (no weird longhand font required) should be your next step. Using either a desktop or mobile device, you can import your signature pretty easily if you follow the instructions on each platform. If the thought of keeping a signature on your computer makes you feel uneasy, you can always import your signature as previously stated, and delete it when you’re done.
Having a signature on hand makes it easy to fill out forms with multiple signature fields. Even if you’re required to fax that official paper to someone, you can use your signed digital file with a service such as FaxZero or Scanbot Pro, and send it without hearing a single dial tone (though you’ll probably have to pay a buck or two to avoid any faxes watermarked with the company’s logo). In short, electronic signatures are handy, useful for staying paper-free, and can save you a headache if you need to sign and send something in a pinch.
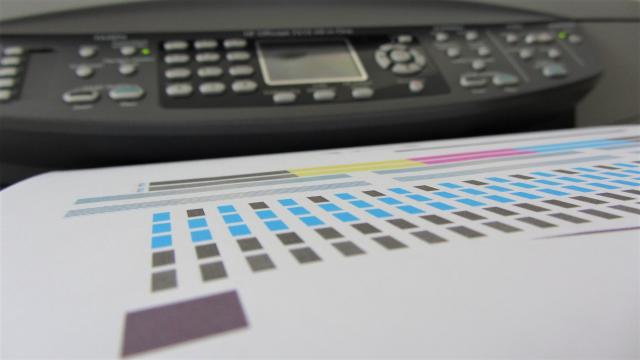
You Might Want an Actual Scanner
Laying your single page on a table, aligning and keeping your phone level to take a photo, taking the picture, and repeating the process with the next page might put you off scanning the rest of your documents, especially if you have a stack of old papers and a busy workday.
Instead of tiring your arms out while you hold your phone above a table, get a home scanner. It can handle multiple documents at a time and will make your paperless office experience less time consuming when it comes to processing documents compared to using a smartphone to take a photo of every page you want to digitise.
With a dedicated scanner (preferably with a document feeder for scanning multiple pages) you can handle stacks of paper all at once, get high-quality scans without worrying about angles and lighting, and have them automatically end up in your cloud storage destination for easy access through your other apps or devices (more on that later). Plus, using a dedicated scanner makes it easier for you to get your work done without getting distracted after scanning a few documents by checking Twitter to see what new memes are on the market.
Start With a Scanning App
That isn’t to say your smartphone won’t do as an adequate scanning tool. Having a mobile scanner will definitely save you a few steps if all you want to do is hold on to a copy of that receipt from yesterday’s lunch or if you need to send a signed form to someone straight away and don’t want to waste time getting your files from your computer, or waiting for them to upload from your home scanner to your cloud storage destination.
As far as apps go, Scanbot for iOS or Android is a full-featured option ideal for capturing whatever document is right in front of you and sending it to its destination, whether it’s your cloud storage account or a Slack message to a colleague. After you scan your documents, you can mark up your scan with annotations and add signatures to documents using your finger (another way to avoid storing it on your computer). Scanbot automatically detects documents in the camera, corrects for perspective to straighten photographed documents, and supports QR code scanning.
Scanbot is free to use, but an in-app purchase unlocks more features vital to working in a paperless office. Optical character recognition detects important information (names, phone numbers, email addresses) and makes it easy to interact with the full text of a document and search for it when you need to find one particular segment in a scanned document, or the contact information on someone’s business card.
Document scanning apps are legion in the App Store, but you should only use well-received apps such as Scanbot or the subscription-based CamScanner, and avoid apps that pepper you with multiple in-app purchases to unlock features that usually come standard (or at least as part of a single in-app purchase).
Pair Your Documents with Services
With all those scanned documents, you no doubt have a folder in which they end up. But keeping them in that same folder on your computer isn’t making the most of having a digital version of your bills, contracts, receipts and other pulp-based documents. Organising your documents using tags or a smarter file naming system will make it easier to find what you’re looking for. Configuring your scanner to automatically dump all your scanned documents into a cloud-accessible folder using something like Google Drive or Dropbox should be done early so you can easily keep track of what you digitise and what you can get rid of.
In his Cult of Mac article about building his own paper-free office, John Brownlee discussed how he set up an inbox for his scanned documents using IFTTT, Dropbox and Evernote. As documents enter the specified folder, IFTTT copies them into Evernote, where he then organises them with appropriate names and tags. If you want to further organise your documents, you can sort them by type and put them in their corresponding folders (receipts, taxes, medical information and so on). Like organising photos, everyone manages files differently, so find a style that works for you.
If you aren’t an Evernote fan, you can store them in a service such as OneNote to tag and name the documents. Storing them on your Mac? Finder’s built-in tags can help you sort and separate urgent documents like bills from less important ones, such as your receipts. No matter where you store them or what you name them, having them available in the cloud will make it easier to extract and edit the information on those scraps of papers. The only question left to answer is what you are going to do with all that useless paper now.
Comments