If you think back to your high school geometry class, you might remember that “If/Then” statements were used in solving mathematical proofs. But even if maths wasn’t your thing, you actually use If/Then statements every day: “If it’s raining outside, then I will bring an umbrella.” Or, “If I eat this doughnut, then I will be very guilt- um, happy.”
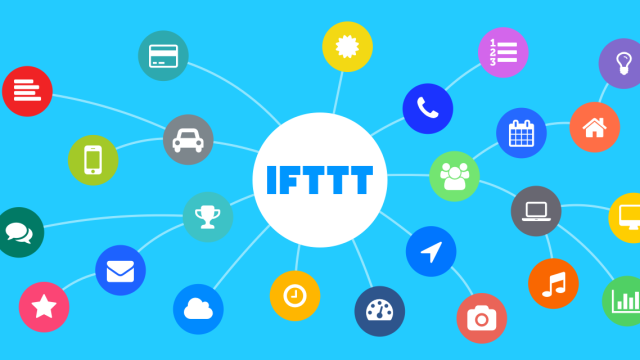
Taking the logic of the If/Then statement to its place in today’s hyper-connected world is the website IFTTT. It’s pronounced to rhyme with “gift” and it stands for “If This, Then That”. Through the IFTTT website and accompanying app, users are able to create logic statements that help them pair up Internet-enabled services and devices in ways that can make life easier — or more entertaining.
Here’s what you need to know to “get it”. (Note: For the purpose of this article, we will be referring to the browser-based version of IFTTT, but nearly all of the information can be applied to the app, as well.)
Getting Started
Like pretty much all other Internet-based services, IFTTT requires you to create an account to begin using it. Signing up is extremely straightforward and because the service is completely free, there is no need to provide a credit card. Simply visit the website and use your email address or Google or Facebook accounts to sign up.
Applets
Everything IFTTT can do is accomplished through applets. These are tiny programs that you can create which use triggers (the “Ifs”) to execute actions (the “Then Thats”). For example one applet might be: “Every time the New York Times publishes a new article in its science section (If), send me an email (Then That).”
It’s important to realise that only companies that have linked up with IFTTT will be available to access via applets. For example, you’ll be able to access applets that control the Nest thermostat (as well as several others), but if you have a Vivint thermostat, you’ll be out of luck because the company hasn’t made its services available through IFTTT.
Because IFTTT has been around since 2011, there are a lot of pre-made applets you can choose from that already have triggers and actions linked, so chances are good that you’ll be able to find what you need without having to create your own applet. First we’ll tell you how to do that, then we’ll show you how to start from scratch.
Finding A Pre-Made Applet
IFTTT allows users to search for applets in several ways.
If you know what you’re looking for, simply click on the search text in the upper left corner of the screen, enter your topic in the search bar and hit enter. For example, if you’re looking for an applet that can automatically turn your Philips Hue lightbulbs on at sunset, enter “Hue” in the search bar.
You’ll be taken to a page that will first list services that can used to build an applet and beneath that, you’ll see a list of pre-existing applets. In this case, the one we want shows up at the start of the list, so all you have to do is click on it, and then click the “Turn On” slider.
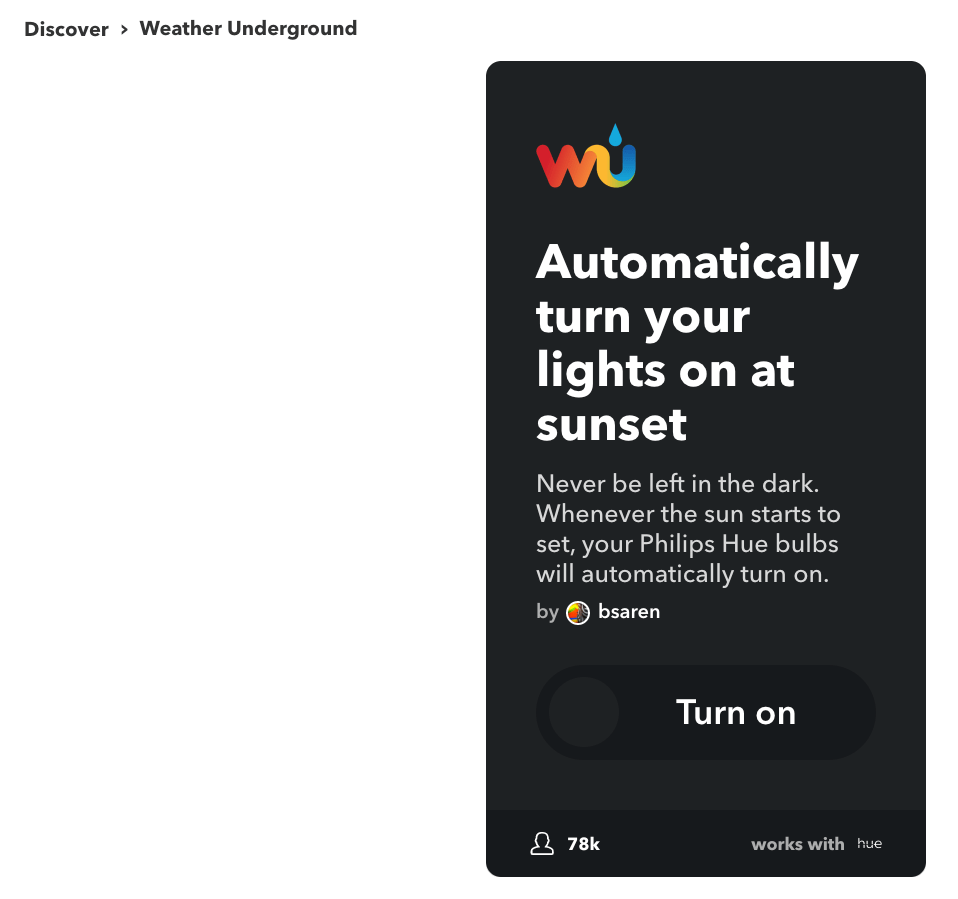
This will take you to another page that explains which services need to be activated to make the applet work. In this example, it’s Weather Underground and Philips Hue. Click the OK button, and you’ll be walked through the steps necessary to activate the services needed for your applet. For this example, you need to tell Weather Underground where you live and then log in to your Philips Hue account.
Once you’ve completed the steps needed, your applet will be activated and you can begin enjoying a new level of interconnectivity.
Browsing
Another way to find IFTTT applets is to click on the “Discover” link at the top of the screen. This will provide you a list of suggested applets based on those you’ve already activated. Alternatively, you’ll notice that when you click on “Search” at the top of the screen, you’ll see a convenient grid showing you a variety of categories. Click on a category, and you’ll be taken to a page showing you applets grouped by genre.
Click “Connected Car” for example, and you’ll find applets that do everything from tracking your car trips in a Google spreadsheet to helping you remember where you parked your car. Under the “Weather” category, you can get a notice when the local surf is surging or if it’s going to rain tomorrow.
The “Social Networks” category, meanwhile, lets you try out some clever cross linking, such as saving photos in which you’re tagged on Facebook to Google Photos.
Creating an applet from scratch
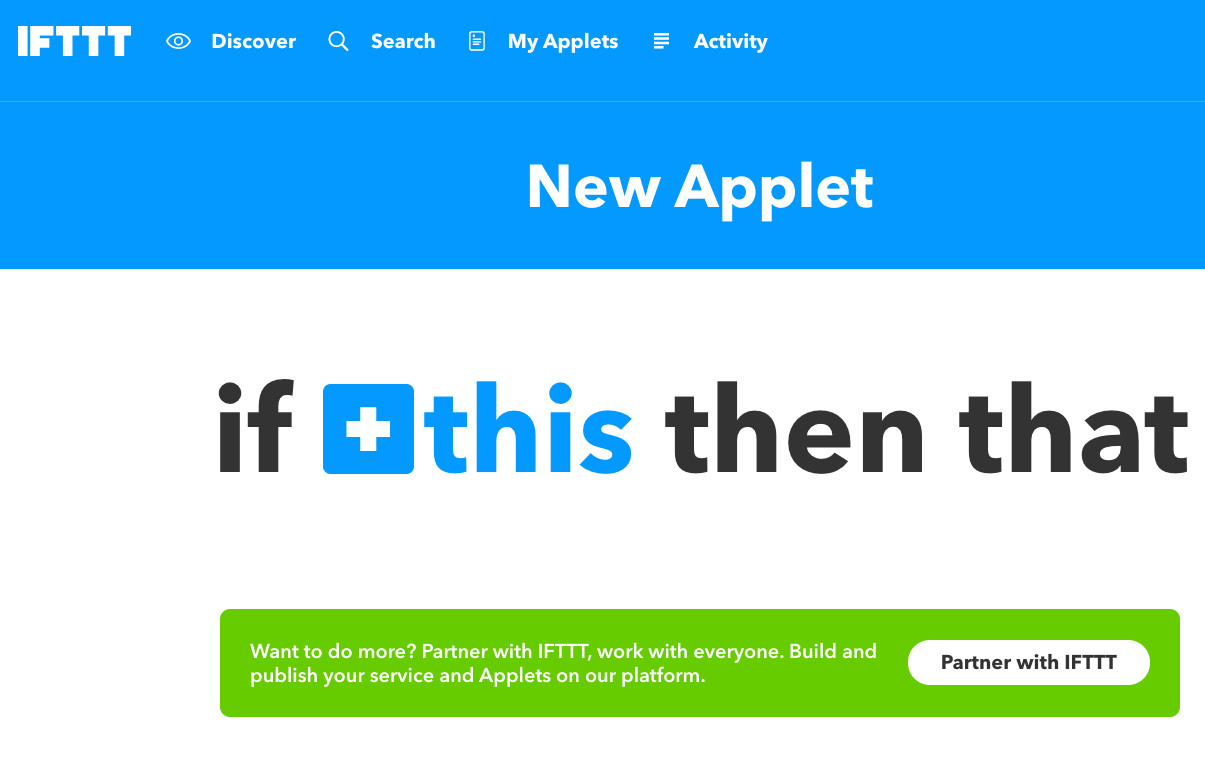
If you can’t find a pre-existing applet that suits your needs, you can create one as long as the company you want to access has an arrangement with IFTTT. To begin, click on “My Applets” at the top of the screen, then click the “New Applet” button in the upper right.
You’ll then be taken to a screen that features the words “if +this then that.” Somewhat counterintuitively, you’ll need to click on the blue “+this” section of the text.
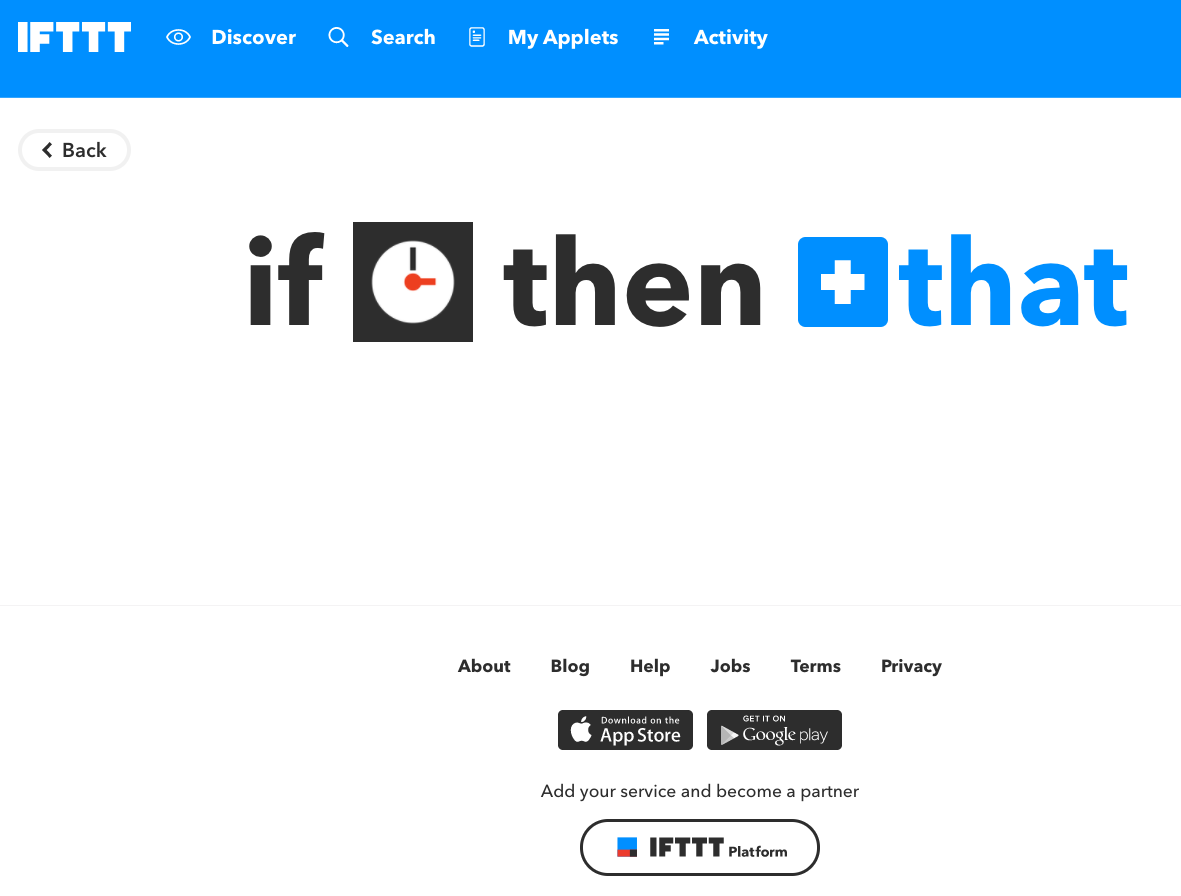
In this case, we’ll create a simple applet with a daily trigger. To set it up, click on Date and Time and you’ll be taken screen that describes the service. Choose when you’d like your trigger to activate (hourly, daily, weekly, etc) and click on “Create trigger.”
Once your service is connected, you’ll then be taken back to the screen showing the large text version of “if this then that”, only this time, the “+this” section will be replaced by a graphic of the trigger you just chose.
Next, it’s time to select the action you want to have activated by your trigger. To do that, click on “+that,” which will now be blue.
In this simple example, choose SMS, then click on the green box that says “Send me an SMS”. You can then customise the applet to send you a message at the interval you specified in your trigger. Click “create action” and your applet will be created. If you want IFTTT to send you a message every time your applet runs, you can click the slider next to “Recieve notifications when this Applet runs”. Then, click “Finish” and you’ll be all set.
Turning applets on and off
Once you’ve activated one or more applets, you can turn them on and off as needed. Simply click on the “My Applets” text at the top of the screen, click onto the applet you’re interested in controlling, and click the “On” button to turn it to “off.”
On these screens, you can also make changes to any applets you’ve created. To do so, click the gear icon in the upper-right corner of the applet box and you’ll see the options you have for applet customisation.
At any time, click the IFTTT logo in the upper-left corner of the screen to be taken back to the main page.
You’ll soon see that you can create applets for everything from getting yourself out of an awkward situation to finding out when the International Space Station passes overhead.
Be warned: You might want to create an applet that kicks you off the IFTTT site if you spend too much time there because all this IFTTTing can get pretty addictive!
Comments
One response to “The Beginner’s Guide To IFTTT”
It was a good way to enforce home automation before Google introduced 3rd party integration in Australia.
My Favourites:
Turn on my LIFX lights at sunset = https://ifttt.com/applets/fSLXkRzw-turn-your-lights-on-at-sunset
Save a tagged facebook photo to my Google photos folder in G-Drive = https://ifttt.com/applets/62108132d-when-you-re-tagged-in-a-facebook-photo-save-it-to-google-drive
If it’s going to rain tomorrow, send me a notification = https://ifttt.com/applets/61264521d-if-tomorrow-s-forecast-calls-for-rain-then-send-a-notification-from-the-ifttt-app