
iOS: With iOS 11, Apple rolled out a new screenshot tool for the iPhone and iPad that allows you to quickly edit your screenshot after you capture it.
Screenshot: E.Price
Taking a screenshot is done exactly the same way it’s always been done. If for some reason you’ve never tried to do that, you take a screenshot by pressing the Home button and the Sleep/Wake button at the same time.
Now when you capture that screenshot, you’ll see a small thumbnail of your recent capture in the bottom left side of the screen. It will stick around for a few seconds after you capture it (you can dismiss it by swiping it to the left), and then move along. To access the screenshot editor, tap on that thumbnail.
Write on It
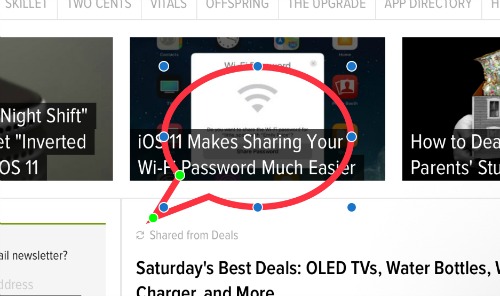
Writing on screenshots is probably the thing you’re most likely to do with the editor. Within it, you have a pen tool as well as a pencil and marker. Choose which digital pen you’d like to use by tapping on it. To the right, you’ll see colour choices (white, black, blue, green, yellow, red). Tap on the colour of your choice and then start writing on the image. In the image below I used the pen to draw the circle, a pencil to underline text, and the marker to draw the sun.
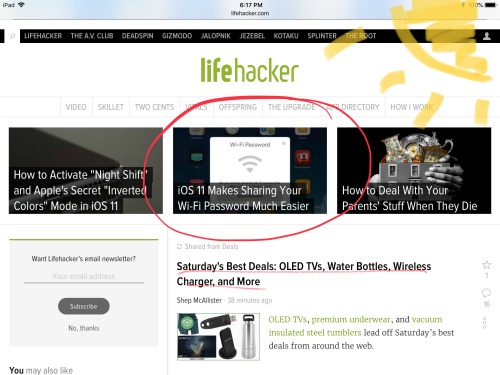
Screenshot: E.Price
If you mess something up along the way, tap on the eraser icon to erase that mishap. You can also go back in time and remove your last edit by clicking the back arrow on the top right side of the page on iPhone, or bottom left on the iPad.
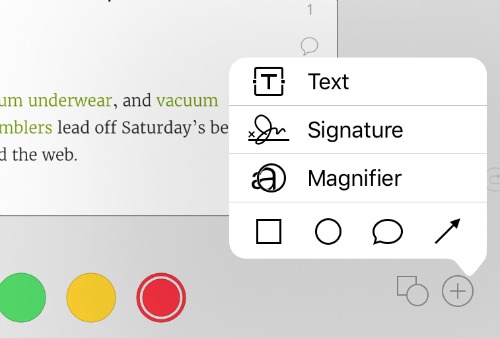
If your digital handwriting isn’t so good, you can also add text to images by tapping the plus sign at the bottom right of the page, and then selecting Text.
Crop Away
Cropping within the screenshot editor works exactly the same way it does in other photo editors. To adjust the screenshot’s size, adjust the blue border around your image. You can also pinch-to-zoom to zoom in on a particular part of the screenshot to come in closer to what you want to highlight.
Save Your Signature
Screenshot: E.Price
One thing the screenshot tool can potentially come in handy for is signing documents on the fly. Within it, you can save your signature, so you just have to drag and drop it on whatever forms (or love notes) you need to sign. To get to where you save your signature, tap that plus sign at the bottom right side of the page and then select the Signature section.
Move Drawings Around
You draw a big circle around something, and then realise you actually circled the wrong thing. You can move your digital circle around (or anything else you’ve written) by tapping the digital lesson tool on the page and then tapping what you’d like to move, and then drag in across the screen to its new home.
Use Pre-Set Shapes
Screenshot: E.Price
Ninety-nine per cent of the time I take a screenshot it’s because I want to point something in particular out to a friend, typically with an arrow. The screenshot tool has a number of shapes pre-set in its menu (a square, a circle, an arrow and a speech bubble). You can get to them by tapping that plus sign at the bottom right and then tapping on the one you want. Shapes sizes can be adjusted to whatever size you need, and you can drag and drop it to the best placement within your screenshot.
Comments