Plex is already an awesome way to stream your media from your computer to all your devices. The recently launched Plex Cloud makes it even simpler by hosting your media for you. Instead of having to keep your own computer on and connected at all times, you can just upload your stuff to Amazon and stream it anywhere you go. Here’s how to set it all up.
The beauty of Plex, and Plex Pass is that you can stream any media in any format to any of your devices anywhere you go. The only drawback has been that you’ve still needed a place to host those files that you own and manage. Plex Cloud frees you from that limitation, and it’s easy to set up.
What You’ll Need Before You Begin
Previously, you had to set up a Plex server on your own computer that’s always connected to the internet if you wanted to stream your movies or TV shows from your PC to your phone. That’s fine if you have reliable internet and a computer (or a NAS) you can keep connected at all times, but it also puts a lot of responsibility on your own hardware. If your internet goes out or your computer lags, it’s on you to fix it. With Plex Cloud, you can stream from Amazon’s servers, which means you’re less likely to overload the server by streaming a movie, and if your internet goes out at home, you can still stream somewhere else
To set up your Plex Cloud server, here’s what you’ll need:
- An Amazon Drive account: If you’re a Prime subscriber, you already have an Amazon Drive account that can store unlimited photos and 5GB for other files. That’s great, but it’s likely not enough for your music and movie collection. For $US60 ($83)/year, you can sign up for unlimited storage. It’s not necessary, and Plex says Plex Cloud will work with any Amazon Drive account, but 5GB isn’t much so you might need to upgrade to make Plex Cloud useful.
- A Plex account with Plex Pass: Plex Cloud is exclusive to Plex Pass users, so you’ll need to make sure you have a subscription. Plex Pass costs $US5 ($7)/month, $US40 ($55)/year, or $US150 ($208) for a lifetime licence.
- A decent internet connection: Once your Plex Cloud server is set up, you’ll need to upload all of your media to your Amazon Drive account. Depending on how big your library is and how fast your internet connection is, this could take a while. Make sure you’re on a reliable connection, preferably wired (just for speed) and without a strict data cap before you start uploading. You don’t want to burn through your cap setting this up.
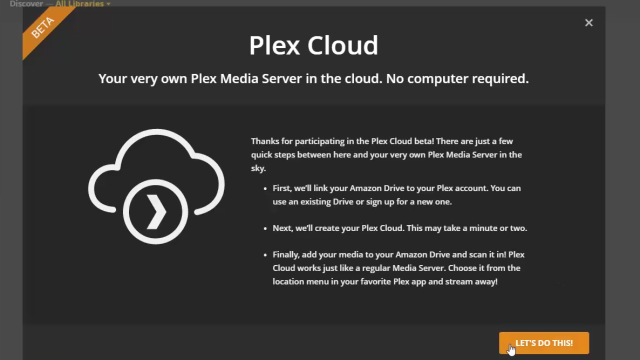
- A Plex Cloud account: At the time of launch, Plex Cloud is only available via invite. Thankfully, the service is now available to anyone with a PlexPass. Sign up here.
Keep in mind, Plex Cloud can get pretty costly. Between the required Plex Pass and the highly recommended Amazon Drive subscription, you could end up paying more than a Netflix subscription every month to store your own downloaded content. Plus, you have to download it all, then upload it all again just to watch it on all of your devices, anywhere. If that’s worth it to you, proceed.
How to Set Up Plex Cloud

Once you get your invite, it’s time for the fun to begin. To set up your Plex Cloud server, follow these steps:
- Log in to your account on Plex Web.
- In the server drop-down menu in the top-left corner, select Plex Cloud.
- After an intro screen, you’ll be redirected to log in to your Amazon account.
- Once you’re logged in, Plex will install the Plex server in your Amazon Drive account. Wait for this to finish, then click Continue.
- Now, upload your music, movies, video, and everything else to Amazon Drive. Check out Amazon’s documentation here to find out how. Note: You’ll need to use the Amazon Drive desktop client to upload any files larger than 2GB.
- Organise your media on Amazon Drive into folders. Making separate folders for movies, TV shows, music, and photos will help you organise your files in Plex later.
- In Plex Web, add folders from Amazon Drive to your libraries the same way you would on your own server normally.
Once everything is up and running, your Plex Cloud server will be available just like any other server in the drop down menu in your various Plex apps. Simply select Plex Cloud on your desktop, home theatre, set-top box, or iOS or Android device and start streaming, at home or anywhere else in the world.
A Word of Warning About Copyrighted Material
It’s an open secret that, while Plex bills itself as a way to share “your” media, it’s often used as a way to stream the movies and TV shows that you’ve ripped from one device or form of media to another. Whether you ripped your own DVDs to back up them, are saving home movies, or downloaded a bunch of copyrighted material, Plex doesn’t know the difference, and because it’s entirely for personal use, no one is scanning your files or hard drive to find out.
Plex Cloud adds a new level of complexity to this problem. Since it uses Amazon Drive to store files, anything you upload is subject to Amazon’s terms of use. In those terms, Amazon states you’re responsible for ensuring you have the right to copy any files stored on the company’s servers, and that Amazon has permission to access your files to “enforce the terms of the Agreement.”
It’s unclear from this if Amazon actively scans files constantly searching for copyrighted material, like YouTube’s Content ID system, or if Amazon will simply take action against your account if they ever find out about it. Either way, you may be taking a risk if you decide to upload terabytes of movies to your cloud account. If you don’t mind the risk (and especially if you’re not planning to share your library), go for it. However, if you’d rather stay closer to the right side of Amazon’s terms of use, or don’t think the risk to your Amazon account is worth it, stick to videos you own and own the rights to, or avoid it entirely.
Comments
One response to “How To Take Your Music And Movies Everywhere With Plex Cloud”
Amazon drive does NOT work with Plex cloud. Your information is out of date. Only Google Drive, Dropbox and One Drive will work with Plex Cloud.
Plex killed amazon support over 3 Months Ago, due to “technical issues”
So this guide is quite outdated!
“December 15, 2016”
A few weeks ago we shared with you that we’ve had technical challenges integrating Amazon Drive with Plex Cloud. The team has worked to address these issues and to expand storage options by introducing support for Google Drive, Dropbox, and Microsoft OneDrive, all of which are working great. Unfortunately, the challenges with Amazon Drive have proven insurmountable at this time, so we have decided to remove Amazon Drive for the foreseeable future. Current beta users with a linked Amazon Drive account will no longer be able to use Amazon with Plex Cloud after December 31st 2016.
We look forward to coming out of the beta with multiple popular storage options that provide a simple, seamless, and beautiful experience. Thanks again for your interest in Plex Cloud!
It’s such a great idea. but the amazon bit kills it. It’s just not worth it for the price.