“Hey, wouldn’t it be cool if you modelled and 3D printed your apartment to figure out where all the furniture will go?” A tongue-in-cheek question from a coworker turned out to be one of the greatest nerd snipes I have ever fallen victim to.
This post originally appeared on the Formlabs Engineering blog.
For the next several weeks before I moved into a new apartment, I worked nights and weekends putting together an accurate 1:25 scale model of the space. The new apartment was smaller than my previous home, and I needed to supply my own furniture. Because of the small room sizes and awkward wall angles of the new place, I was struggling to figure out how to arrange everything.
By modelling and 3D printing the apartment and furniture, I determined the layout and what furniture to buy before I moved. Thus, “Tiny Town”, as I later dubbed it, was born.
Modelling the Space
The first step was to measure everything in the apartment — the dimensions of each room, as well as the locations of doors, windows and heaters. Using a CAD program, I recreated the layout of the floors and walls using 2D sketches. I chose to use OnShape, a freemium cloud-based CAD software, primarily because I wanted to learn a new program, but any parametric CAD software should do the trick. From those 2D sketches, I then created 1:25 scale drawings which could be exported as DXFs.
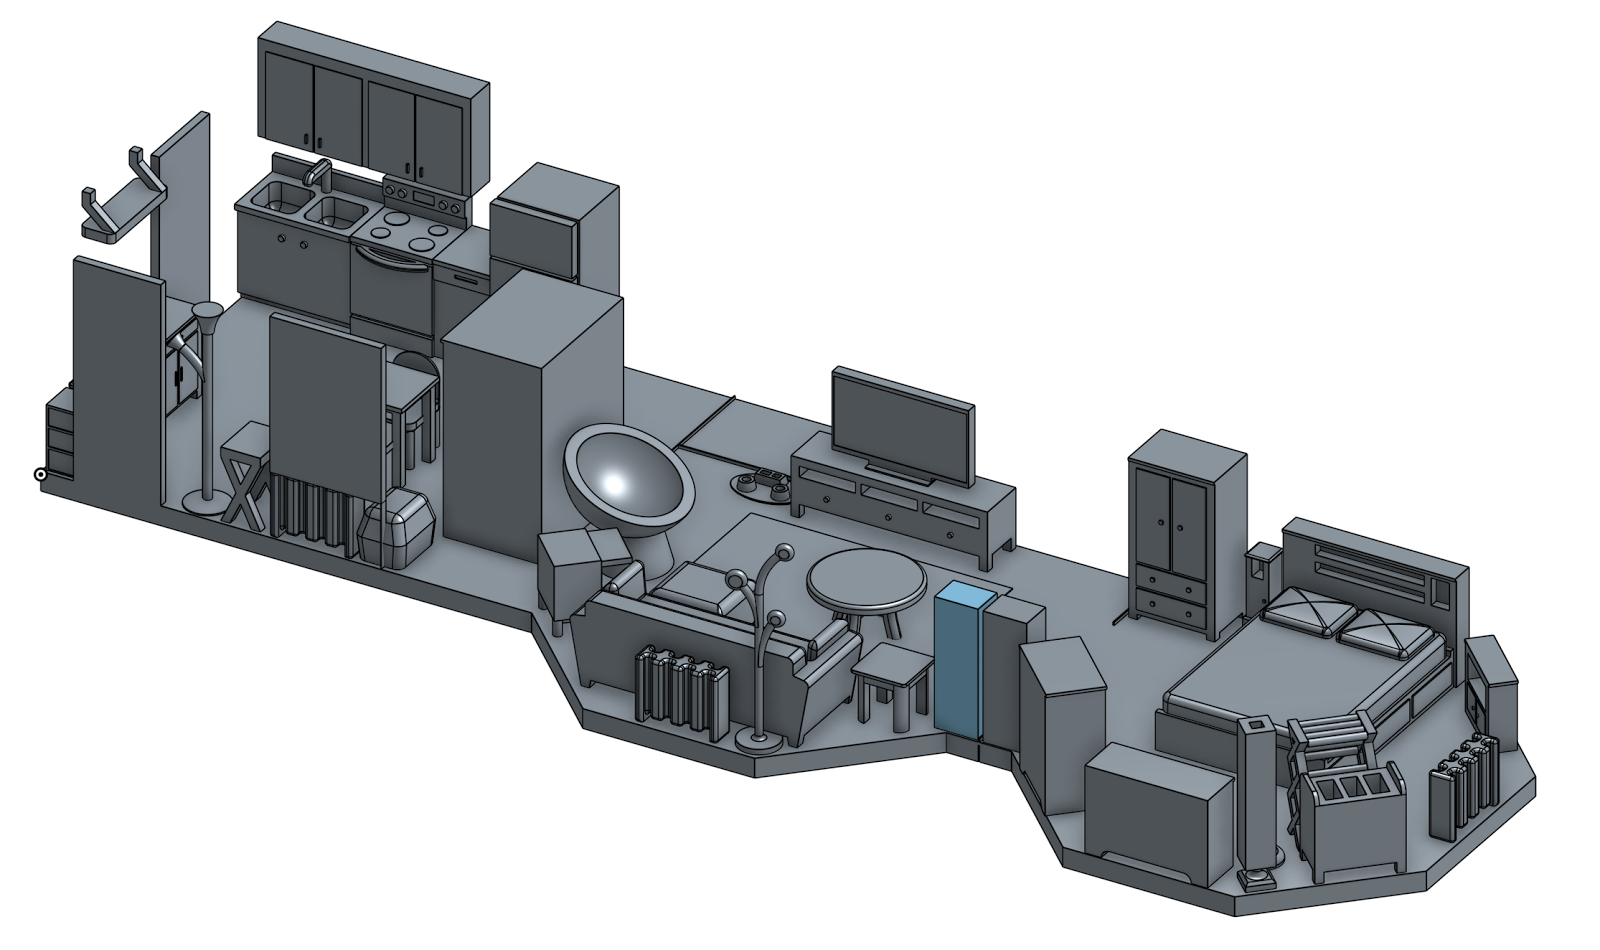
Tiny Town as modelled in OnShape. The walls are modelled in a different part studio. Image by Craig Broady.
With scrap cardboard, I laser cut the floor and walls, using a lower power etch to mark where the walls would bend. By making the walls all one piece, I reduced the amount of gluing necessary later.
Exterior corners are easy to etch using the laser cutter, but interior corners are a bit trickier. Since you can only laser cut one side, you need to denote the location and then make the cut using a hobby knife on the other side. For interior angles, you’ll also need to account for the thickness of the cardboard. If you don’t have a laser cutter, you can also cut the cardboard by hand, using the drawing prints as stencils. Hot glue works well to assemble the walls.
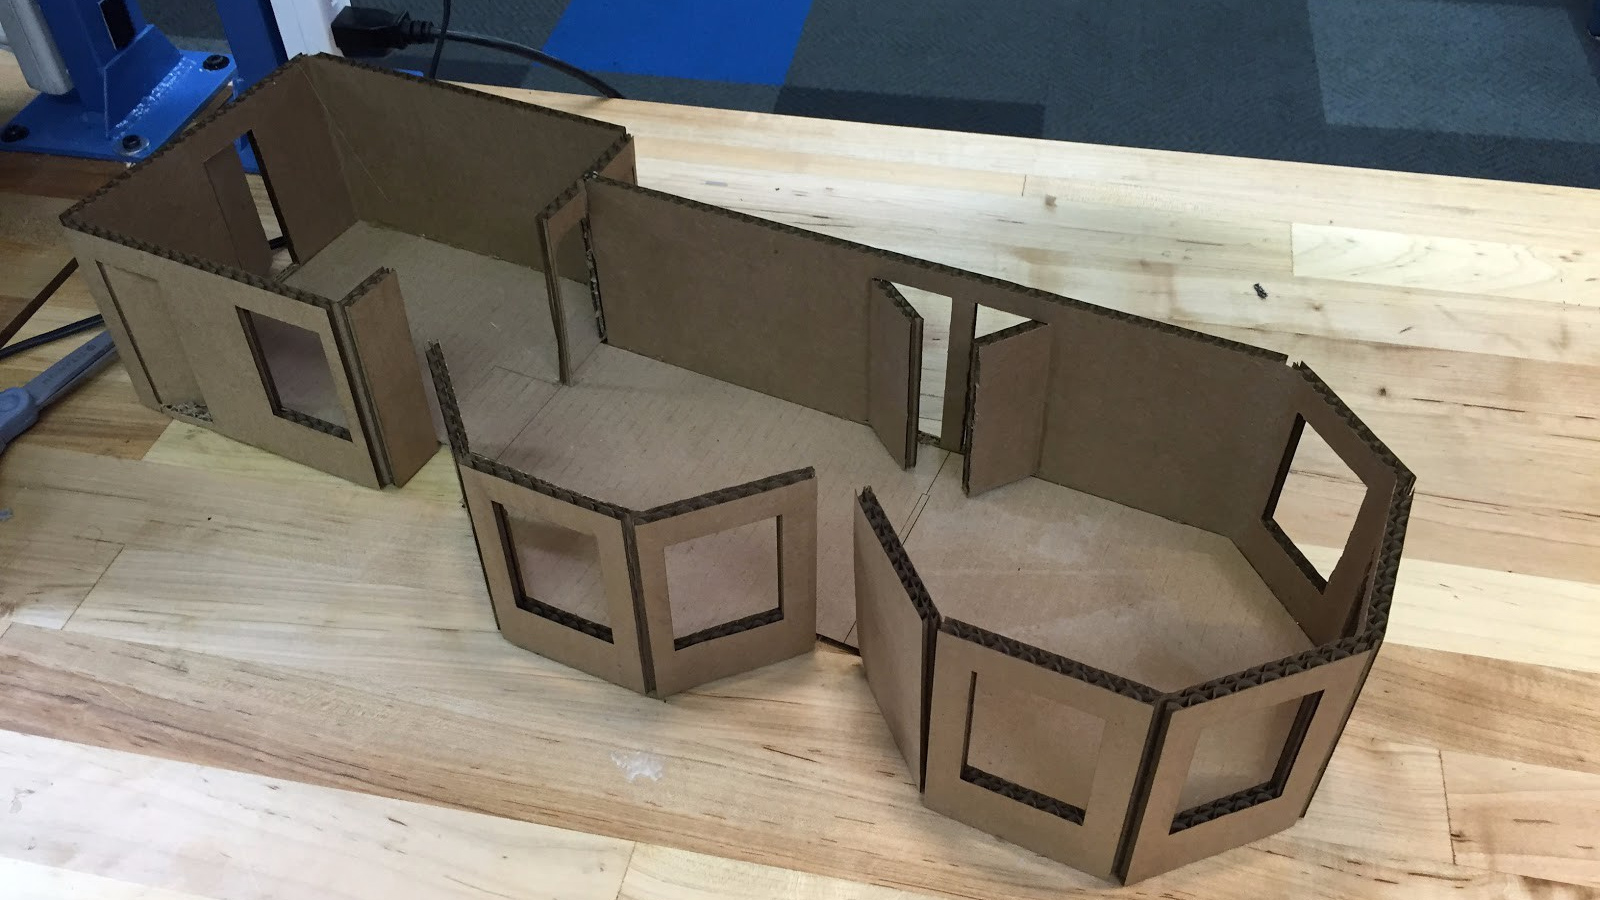
Most of the floors and walls, laser cut and hot glued. Image by Craig Broady.
Printing the Furniture
While simple boxes would have sufficed, the extra detail really brings Tiny Town to life. After modelling the first few pieces of furniture, I became pretty efficient at making knobs, handles, shelves and door seams. Because I was printing the parts on a Form 2, I knew that it could produce these small details. An advantage to SLA over FDM, the printer can resolve features on the order of hundreds of microns — such as cabinet doors and shelves.
First, I went home and measured all of the furniture that I was planning to take to the new apartment. Then, using specifications from the vendors’ websites, I found measurements for all of the furniture I was considering buying.
From these measurements, I created CAD models. I hollowed each model such that they had 3 to 5mm thick surfaces when scaled down to 1:25 for printing. After exporting as .STL files, I imported the models into PreForm to prepare them for 3D printing.
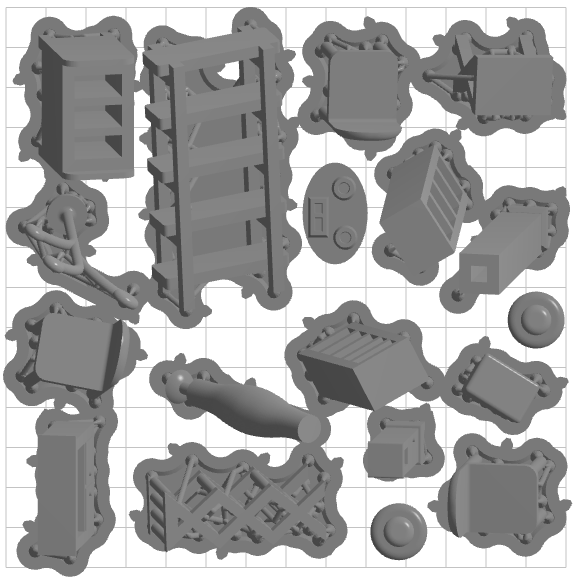
Eighteen parts arranged for printing in PreForm. This job (114mL) prints in approximately seven hours using grey resin with 100µm layers. Image by Craig Broady.
While some of the models could be printed flat without support structures, I rotated most of the models by 12º along both the X and Y axes and generated support structures with the default parameters. I tightly packed the build area and used grey resin for all of the furniture for a simple aesthetic.
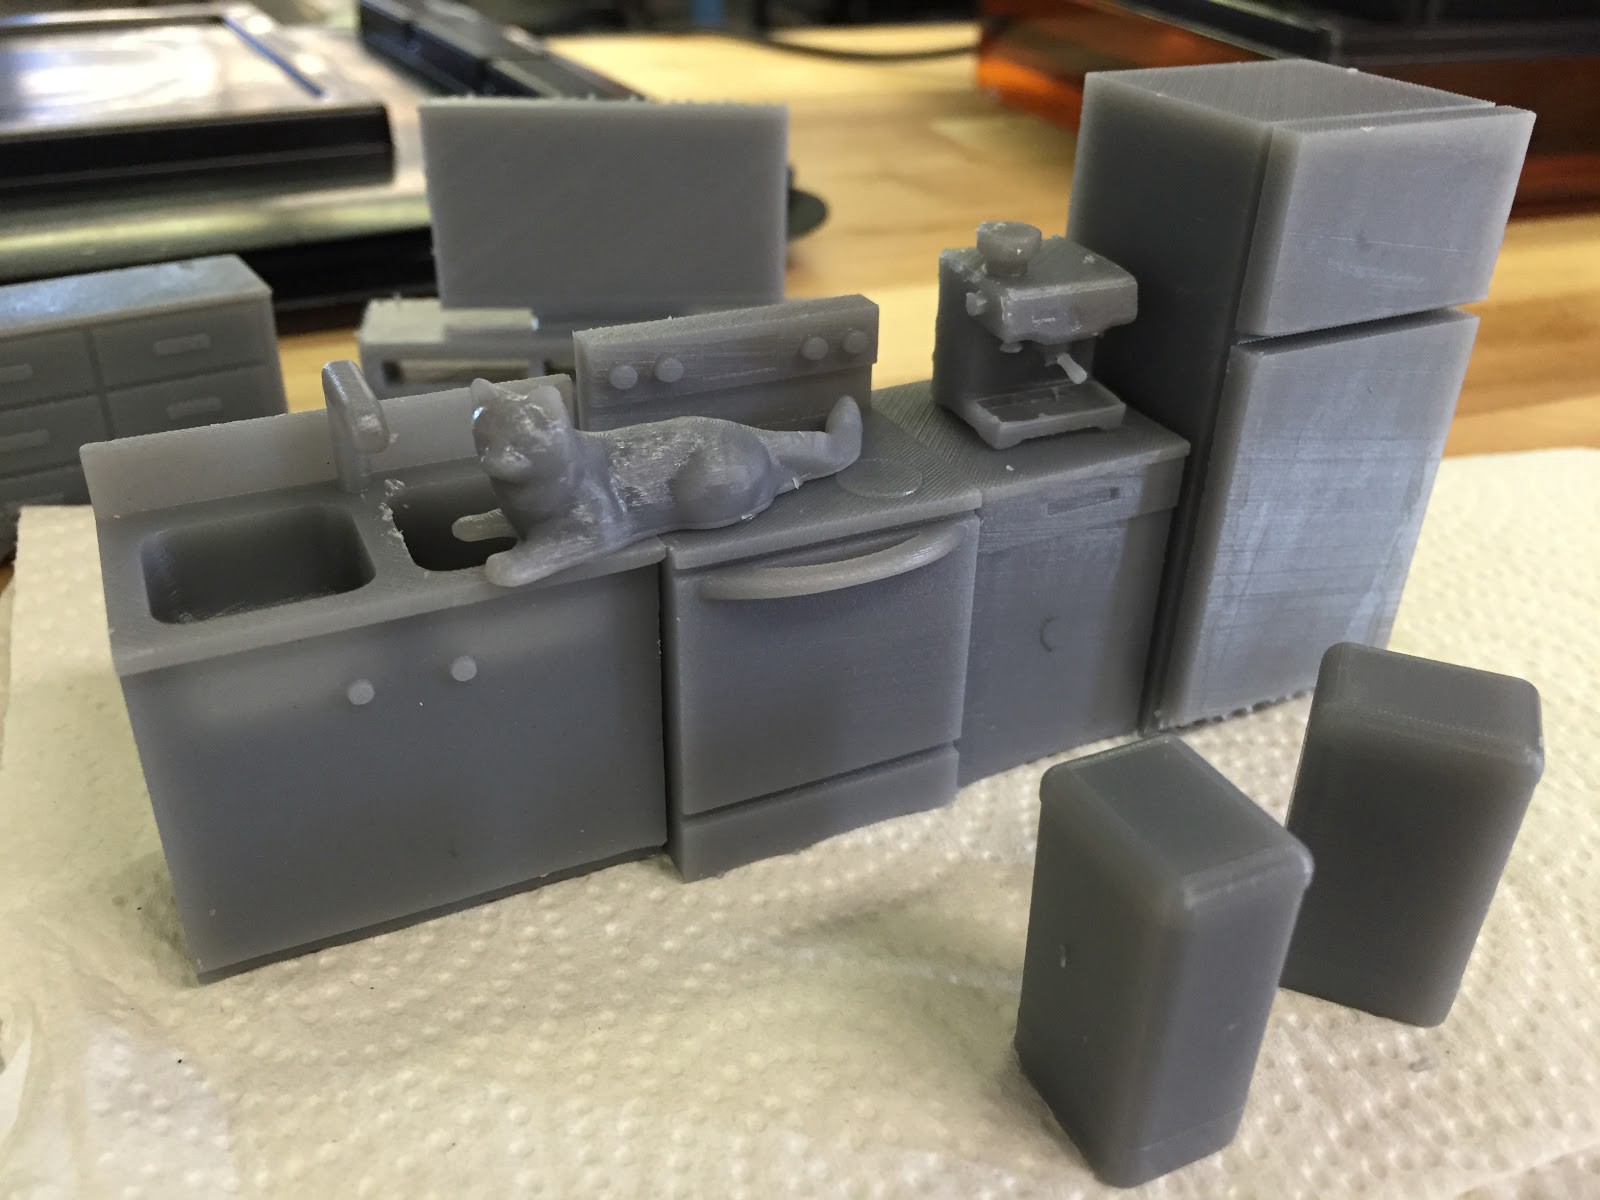
Several printed parts immediately after cleaning and support structure removal. Cat model via Thingiverse. Espresso machine modified from GrabCAD. Image by Craig Broady.
Arranging Tiny Town
Once I had printed all of the furniture, I could begin arranging it. Could I have done all of this purely in CAD? Of course, but it would have been way less fun.
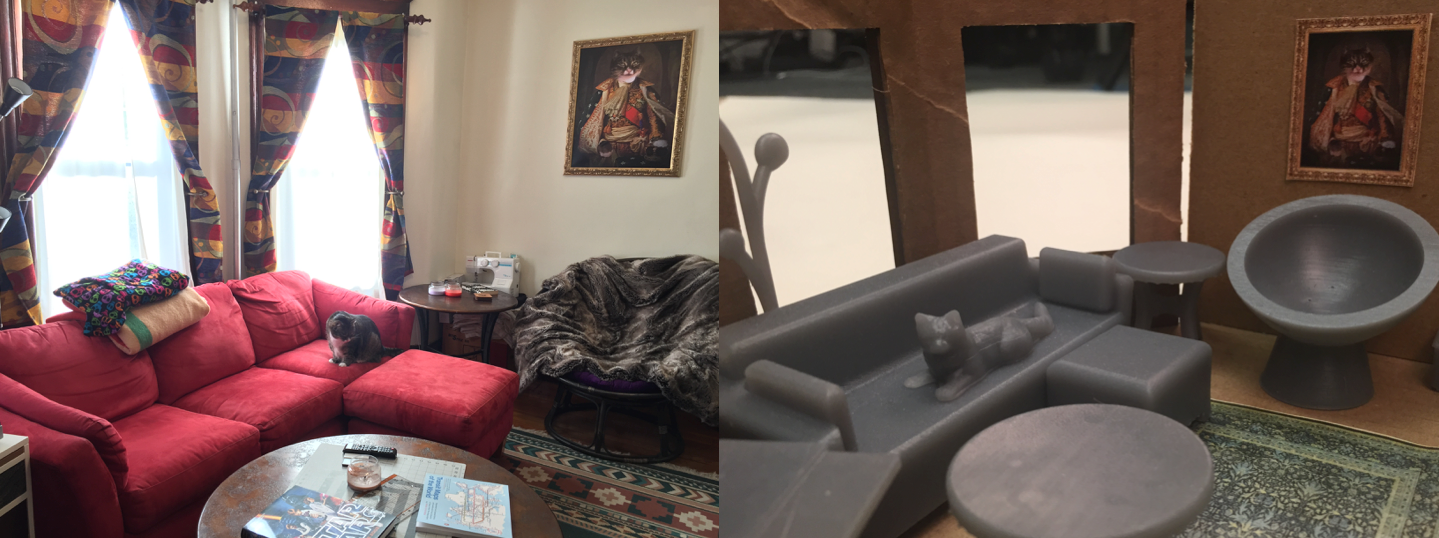
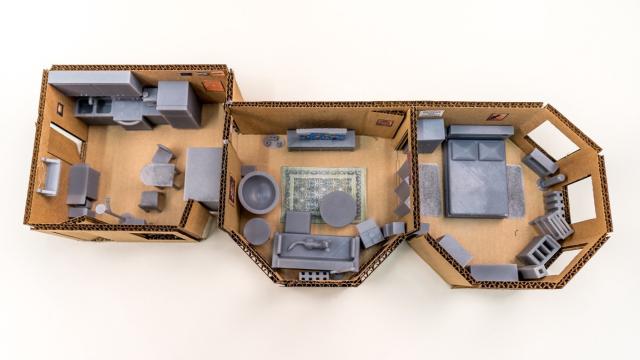
Living room layout. Left: real apartment. Right: Tiny Town. Image by Craig Broady.
After trying several different arrangements, I finally settled on a layout where everything fit comfortably. As a bonus, I used a (paper) printer to print all of my paintings and rugs in the same 1:25 scale. At the end of the day, I was confident about which furniture to order for the new apartment, and I could sleep easy knowing it would all fit.
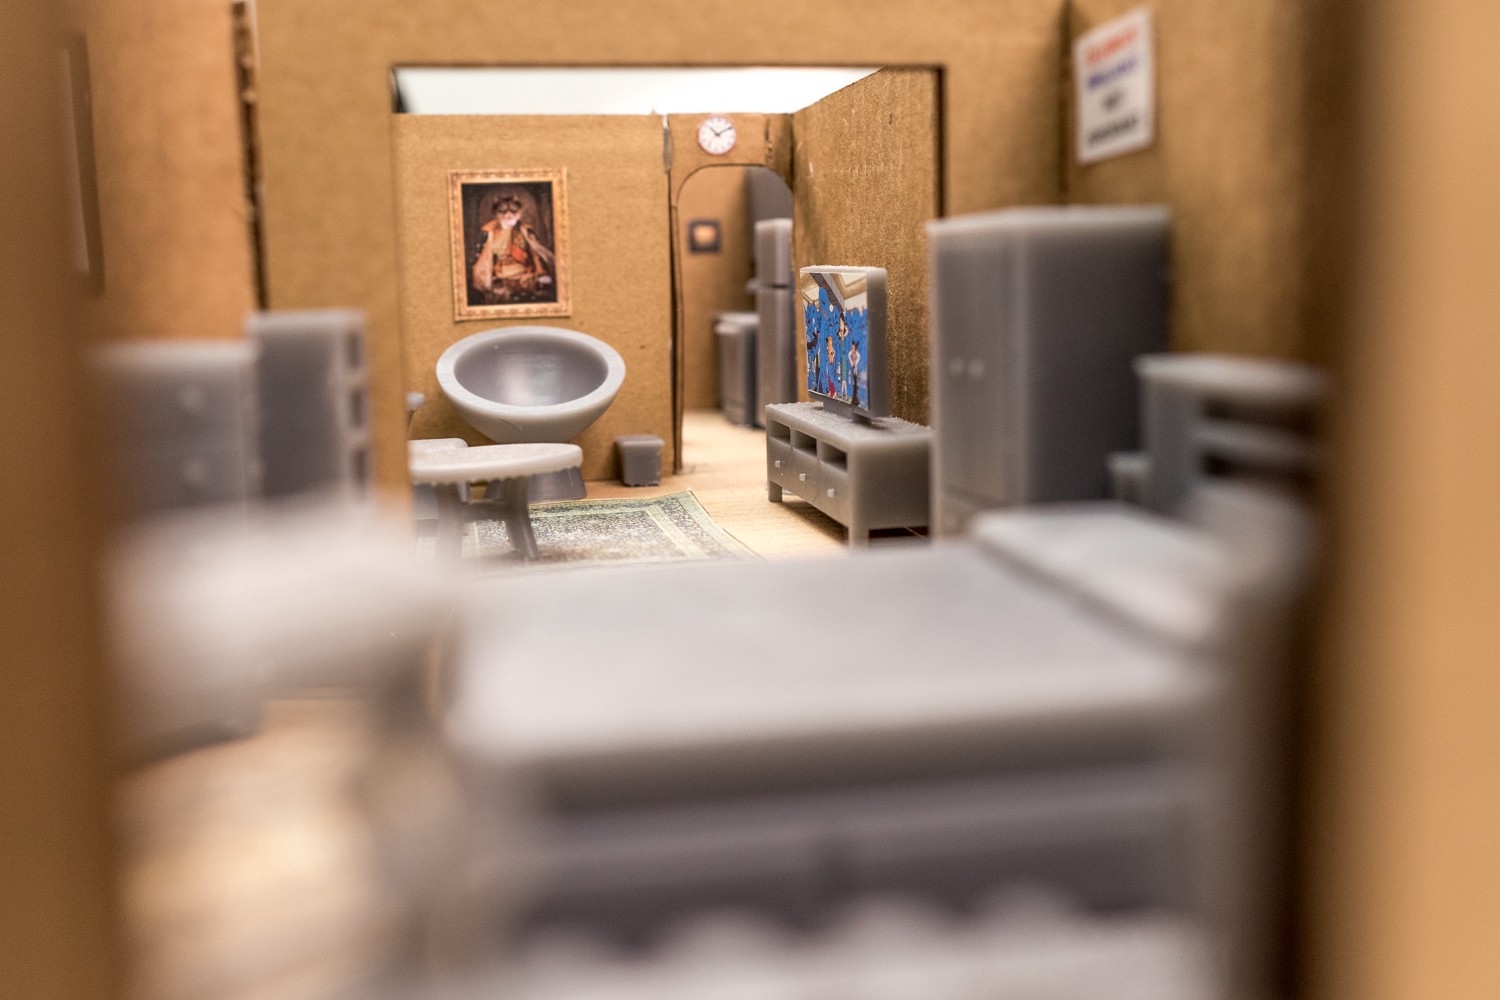
Image by Craig Broady.
With Tiny Town on my workbench in a heavily trafficked area of the office, I received lots of feedback from my coworkers. One question one consistent from person to person: “Can you go one level deeper?” If I were to take Tiny Town home to my new apartment, it would make sense for me to print a Tiny Town for my Tiny Town — a highly detailed part just 20mm x 8mm in area. This sort of print would be one of the rare instances to use 25µm layer height for general purpose resin, resulting in a 158 print. The Form 2 performed splendidly, and the Tiny Tiny Town was a success with most of the features resolved.
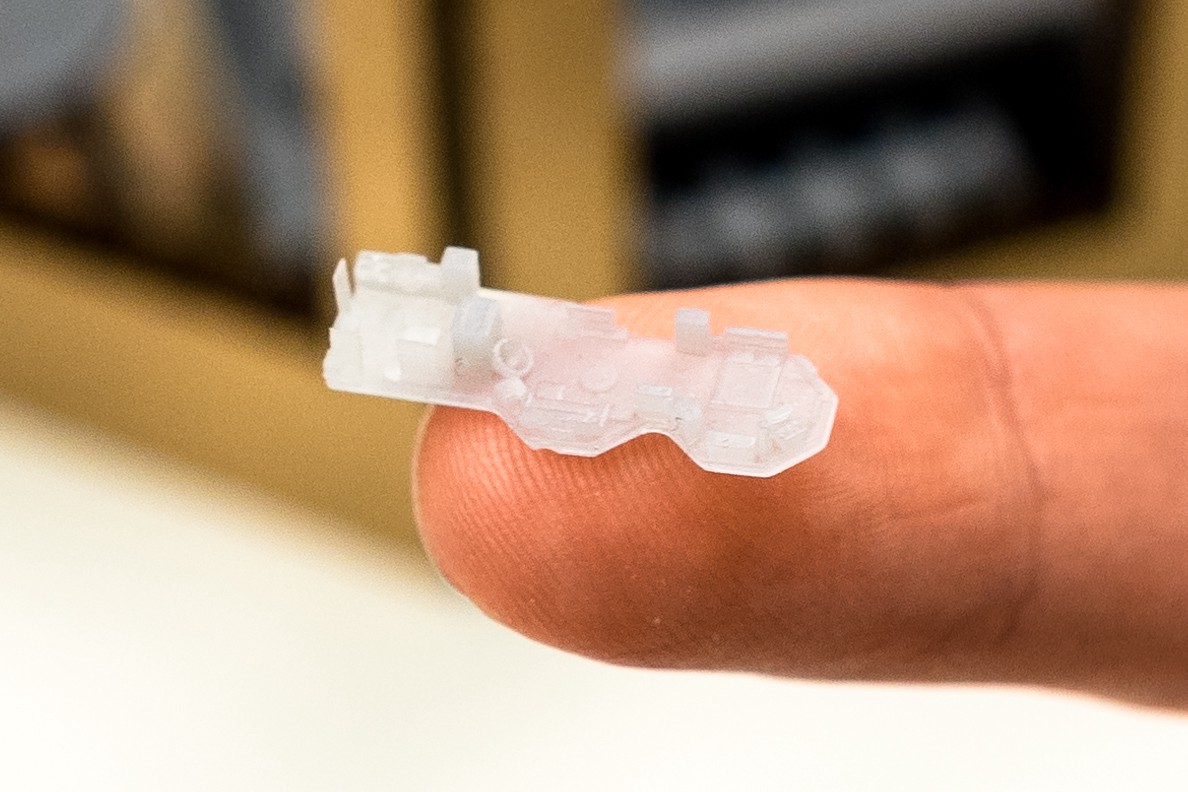
Tiny Tiny Town, a 1:125 scale model of the apartment. If I were to go another level smaller, the width of the apartment would be as small as the beam diameter of the Form 2 laser. Image by Craig Broady.
More than anything, this project demonstrates how quickly one can take an idea and turn it to reality with 3D printing. The speed and simplicity in which I went from idea to CAD to physical model is noteworthy. Each print of about a dozen items took five minutes to set up, several hours to print and then half an hour (mostly idle time) to clean. I spent very little time finishing the parts, but sanding and painting would add another layer of realism to the models. While arranging for simple apartment moves may not be worth the time and resin, the potential for quality architectural scale models is very real.
I Made a Tiny Town and So Can You: 3D Printing My Future Apartment [Formlabs Engineering]
Comments
2 responses to “How I Used 3D Printing To Design My Future Apartment”
It’s an evolution of what I do, a direct to scale 1:25 paper diagram with any and all furniture made with individual cut-outs of paper moved around
A relatively common model aircraft scale is 1: 24 Architectural models also include this as a standard scale, and even some doll houses. Lego miniland is 1:20
You’d think a scale where 1 inch of model = 24 inches (2 foot) of original, would be popular in the USA. However, Wikipedia claims the 1:25 used in this article is more common.
Americans are weird.
See: https://en.wikipedia.org/wiki/1:24_scale