When it comes to network security, most of the tools to test your network are pretty complex. Nessus isn’t new, but it definitely bucks this trend. It’s incredibly easy to use, works quickly and can give you a quick rundown of your network’s security at the click of a button.
If someone wanted to hack your local network, the first thing they’d do is run a vulnerability scan, then they’d run a penetration test. A vulnerability scan digs through the various devices on your network and looks for potential holes, like open ports, outdated software with known vulnerabilities or default passwords on devices. If they find anything, a hacker would test those vulnerabilities, then find a way to exploit them. Testing these vulnerabilities is a two-step process because a scan just reveals the possibility of problems, a penetration test verifies that the problem is actually exploitable.
Nessus is commercial software made to scan for vulnerabilities, but the free home version offers plenty of tools to help explore and shore up your home network. It also point you to a variety of different tools to then penetration test a network if you want to learn more. Here’s how to use it.
Step One: Download and Install Nessus
In order to download Nessus, you’ll first need to sign up for an online account so you can download the software and get an activation code.
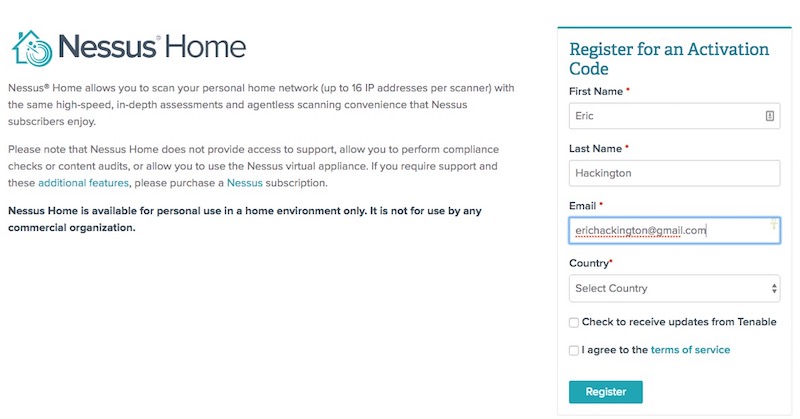
- Head to the Nessus Home landing page, enter a name and email address, and then click the Register button. You’ll want to use a real email address here because Nessus sends you an activation code that you’ll need in a step later.
- Click the Download button, then download Nessus for your operating system. It’s available for Windows, Mac and Linux.
- Once the download is complete, run the installer package and follow the on-screen instructions to finish installation.
Nessus creates a local server on your computer and runs from there, so don’t be surprised that the installation process is a little different than you’re used to.
Step Two: Set Up Your Nessus Account and Activation Code
Once Nessus is installed, point your web browser to: https://localhost:8834/ This is where we’ll complete the signup process and activate your copy of Nessus.
- When you launch Nessus for the first time, you get a “Your connection is not secure” warning from your browser. Click “Advanced” and then “Proceed to localhost” to bypass this warning.
- Create an account on the Account Setup screen, leave the Registration as “Home, Professional or Manager,” and then enter the Activation Code from your email. Click “Continue”.
Next, Nessus will download a number of tools and plugins so it can properly scan your network with updated utilities. This can take a few minutes, so grab a cup of coffee and make yourself comfortable.
Step Three: Start a Vulnerability Scan
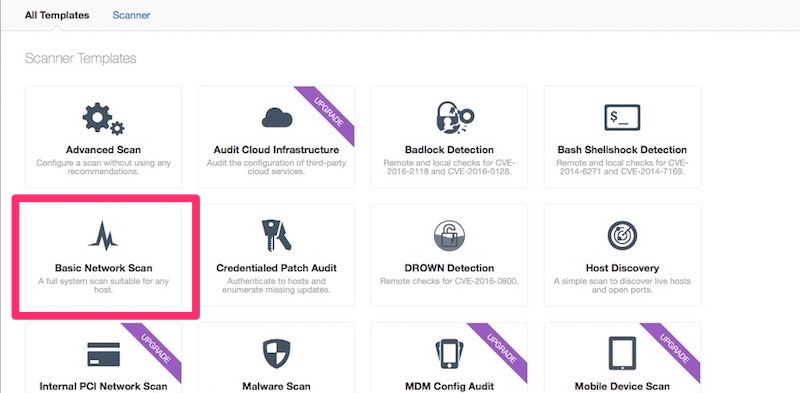
It’s time to actually test your network. This is the fun part. Nessus can actually scan for quite a few different problems, but most of us will be content using the Basic Network Scan because it offers a good overview.
- Click the “New Scan”.
- Click “Basic Network Scan”.
- Name your scan and add a description.
-
In the “Targets” field, you’ll want to enter IP scanning details about your home network. For example, if your router is at 192.168.0.1, you’d want to enter
192.168.0.1/24. This will make it so Nessus scans all the devices on your network (unless you have a ton of devices this is probably as high as you’d need to go). If you’re not sure about the local IP address for your router, here’s how to find it. - Click “Save”.
- On the next screen, click the Play icon to launch the scan.
Depending on what and how many devices you have on your network, the scan takes a while, so sit back and relax while Nessus does its work.
Aside from the Basic Network Scan, you can also run an Advanced Scan that includes more parameters to narrow your search, a Badlock Detection scan which hunts down a security issue with SAMBA, a Shellshock scan that looks for vulnerabilities in old Linux or Mac machines, a DROWN scan that looks for computers hosting sites susceptible to DROWN attacks and a few other more acute scans. Most of these issues will also get picked up with the Basic Network Scan, but if you’re doing anything beyond just maintaining a normal home network, like running a private server that’s exposed to the internet, then you’ll want to double-check that everything is up-to-date using the more specific scanning modes. The rest of us will be fine with the Basic Network Scan.
Step Four: Make Sense of the Results
Once Nessus finishes, you’ll see a bunch of colour-coded graphs for each device (referred to as hosts) on your network. Each colour of the graph signifies the danger of a vulnerability, from low to critical.
Your results should include all the devices on your local network, from your router to your Wi-Fi-enabled printer. Click the graph to reveal more information about the vulnerabilities on each device. Vulnerabilities are listed as “plugins”, which is just Nessus’ way of discovering vulnerabilities. Click on any plugin to get more information about the vulnerability, including white papers, press releases or patch notes for potential fixes. You can also click the Vulnerabilities tab to see an overview of all the potential vulnerabilities on the network as a whole.
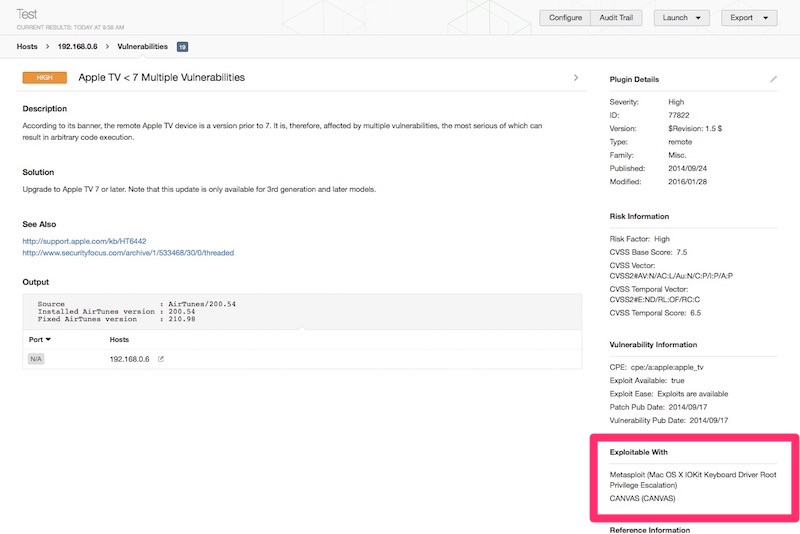
Take a second to click the link on each vulnerability, then read up on how a hacker could exploit it. For example, I have an old Apple TV with an ancient firmware installed because it’s never used. Nessus found it and marked it as a “High” priority vulnerability, then links to Apple’s own security update page for more information. This lets me know that a hacker can exploit the Apple TV’s firmware by setting up a fake access point. The vulnerability page also helpfully lists exactly what software one would need to penetration test and hack that vulnerability. For example, Nessus lists Metasploit as the toolkit needed to exploit this weak point and with that knowledge, you can search Google for instructions on how to take advantage of the vulnerability.
There’s a chance some of these vulnerabilities will be a bit obvious. For example, Nessus picks up on any device still using a default password or points out when a computer or device is running an outdated firmware. Most of the time though, you probably won’t understand what the heck you’re looking at with these results.
Step Five: What to Do Next
Nessus gives you all this data, but what exactly are you supposed to do with it? That depends on which vulnerabilities Nessus finds.
After your scan is complete, click the Remediations tab. Here, you’ll find the biggest potential security holes in your network. In my case, alongside that Apple TV, this includes an ancient version of Adobe AIR installed on my laptop, an old version of Firefox, a Raspberry Pi running an old version of Apache and a few others. All of these issues are easily remedied by either updating or deleting old software. You might think you’re vigilant about updating your software, but so do I, and yet I still had plenty of weird old software I never use sitting around creating potential access points for a hacker. You mileage will of course vary here, but regardless of your results, Nessus provides the information you need to close any holes.
While all this might sound a little scary, it’s worth noting that while Nessus gives you a lot of the potential ways into a network, it’s not a foolproof guide. On top of needing to be in your network in the first place (which of course, isn’t terribly complicated), they’d also need to know how to actually use the variety of the exploitation tools Nessus suggests.
While the exploit on my Apple TV could potentially grant someone access to the device, that doesn’t necessarily mean they’d be able to do anything once they’re there. Regardless, as an end-user who’s simply trying to shore up a network, Nessus is a great starting point for finding the most obvious vulnerabilities that could make you an easy target, or to just explore your home network. With very limited searching on Google, Nessus will lead you to a ton of different hacking tools and a wide variety of software, so dig in and learn as much as you can.
This post is part of our Evil Week series at Lifehacker, where we look at the dark side of getting things done. Sometimes evil is justified, and other times, knowing evil means knowing how to beat it. Want more? Check out our evil week tag page.
Comments