Pokemon GO is great for adventures on your feet, but just like the original Game Boy games, having a bike makes everything better. You travel faster, you can carry more stuff, and it’s a load of fun. Here’s how I built the ultimate PokeBike, and how you can build your own.
Last Friday, my group of friends got together to walk around and collect Pokemon, but one of my friends decided to bring a bike. What a cool idea, I thought. But when I tried to ride around and play at the same time, it actually sucked. I had to hold my phone with one hand while I steered the bike, my Pokemon go-bag started to hurt my back (and I got sweaty) and the battery pack I was using to charge my phone was constantly threatening to fall out of my pocket. Still, I was determined to make it work. A few days and a few internet orders later, the PokeBike was born.
What You’ll Need
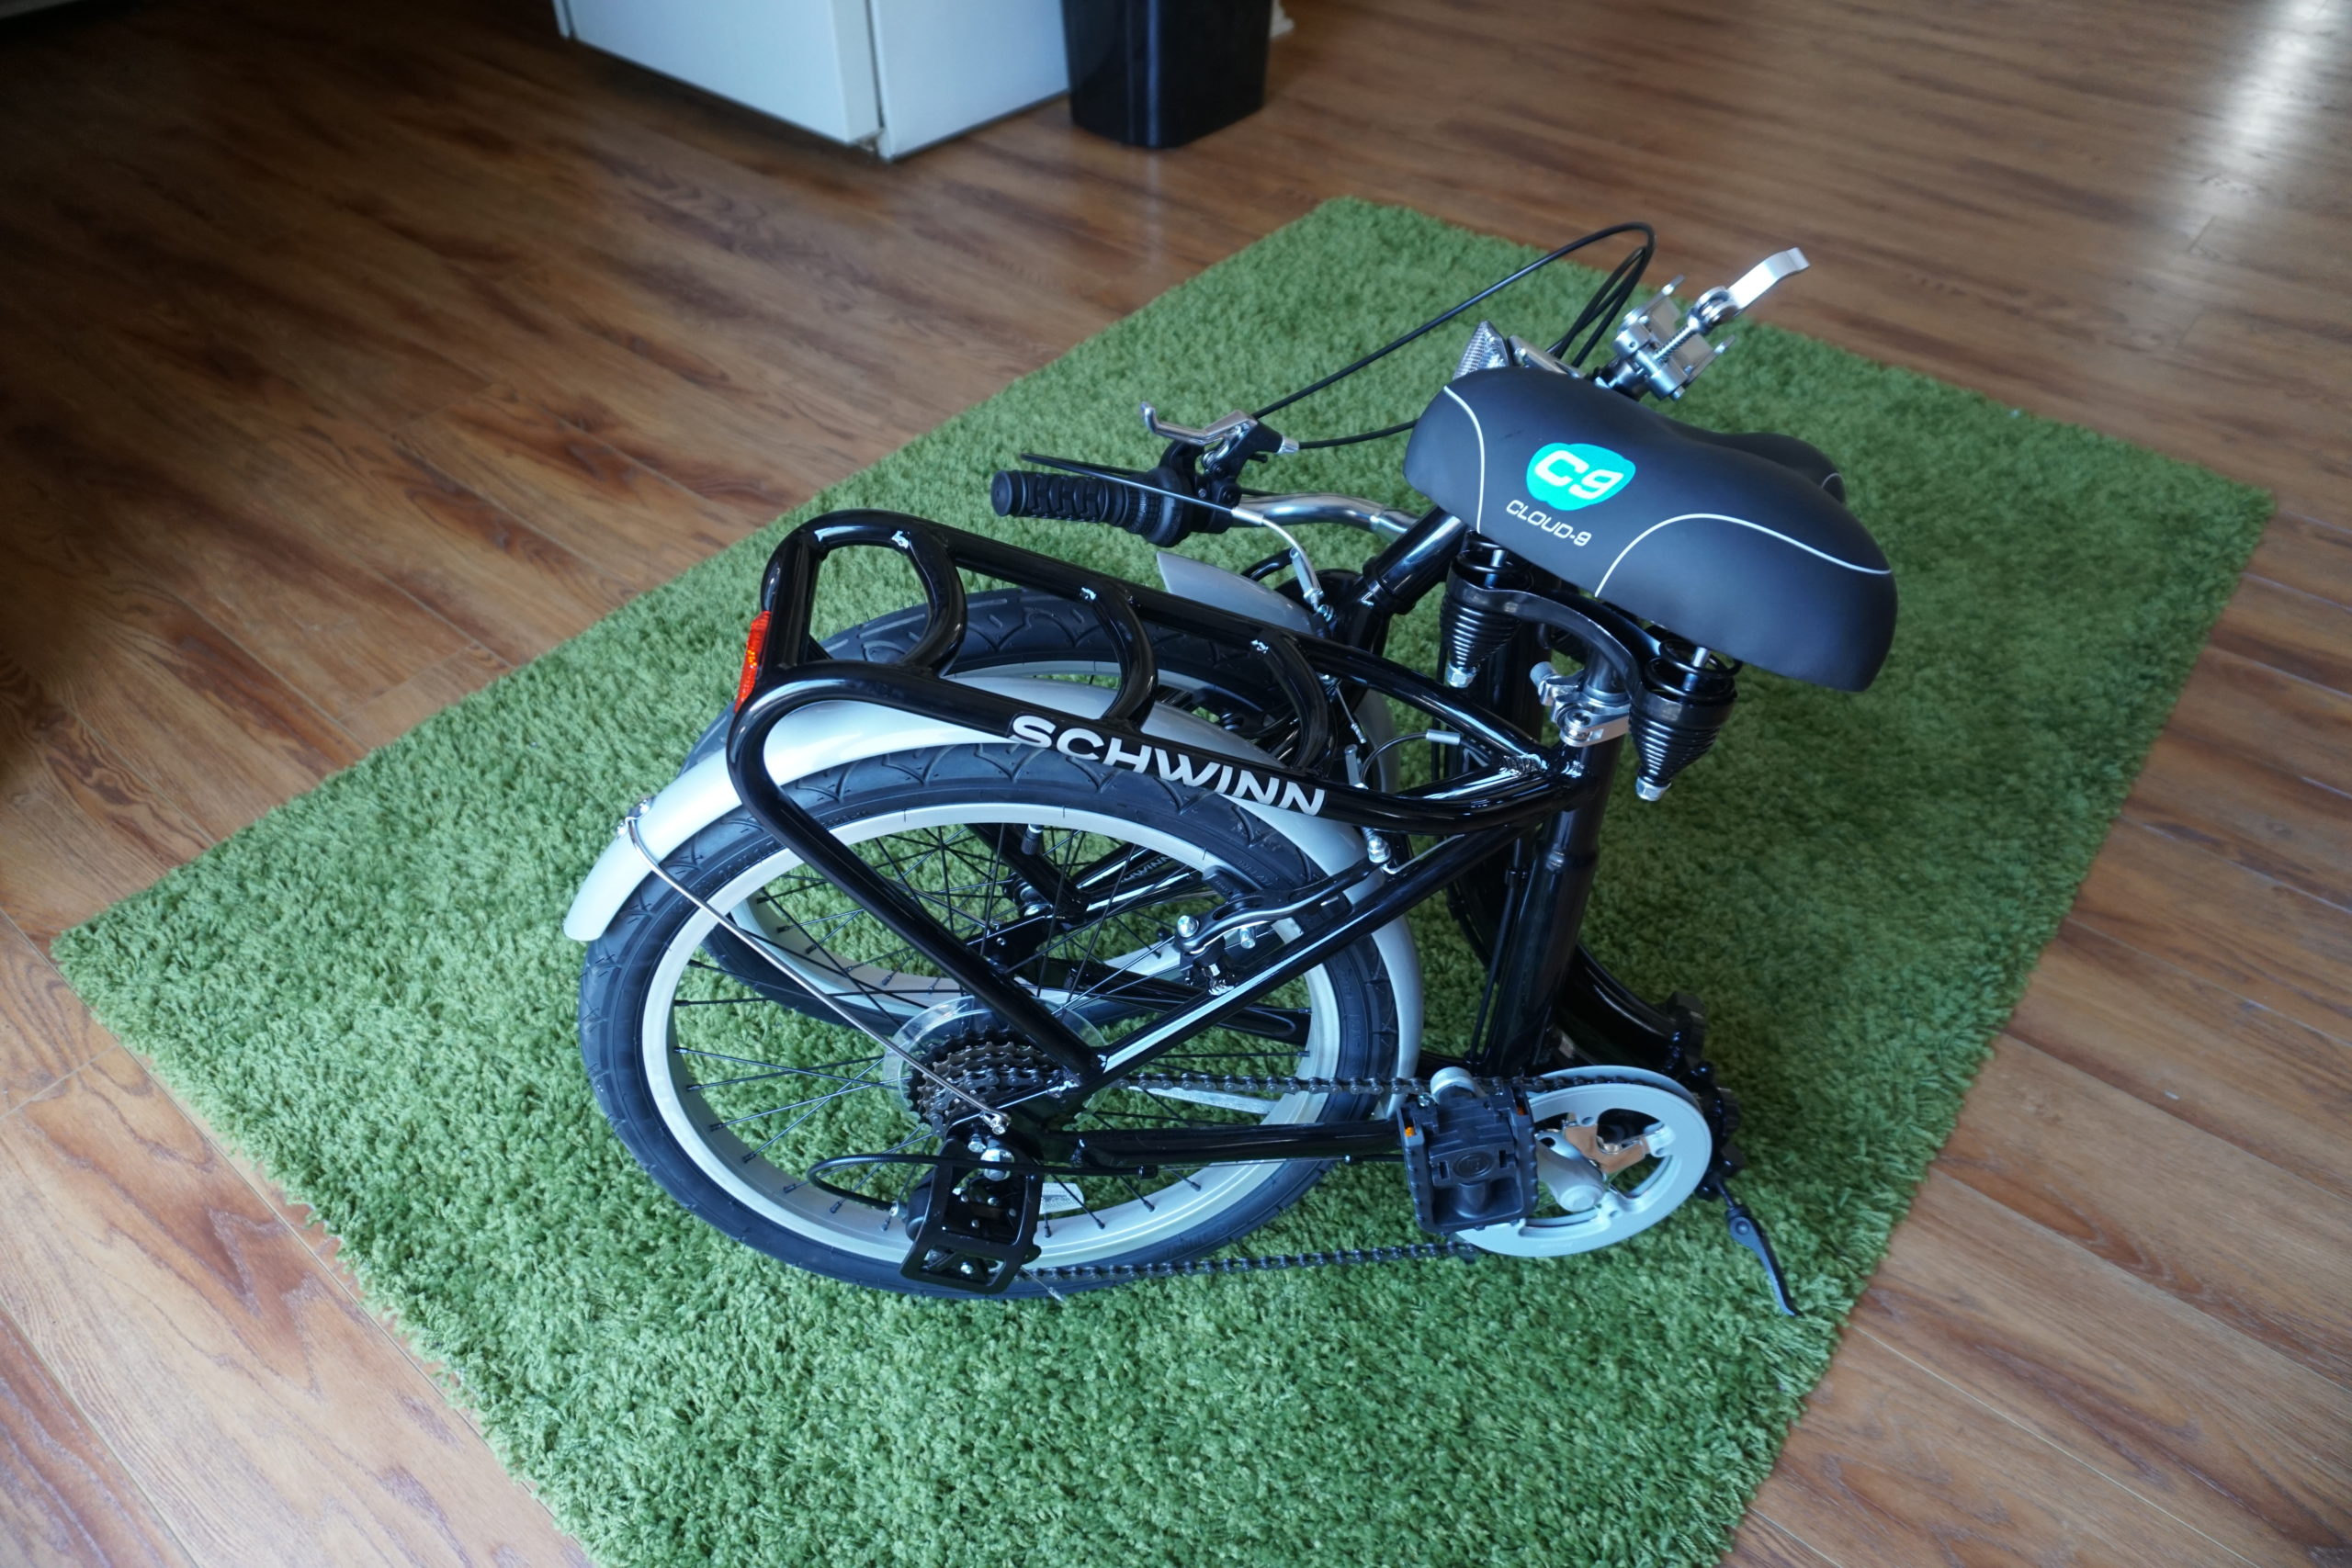
First thing’s first, you need a bike. You can pretty much turn any bicycle into a PokeBike, but I recommend springing for something like the Schwinn Loop 7-Speed. It’s great for all-purpose riding (I got mine for beach-cruising originally), and it’s not that expensive for a bike (at least in the US – you might have a little more trouble locating and shipping it in Australia). Best of all, the entire bike folds together into the size of a typical suitcase. That means you can easily toss it in your car and head to new areas to ride around. You can even fold it up to catch the train, bus or grab an Uber with it. In Pokemon GO, the more mobility you have the better.
And since you’ll be spending a lot of time riding your bike, I also recommend you get a seat designed for extended rides. Look for something like the Sunlite Cloud-9 Cruiser Saddle ($US24 [$32]) – it’s super comfy and offers a smoother ride with it’s built-in suspension. Your butt will thank you for it.
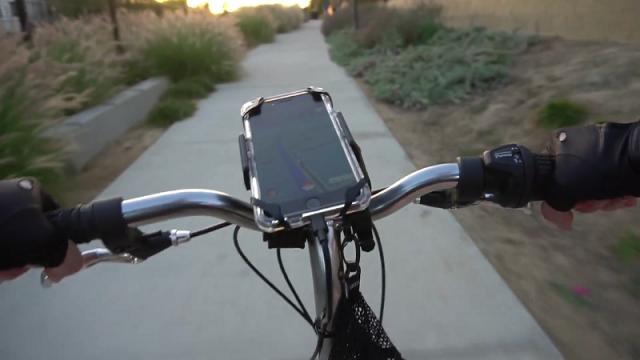
Once you have the actual bicycle portion ready, the most important aspect of your PokeBike is a smartphone mount for your handlebars. This lets you ride with two hands and still see what’s happening on your phone’s screen. I use the Bestrix Universal Phone Bike Mount ($US18 [$24]) for my iPhone 6s Plus. You might have difficulty finding this particular mount in Australia, but you still have a wide world of options to choose from.
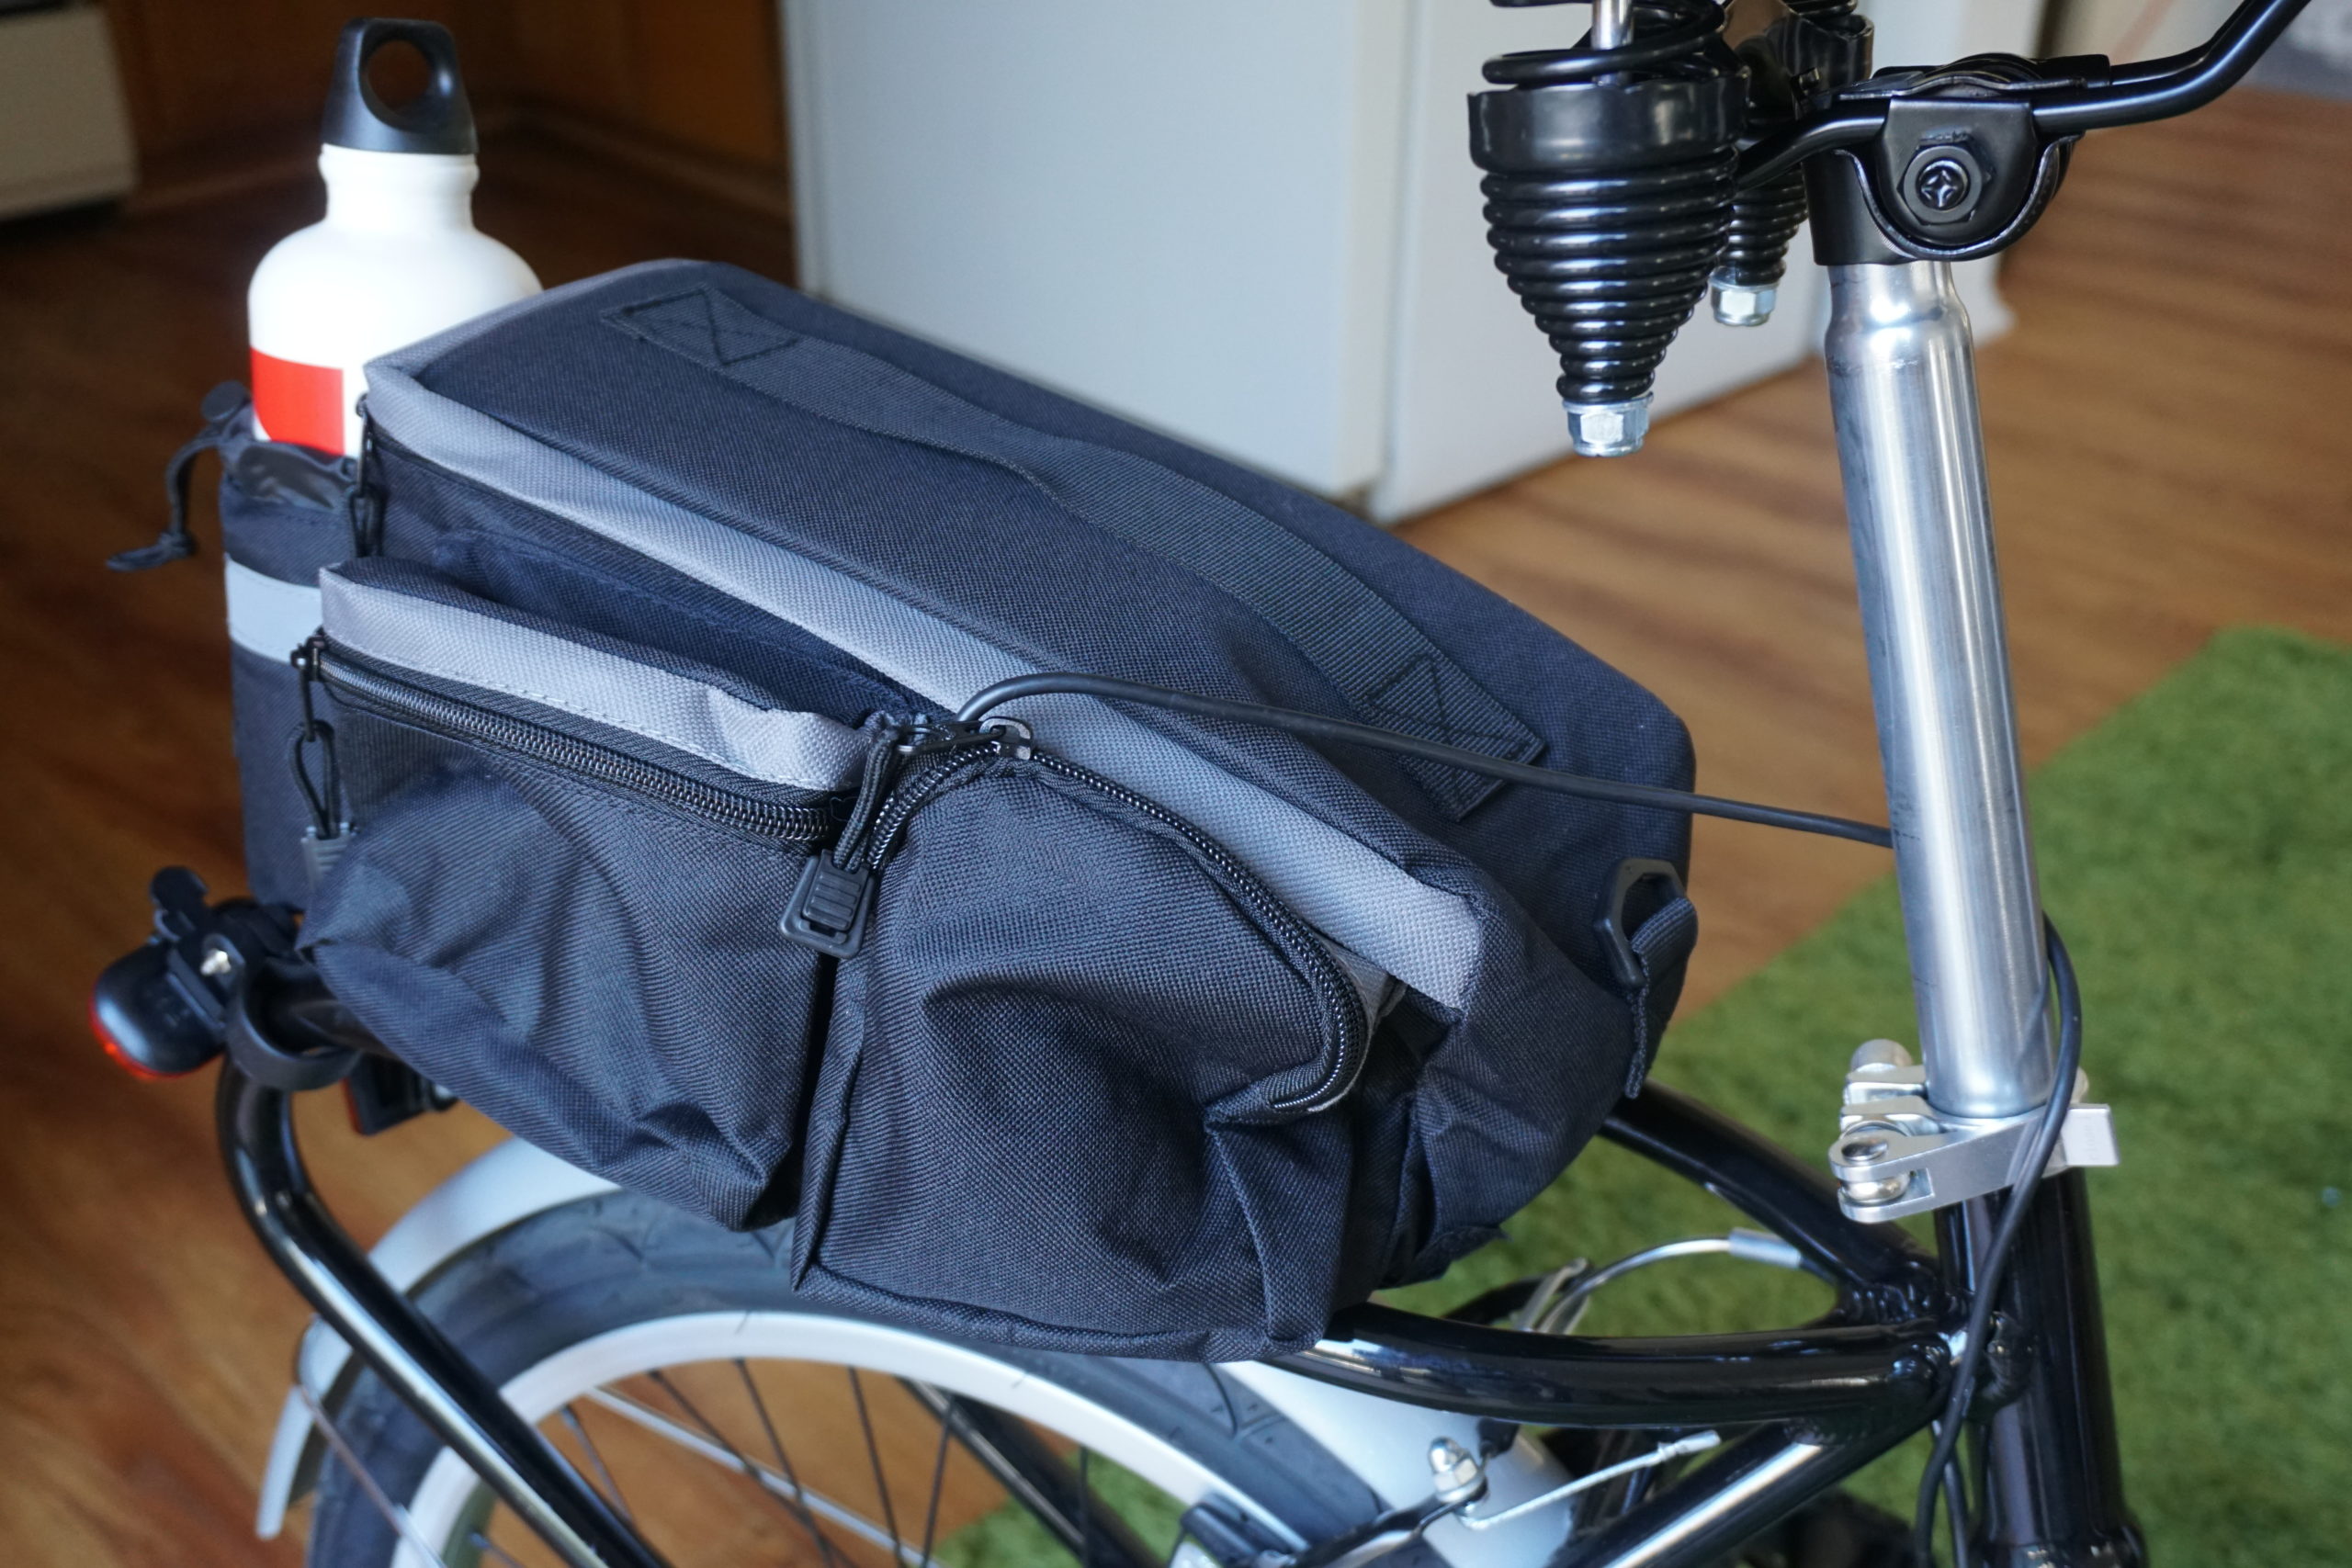
Next up is a Pokemon GO-bag that mounts on your bike so you don’t have to carry your stuff, like an external battery pack, on your back. The Schwinn Loop has a sweet cargo rack on the back that’s big enough for a rear seat bag, so I put it to good use. I chose the BicycleStore Mountain Road 7L Rear Seat Bag ($US17 [$22]) because it has a lot of space, it’s waterproof, it has a spot for a water bottle and the sides of the bag have reflective tape so I’m easier to see at night. Look for a bag with similar features. If you’re using a bike you already own that doesn’t have a rear cargo rack, there are still options for your Pokemon GO-bag. A triangle frame bag is great, and you can always add an under-seat saddle bag. Of course, you can always make your own storage options too. You can build a simple bike cargo carrier with some PVC pipe and a milk crate, or make some bicycle panniers with kitty litter buckets or a couple of tool boxes.
Those are the big-ticket items, but there are a few other odds and ends you’ll need to complete your setup:
- 1.8m USB Phone power cable: You’ll need this run power from the battery pack in your Pokemon GO-bag up to your mounted phone.
- Bicycle safety lights: Bicycle lights are an inexpensive pickup at any cycling store – look for both front and tail lights. And you can even make your own safety light that never needs batteries and is pedal powered, or add some DIY bike signals for extra precaution.
- Zip-ties: For securing cables and extra security when mounting your Pokemon GO-bag. You can get these nearly anywhere.
- Mesh storage bags (optional): For storing easy-to-access items when you don’t feel like digging through your mounted bag.
Once you have everything you need, it’s time to assemble your own PokéBike.
Put It All Together and Get Ready to Ride
Start by mounting your Pokemon GO-bag. It doesn’t matter if you have a rear seat cargo bag, saddle bag or triangle frame bag — this should be first because your battery pack will go in here. Most of these attach with a few velcro straps, so it should be easy enough. If you’re concerned about it falling off during a ride, a few well-placed zip-ties will do the trick. Plug your 1.8m USB charging cable into your battery pack and designate a pocket in your mounted bag to keep it in. Zip it up so just the wire is sticking out, but don’t run the cable yet.
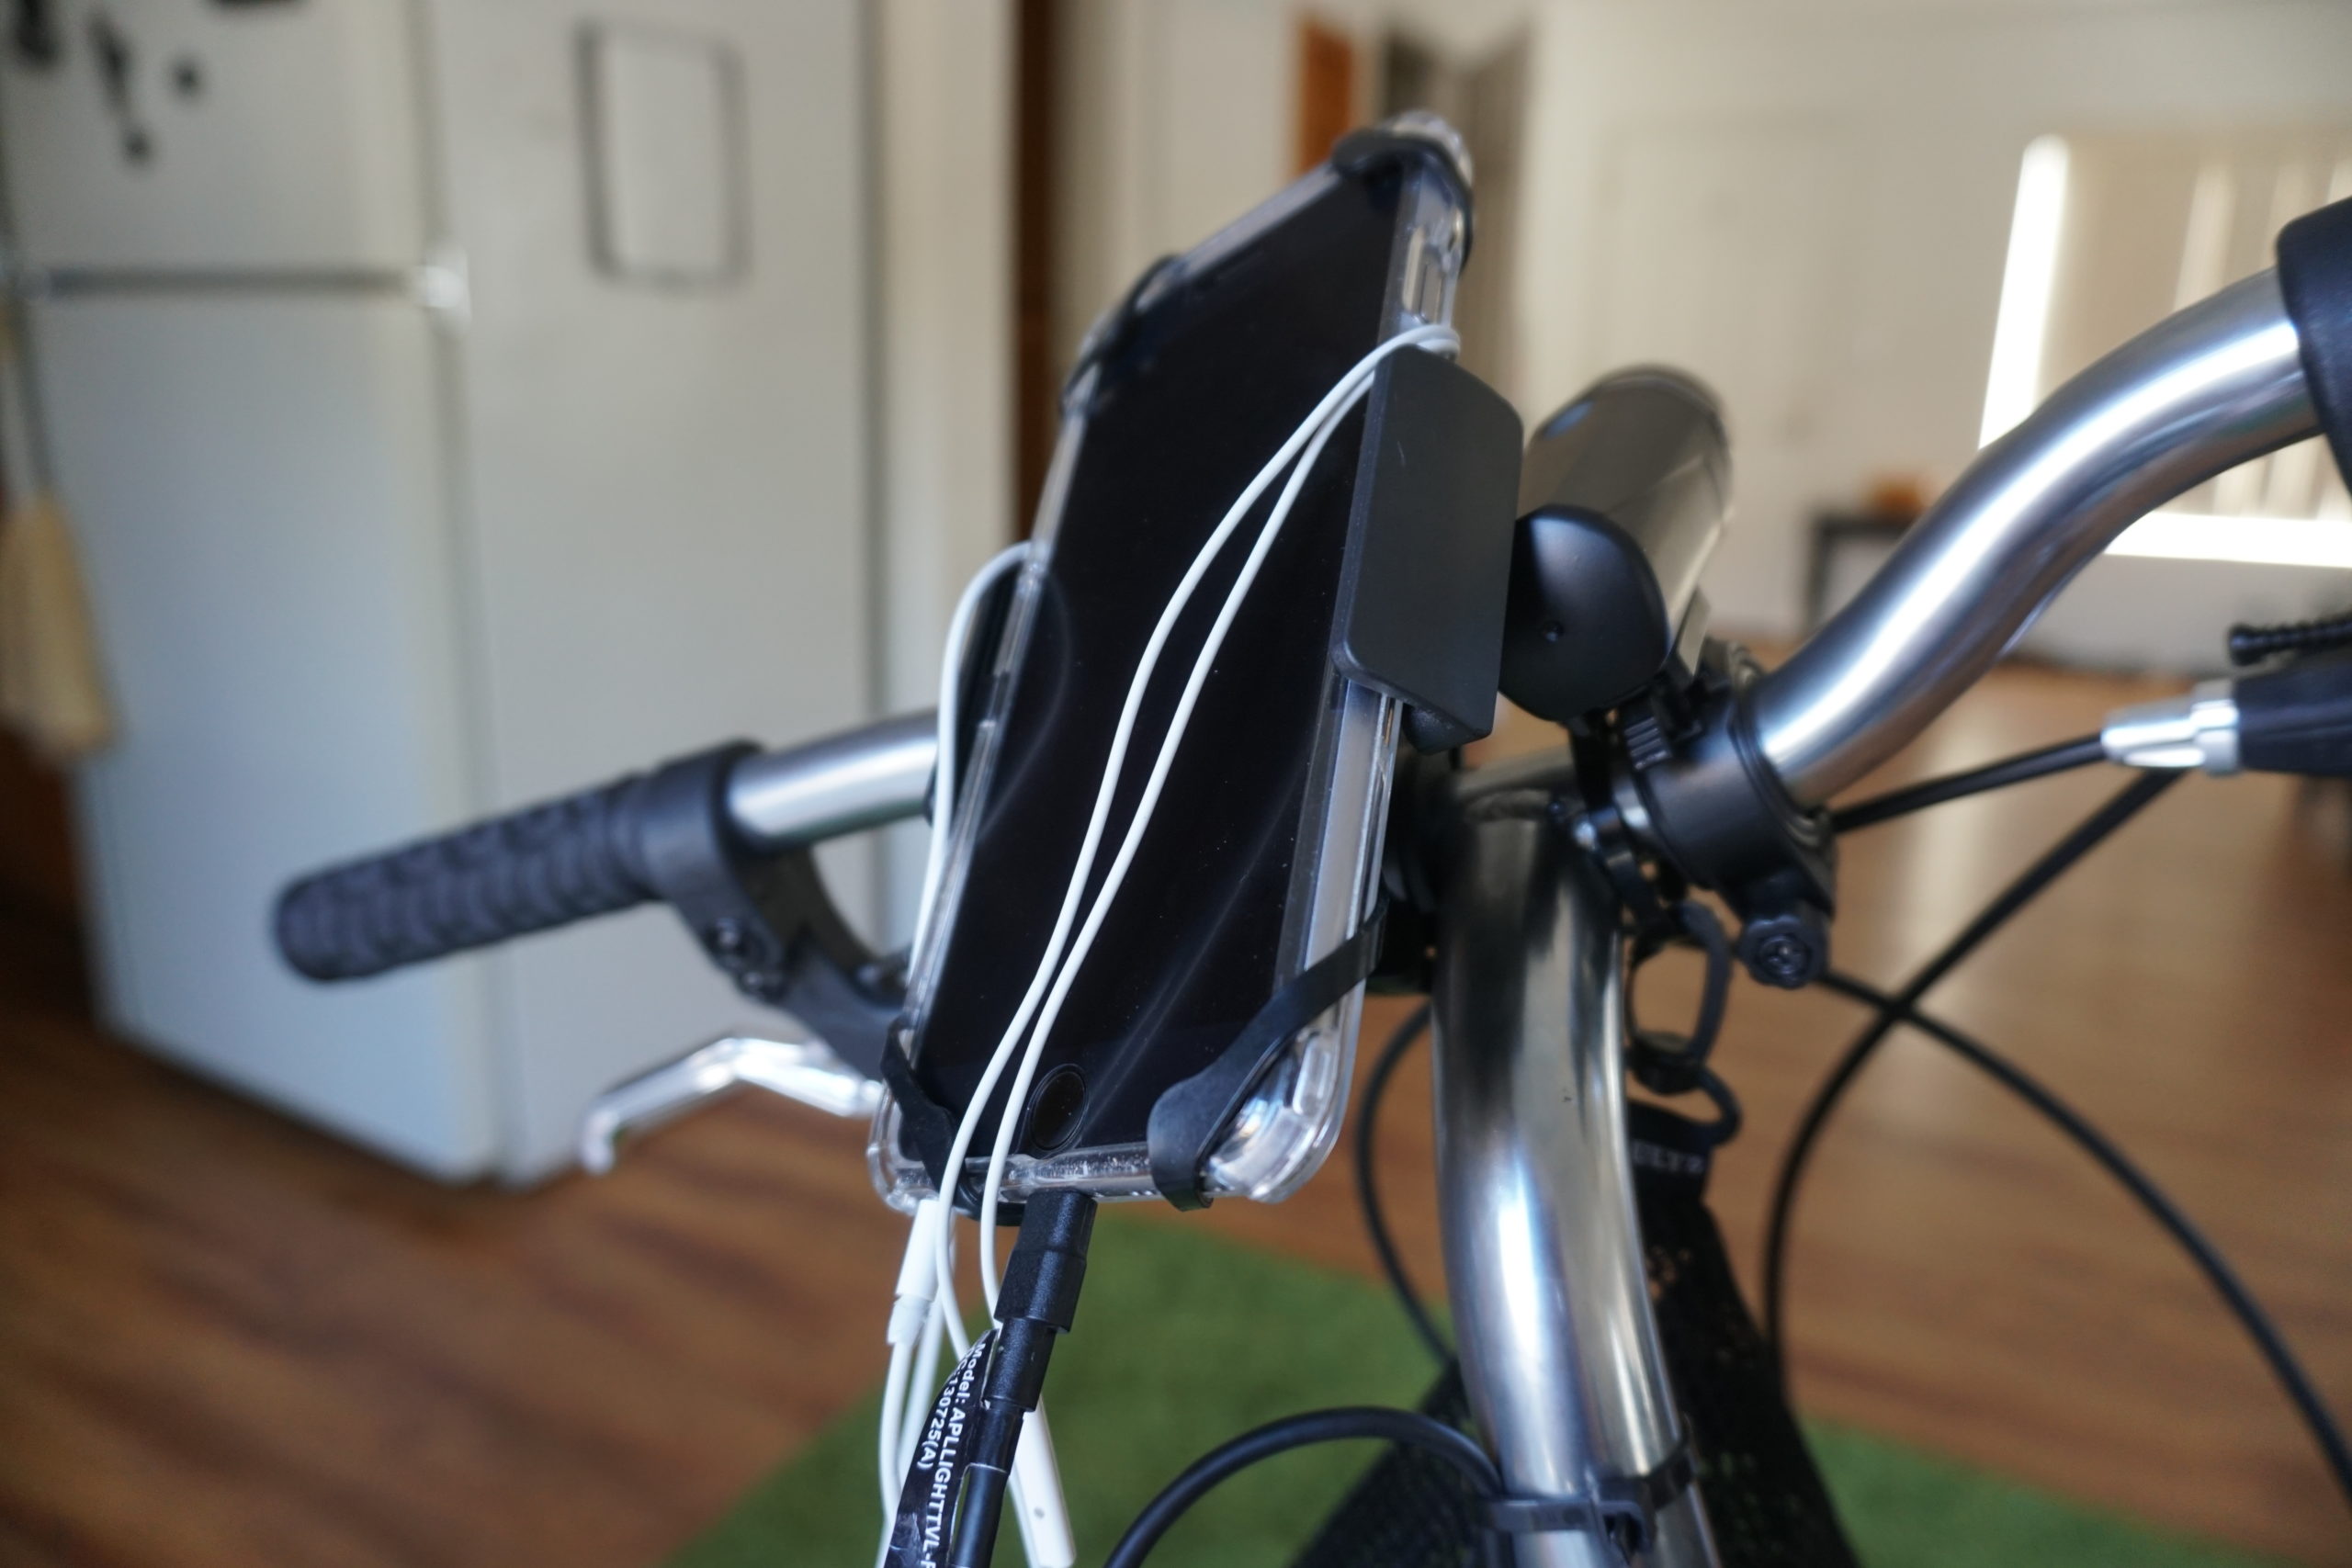
Now attach your smartphone mount to the handlebars. It should go as close to the middle as possible — you don’t want it to be difficult to grab onto the handlebar grips and brakes in an emergency. It will have to be slightly left or slightly right because of the centre bar of your bike’s frame, but it doesn’t matter which way you choose. I chose left so it’s slightly easier to tap the screen with my left hand while my dominant hand steers. Once your mount is attached, place your phone in the mount. Adjust everything to where you’ll want it while riding.
With the two endpoints now in place, take the USB charging cable and start to wrap it around the frame of your bike toward the smartphone mount. Be mindful of where you wrap and keep close to the frame so nothing can get caught in it. By the time the cable reaches the mount, there should be just enough slack to easily plug in your phone, but not so much that you’ll yank it out on accident while riding.
Once you have those things in place, attach the safety lights. The headlight goes on the handlebars on the opposite side of your smartphone mount, and the tail light goes on the back somewhere. I mounted mine under my seat. After that, grab a zip-tie and a mesh bag, then attach one to the handlebar. This is a great place to put a few easily accessible items. I usually have a granola bar, a few dollars if I want to stop for something to eat and my apartment key in there.
Tips for Riding Your PokeBike Safely
With everything in place, you’re finally ready to ride your way to pure Pokemon awesomeness. Before you take off, though, I have a few suggestions for making your rides a little better (and safer):
- Wear headphones or, well, a headphone (and not the noise-cancelling kind). Because you’re riding around at various speeds, it’s a bad idea to keep your head down looking at your screen. It’s better to rely on the game’s sounds instead. Grab some earbuds, stick just one in and turn off the game’s music. Now you can ride until you hear the bustle of a wild Pokemon appearing or the familiar jingle of being near a PokeStop.
- It’s better to turn off the AR stuff while you’re riding. Your phone is mounted and that means pointing its camera at stuff would require unmounting it every time. The non-AR modes will let you do everything without ever having to pull out your phone.
- Remember to actually stop when you do things on your phone. Don’t try to catch Pokemon, collect items at PokeStops or battle at gyms while you’re moving. You will crash and either hurt yourself or someone else. Always pay attention while you’re moving and always follow basic bike safety procedures.
The first time I hopped on my PokeBike, I felt the same giddiness I had when I was a kid pretending to chase imaginary monsters in my neighbourhood. I hope you get the same kind of joy out of yours.
Comments
2 responses to “How To Turn Your Bike Into A Pokemon GO Machine”
Operating a vehicle (yes a bike is a vehicle) while using the phone is a crime in some (if not all) states.
Or something with a lifetime Warranty
https://www.ja-gps.com.au/RAM/ram-hol-un7-400u/