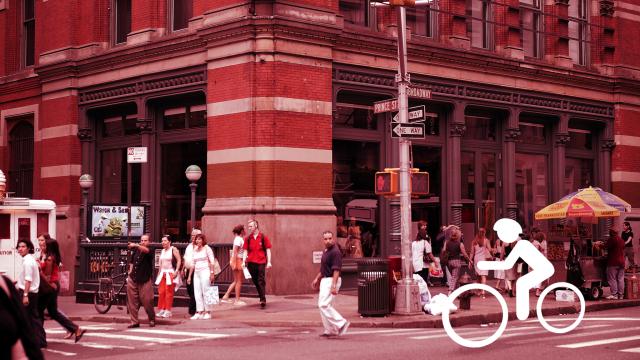
Biking through a city scares a lot of people. Perhaps it’s the lack of safe culs-de-sac, or maybe just the idea of cars whizzing by and crushing you into pulp. Urban cycling sounds terrifying, but it’s not as complicated or dangerous as it seems.
Photo via Getty Images. Remixed by Tara Jacoby.
I’ve been a cyclist for the majority of my life, and have lived in cities ranging from bike-friendly to I’m-going-to-run-you-off-the-road for the past 15 years. Being in a city means a higher congestion of both people and cars, and it feels like things could go horribly wrong at any moment. My first few rides in the notoriously car-centric Los Angeles were a little frightening, but once I learned the basics of how drivers in the city tend to behave, I’ve found it more pleasant and predictable than it is scary. The same goes for any city. Once you’re comfortable, you’ll forget about the dangers and just enjoy yourself.
Know Your State’s Laws
Are you allowed to ride on footpaths? Is it legally safe to pass a car on the right side when you’re on a bike? Like driving, every state has a different set of laws for cyclists, so it’s worth brushing up on the basics. Cyclists in NSW should keep in mind that from March next year they will be required to carry photo identification, and may be fined 350 per cent more if they fail to wear a helmet.
There’s one basic tenet though: follow the rules of the road just as you would in a car. Don’t run lights, don’t cut people off, and make sure you’re in the correct lane when you’re turning. Many states also prohibit biking on the footpath, so don’t pop onto a footpath unless you have to (it’s also just bad form, since that’s where people walk and a bike has no place there). Ride on the left side of the lane (in a bike lane if there is one), with the flow of traffic. If you ever feel unsafe, most states allow you to take up a whole lane of traffic when needed.
Assume Every Driver Doesn’t See You (and Other Tips for Not Dying)
Like anything, cycling safety is all about being aware of the world around you. Case in point, my general assumption when riding a bike is that cars do not see me, nor will they alter their path for me. Since most bike lanes are on the left side of the road, I assume every single car next to me or in front of me is potentially turning left, and never ride anywhere near their blind spot or so fast that I can’t stop immediately. The same goes for parked cars opening their doors into a bike lane. If you see the silhouette of a head in a parked car, assume that door could open at any moment. Basically, just never assume anything of drivers when you’re on a bike. Don’t assume they will stop for you, that they see you, or that they expect you to do anything but follow the rules of the road.
While assuming you’re invisible is a good place to start, let’s run through a bunch of basic tips for keeping yourself safe:
- Don’t wear headphones: Just don’t. I keep headphones accessible for when I’m on bike paths or car-free roads, but if you’re in traffic, do not wear headphones.
- Put lights on your bike: If you’re riding at night, you need lights for both the front and back of your bike. This is especially useful in the winter months when the sunset tends to creep up on you. I like Knog lights because they’re easy to clip on and rechargeable over USB. Make sure you remove those lights before you lock your bike up outside. They’re an easy target for thieves.
- Ride a city-appropriate bike: Beach cruisers and mountain bikes might make you feel safer because they tend to be giant tanks that can crush through anything (which is fun in its own right), but they’re not actually great for navigating the city. Road bikes or commuter bikes are usually a better choice. I prefer road bikes myself, but cheap, commuter bikes like these ones spotlighted by Bicycling Magazine are great alternatives for people who don’t want to drop a lot of cash. These bikes tend to be single speed, which cuts down on maintenance and eases you into riding a bike again because you don’t have to worry about shifting. That said, the lack of gears makes them a bit troublesome for anywhere with a lot of hills.
- Ride a bike that fits: Ever trip over yourself because you decided to get a pair of shoes a half-size bigger? That’s what happens when you’re on a bike that doesn’t fit, except you’re going 48km per hour. When a bike doesn’t fit you, it’s not only uncomfortable, it’s also unwieldy and hard to ride, which leads to accidents. This guide can help you figure out your measurements, but if you’re new to cycling, it’s worth going into a bike shop for a professional fitting so you know both your frame size and how high your saddle should be.
- Treat the bike lane like a lane, not a safe zone: People tend to think bike lanes are some type of magical barrier that you can safely ride in. They’re not. They’re just another lane on the road, and cars will merge into it sometimes, cut you off, and people will open doors from parked cars into the lane. Just because you’re in a bike lane doesn’t mean you’re behind some protective barrier. It’s a lane, and drivers will teach it as such.
- Practice on side streets: “It’s just like riding a bike” is a bogus claim. If you haven’t ridden in a long time, getting on for the first time will feel weird. Stick to side streets without a lot of cars to practice until you get comfortable. If you’re commuting, there’s no shame in avoiding the big roads until you’re ready.
- Use Google Maps: Google Maps has cycling directions, and they’re fantastic. If you don’t know how to get around, plot out your route in Google Maps first. This will guide you along bike-friendly streets and paths so you can avoid accidentally getting on some four-lane road with no room on the side. Heck, you can even break the no headphone rule and get turn-by-turn directions if you need to (but seriously don’t also listen to music or podcasts or whatever).
- Don’t be a dick: Drivers hate cyclists. This is just how it is. So don’t go out of your way to upset them. Follow the rules, remember that they’re in giant hunks of metal that can crush you in an instant, and always assume they’re out to get you. It’s a hard thing to accept, but it will keep you safer. Otherwise, just be chill, shrug off the honking horns and middle fingers, and enjoy yourself.
This might sound like common sense if you bike a lot, but I still see people act like idiots every day. Stay aware, and you’ll be safe.
Keep a Basic Repair Kit with You At All Times (and Know How to Use It)
If you’re going to ride further than you’re willing to walk your bike back home, you want a repair kit. This typically just includes a patch kit for repairing tyres, but a good one includes more than that.
The Sweethome has a fantastic guide for what you need in a repair kit. Everyone’s kit and needs vary a little bit, but here’s the basics of what you want to own:
- Tyre levers for levering the tyre off the wheel’s rim.
- A patch kit for, you guessed it, patching holes in a tube. I also usually stuff $15-$25 worth of cash into the patch kit for emergencies or even to repair the tyre itself in a pinch.
- A hand pump for pumping up those tubes.
- A spare tube. Personally, I prefer to just replace the tube entirely when I’m on the road and patch it later from the comfort of my own home.
- A wrench or multi-tool, depending on your bike, you might need a wrench or multi-tool to remove the wheel.
That’s it. You can pack all that into a seat bag that fits under your saddle if you want, carry tools in your backpack or shoulder bag, or mount it all on your bike with panniers. If you plan on leaving your bike locked up outside, I recommend skipping the seat bag or panniers, as they will certainly get stolen. You should also know how to use these tools, so if you’ve never replaced a tube in a bike tyre, do it once before you hit the road. It’s an easy process, but it’s a lot easier to learn how to do it for the first time when you’re sitting in your living room than it is on the side of the road. Remember, this is a basic kit. If you’re venturing out on longer rides, you’ll need more stuff to do more complicated roadside repairs, but this is plenty for commuting around the city.
Maintain Your Bike
Before you hit the road, you should always give your bike a quick ten-point safety check to make sure you don’t go barreling into traffic because of a busted set of brakes. This is really nothing more than giving your bike a once over to make sure the brakes work, the shifters work, and everything’s still functioning. If you ride every single day, this isn’t as necessary, but if you only ride on the weekends, it’s worth checking. Always check your tyre pressure before you hit the road as well. If it’s low (you’ll find the recommended PSI on the sidewall of your tyre), pump it up before you leave the house.
Otherwise, regular maintenance just means the occasional do-it-yourself tune up. If things feel funky when you ride, your bike needs adjustments. This usually means just a tiny little half-turn of a screw somewhere. If you want to do your own repairs and adjustments, YouTube has everything you need, but for those who prefer paper, Zinn & the Art of Bike Maintenance is a fantastic book to keep around.
Lock Up Your Bike Correctly
Bikes get stolen all the time. It’s just one of those things that’s bound to happen. If you’re going to commute around, hit up restaurants, and basically use your bike like a car, then you really need to lock your bike up correctly.
The best type of bike lock is a U-lock like this. Don’t use combination locks or cable locks because they’re easy to cut or break. Lock the U-lock through the frame and rear wheel (the most expensive of the two wheels) and practice common sense for where you lock it up. If you’re stuck using those obnoxious comb racks common on college campuses, make sure you lock your bike up properly. Avoid locking it to anything that looks easy to remove (like a signpost mounted in dirt) or in low traffic areas. The more people that are around your bike, the better. Make sure you get rid of any accessories like saddle bags or lights before you leave your bike too.
As with any hobby, there are dozens of other things to think about and learn. But all that stuff depends on what type of biking you want to do. As you get used to biking around in the city, the prospect of long contemplative road rides in the mountains, shredding brown pow on a mountain bike, or dirty cross races might become surprisingly appealing.
Comments
2 responses to “The Practical Guide To Biking In The City”
Mostly good advice. Some penceworth from riding into/out of a CBD:
1. Use lights all the time. Half-decent LED ones are bright enough that they can be seen even on sunny days. It’s easy to be lost against the background clutter of parked cars on the left side of the road. This will help pedestrians see you too as people absent-mindedly stepping out in front of cyclists cause accidents too.
2. Wear high-viz or reflective clothing. This helps mostly at night. But also has some effect during the day too.
3. Do not ride up the middle of lanes. Doing so is guaranteed to annoy drivers and then stupidity/malevolence ensues.
4. Mountain or all-terrain bikes are actually pretty handy in the city. They’re designed to change direction quickly and have suspension to soak up potholes and other bumps. An option is to swap out the knobblies for some semi-slicks which help reduce rolling resistance.
5. Try to avoid bus routes. There may be no other option but it’s much nicer riding where buses don’t go. Mostly it’s the hazard from them pulling over repeatedly, often with little warning, and especially since bikes lanes tend to be shared with bus stops. But also since there are too many knackered old buses still running on diesel which belch really unpleasant fumes and plenty of PM2.5 right where you’ll be riding.
great only: Lock the U-lock through the frame and rear wheel (the most expensive of the two wheels)
doing this will guarantee that some dick will run off with your front wheel
You should swap out the quick release axle for a locking one, or at least one that needs a tool.