When you move in the real world, you usually head over to the post office and fill out a change of address form. But when you change your email address, things get surprisingly complicated. Here’s how to make the transition without screwing everything up.
Photos by Jeremy Keith.
Pick an Email You’ll Actually Keep This Time
First things first, let’s make sure you migrate your email address to one you’ll actually use. We’ve covered how to really future-proof your email address before and we’ve also talked about what people think about you and your email address. What’s best for you really depends on what you need from your email.
In an ideal world, your best bet is your own domain and email address with your name. Something like [email protected] has a lot more staying power than [email protected]. This way, you won’t deal with an email provider so you don’t have to worry about ever changing your email address again. If that sounds scary, don’t worry, any of these domain registrars are worthwhile, and the process isn’t nearly as complicated as it sounds. Plus, if you’re a fan of Google, you can get Google Apps (like Gmail) on your own domain pretty easily. The bonus is that if Google Apps ever gets outdated (or you just want to stop using them), you can simply deactivate your account and move elsewhere.
If you don’t want to spend the money on a domain, we’d recommend going with one of the big providers, like Gmail or Outlook.com (we’ve compared the two before and both are great in their own right). Basically, you want to avoid the email address you get from your school, the email address your ISP gives you, or your company email address. Work and school emails are fine, but they won’t last forever, and you need something that you can always come back to.
As for your actual email address, make it as easy to remember and as “grown-up” as possible. That means avoid cringe-worthy names like “[email protected]” or “[email protected]” if you can. Instead, stick to your name whenever possible. If that’s not available, add something to your name that won’t be embarrassing or give anything too personal away. Which is to say, avoid adding your birth year, your political affiliation or your favourite sports team.
Migrate Your Old Inbox to Your New One
In a lot of cases you can migrate your old emails and contacts to your new email address pretty easily. We can’t cover how to do this with every single webmail and domain provider out there, but here’s how you’d migrate to a new account with Gmail and Outlook. It should be pretty similar with other services.
Migrate Your Email to Gmail
Once you set up your new Gmail account you can import email and contacts into that account pretty easily with Google’s Mail Fetcher:
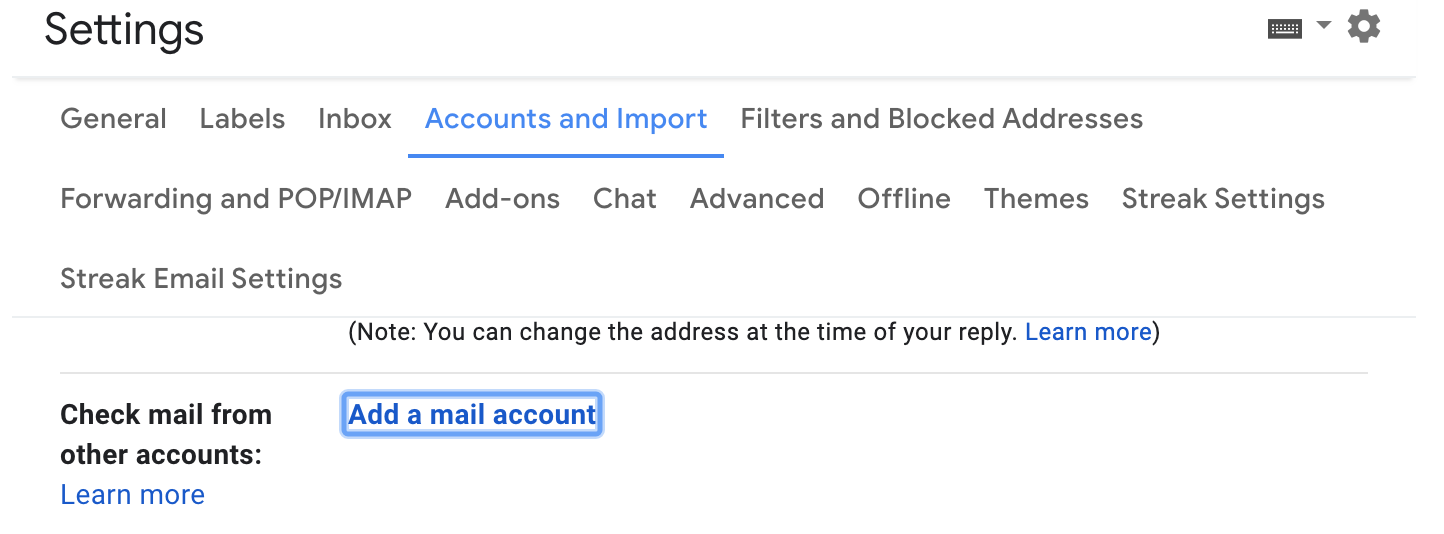
- Sign into your Gmail account and click the gear icon, then select “Settings”
- Open the “Accounts” tab
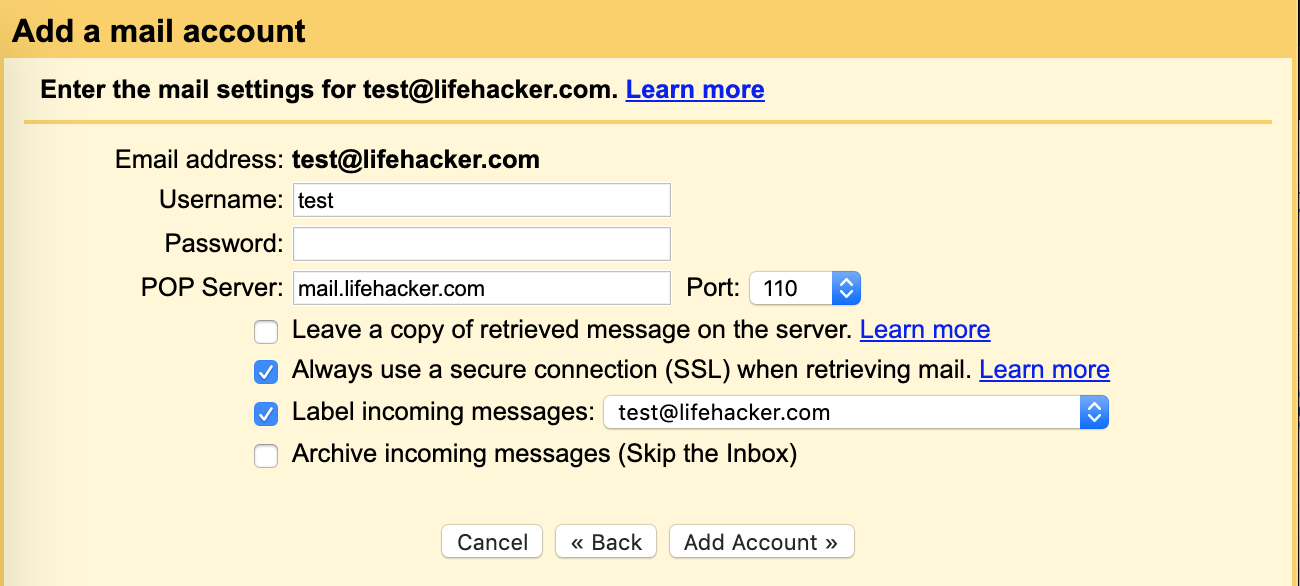
- In the “Check mail from other accounts” section, select the “Add a POP3 mail account you own” option
- Enter your old email address and select “Next Step” and then enter your password
- Select the options you want (label incoming messaging, archiving old messages, etc)
- Click “Add Account”
Now, all your old email will get imported into your new account. You’ll also get any new emails that come through so you don’t need to worry about email forwarding. Mail Fetcher can be a little slow, so if you need to get those emails quickly, we’d recommend setting up a forwarding system on your old email account as well (see the next section for how to do that).
Migrate Your Email to Outlook
Moving everything in your old email over to Outlook is pretty simple, but how you do it depends on where you’re switching from. Since a lot of people might switch from Gmail, here’s how to get away from Google:
- Sign into your Outlook account
- Head here and select the options you want. Click “OK” to open up your Gmail account page
- Sign into Gmail. This starts the migration process
If you’re not on Gmail, you’ll need to do things a little differently. It’s also a good idea to create a personal backup of your email so you can import those emails in case something goes wrong. This way, you’ll always have access to your old emails regardless of what platform you choose. If you’re not on Outlook or Gmail, a service like Yippie Move will handle the move for you, but it costs $US15 an email (which can get steep quickly!).
Keep Your Old Email Alive and Set Up Email Forwarding
Next, it’s time to set up a system so that anything sent to your old email account gets forwarded to your new one. You’ll need to do this on your old email account (if you switched to Gmail, you already set this up in the last step with the Mail Fetcher). This is different for each email provider, but here’s how to set up email forwarding from Gmail and Outlook.
Set Up Email Forwarding from Your Old Gmail Account
If you switch from Gmail to another service, you want to forward those emails to a new account. Here’s how to do it:
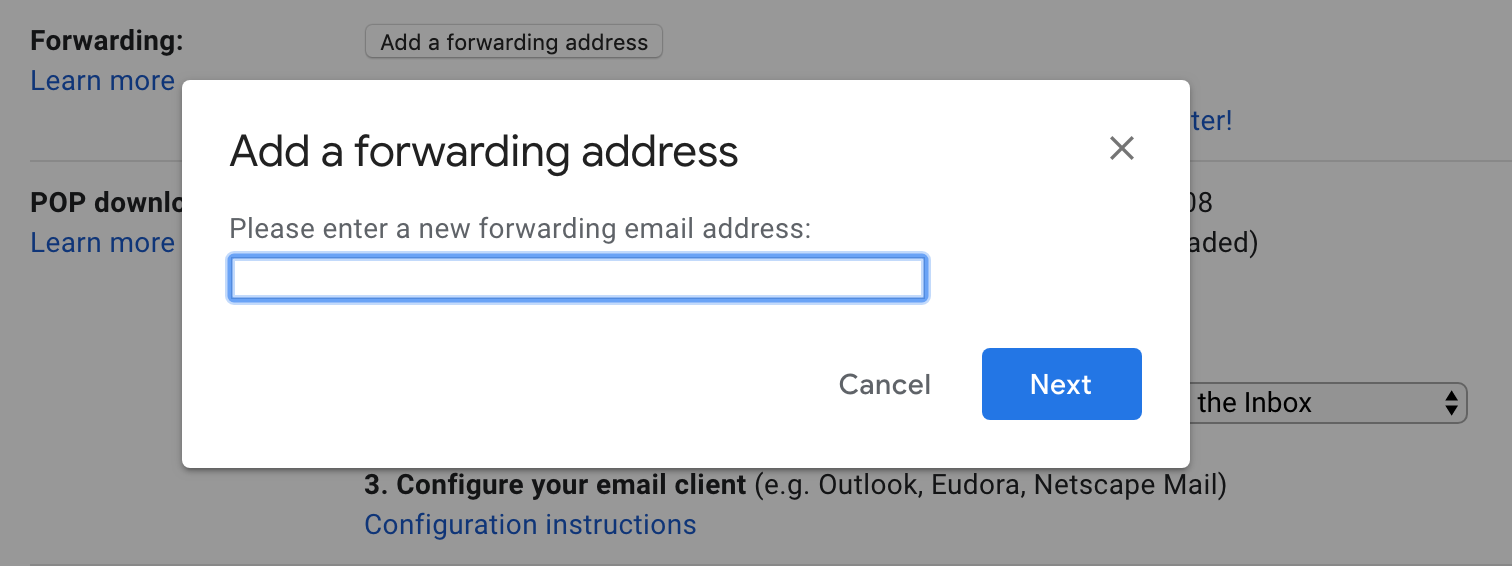
- Open Gmail and click the gear icon
- Select Settings
- Select the “Forwarding and POP/IMAP” tab
- Click on “Add a forwarding address”
- Enter your new email address
- You’ll get a verification email at your new email address, click that verification link
Now, when someone emails you at your old Gmail address, you’ll receive that email at your new email address. If you only want to receive select emails here, you can set up filter-specific email forwards so you don’t bring along any junk or spam to your new email.
Set Up Email Forwarding from Your Old Outlook Account
Email forwarding is incredibly easy to set up in Outlook:
- Click the gear icon and select “More Email Settings”
- Select “Email Forwarding”
- Check the box “Forward your mail to another email account” and enter your new email address
Now, any email sent to your old Outlook address will go to your new one. Most other mail clients should have similar processes to Gmail and Outlook.
Update Your Email Address On All Your Accounts

One of the biggest pains with a new email address is that you have to update your information in all your online accounts. This means you need to log in and change your email address everywhere on the web from Facebook to your bank. Let’s be honest, it’s tough to remember where you have accounts.
You have a few different ways to go about this, but if you use a password manager like LastPass this process is pretty easy because password managers provide you with a list of all the sites where you have accounts. With LastPass, just log into your account, head to your LastPass vault, and look at all the web sites where you have accounts. Take an afternoon and log into each of these and update your email address. Don’t forget to update your info in LastPass while you’re at it.
If you don’t use a password manager, it’s a little harder to find all your accounts. The easiest way to do this is to search through your old email for phrases like “confirm your email”, “unsubscribe”, “your new account” or “welcome to”. This should provide you with a pretty accurate list of websites you have accounts at, email newsletters you’ve subscribed to, and just about everything else.
Tell Your Friends and Family
Finally, it’s time to break it to your friends and family that it’s time for them to update their address books with your new email address. To do this, send out an email from your new address.
Depending on how many people you need to contact and what your relationship is with them, you might want to send out a few different sets of emails: one for your family, one for friends and one for business associates. Send the emails from your new email address and BCC everyone else on your list so you don’t accidentally share a bunch of email addresses with people. You can say whatever you want here, but keep it short and to the point: “Hi everyone, this is my new email address, please update your address books and contact me here from now on. Thanks!”
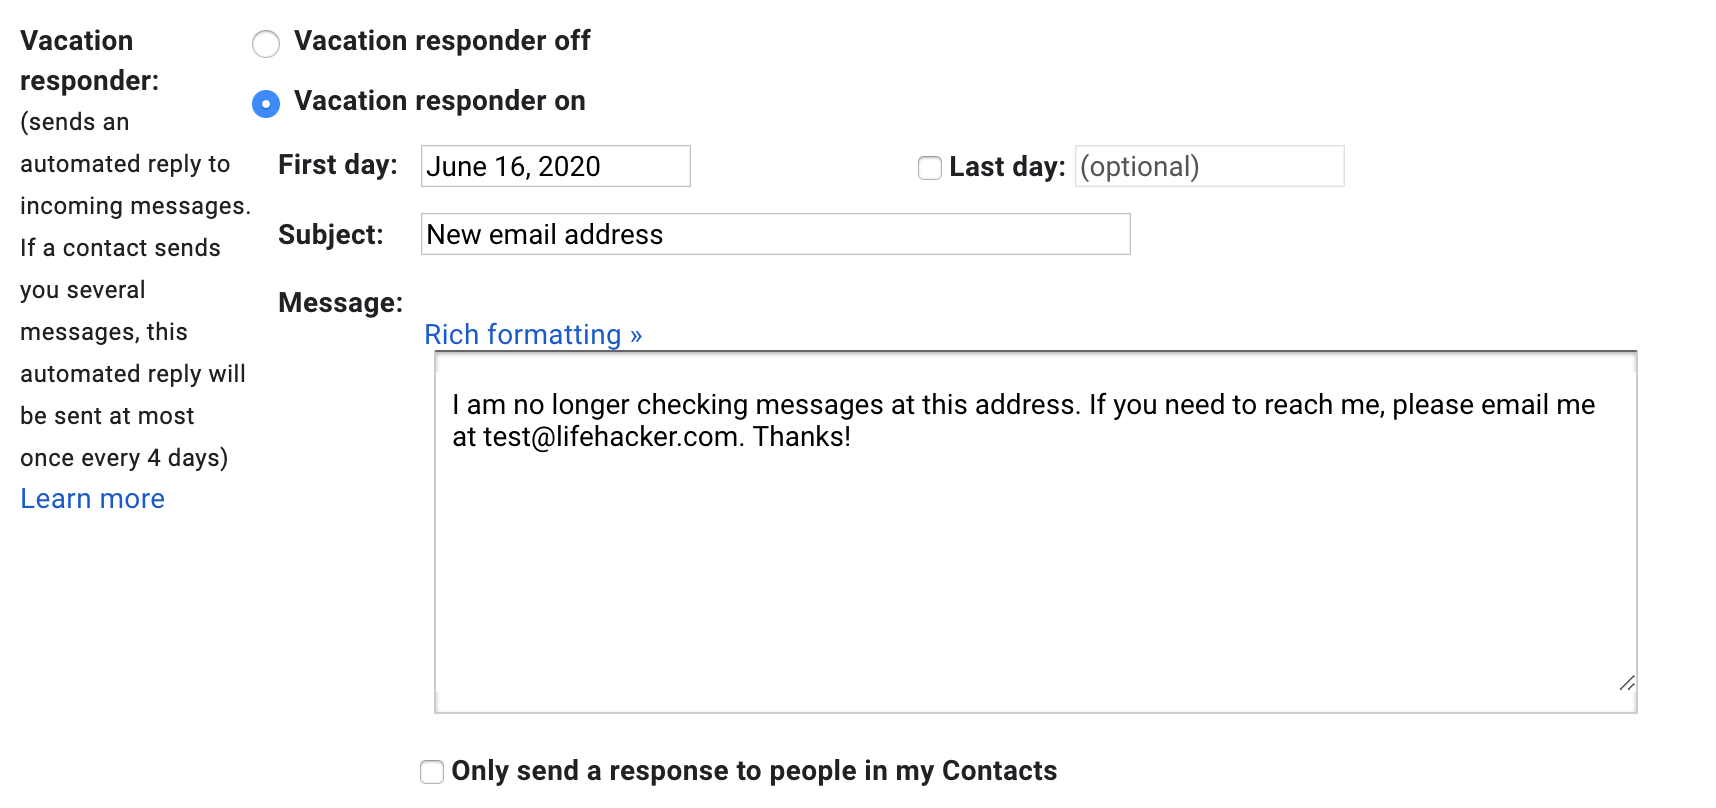
After you’ve weathered the storm of getting your email forwarded, updated everyone about your new address, and everything seems to be working pretty smoothly, it’s time to throw an auto-responder on your old email address and let it die gracefully. Just head into your old email account, create an auto-responder (also known as an out-of-office responder), and create a message that tells recipients about your new address.
That’s basically it. In some cases, you might need to follow up on your change of address email to make sure your initial note didn’t end up in someone’s spam or junk folder but you should otherwise be well on your way to ditching that old email address and moving on to something you’ll actually want to keep.
Comments
3 responses to “How To Change Your Email Address Without Screwing Everything Up”
All sounds great until the link to a past article on Domain Registrars. Stating that .au domains are slightly more expensive only shows the poor choice in registrars youve chosen to promote (suspect) or a lack of real research.
A .au domain in Australia only costs $10 per year (min 2 year registration) it demands you have an ABN or similar. Apart from that its not complicated. If you find you ‘re spending more than $20 per year on a domain name, migrate your domain name to another registrar. Migration for .au domain names is free, if someone tries charging you for migration they are breaking Australian laws. I sell au domains at $10 a year. Anyone can become a domain name reseller, I am one for my own purposes but I sell them to friends, because I can.
Next issue, deciding on a good custom domain name…
I still use the email address I had from school….not for business, I use it for things I think will flood me with advertising. i’ve got about 10,000 unread mail in there……